Slipcover Fit: Best Dart Placement for a T-Shape Deck
Hello everyone, and happy beautiful October!
If you are gung-ho to slipcover your T-cushion chair or sofa, you are going to love today’s post. I share fit tips for creating great looking front corners on a T-shape deck using darts in just the right places.
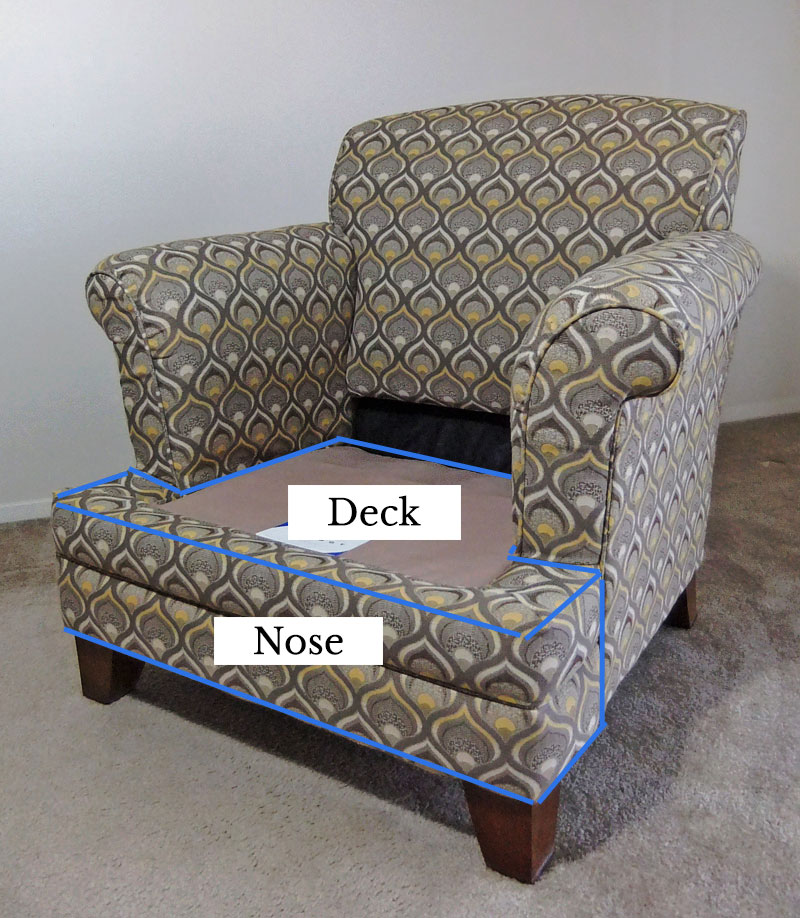
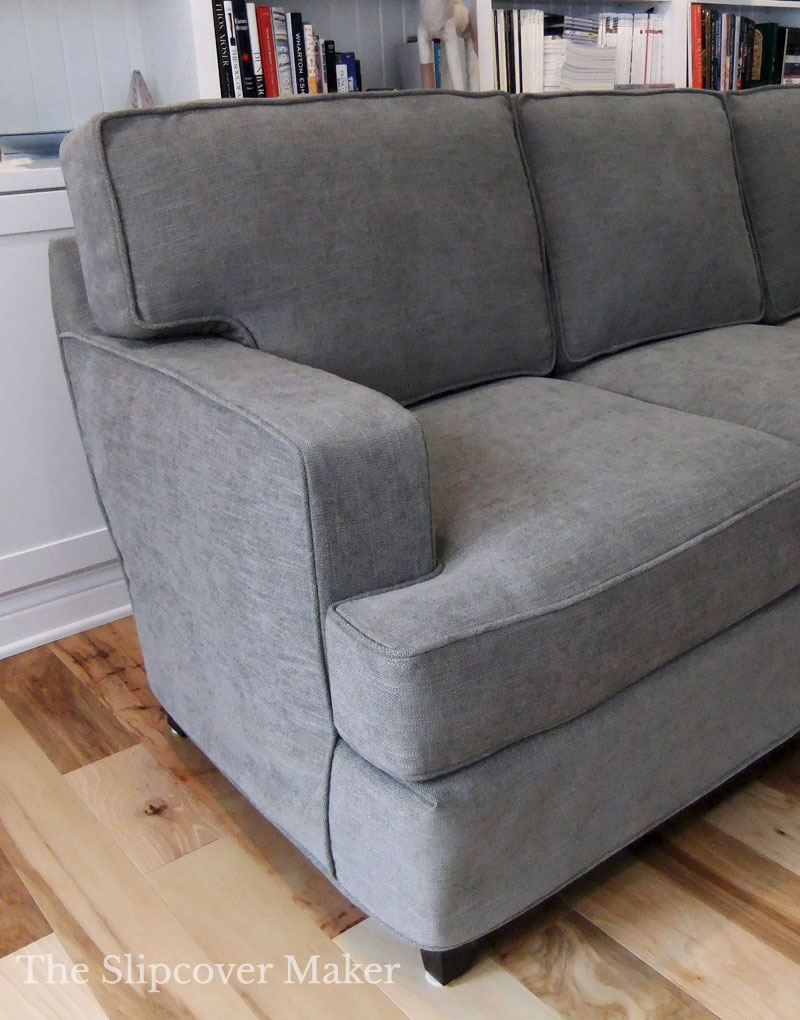
First, a little anatomy lesson. The deck is the area directly beneath the seat cushion. A T-shape deck extends to the outer arms. The shape is the same as the T-cushion.
On T-shape designs, the deck spills over to the front of the chair. This area is called the nose. It’s the front panel below the deck and wraps around the front corners.
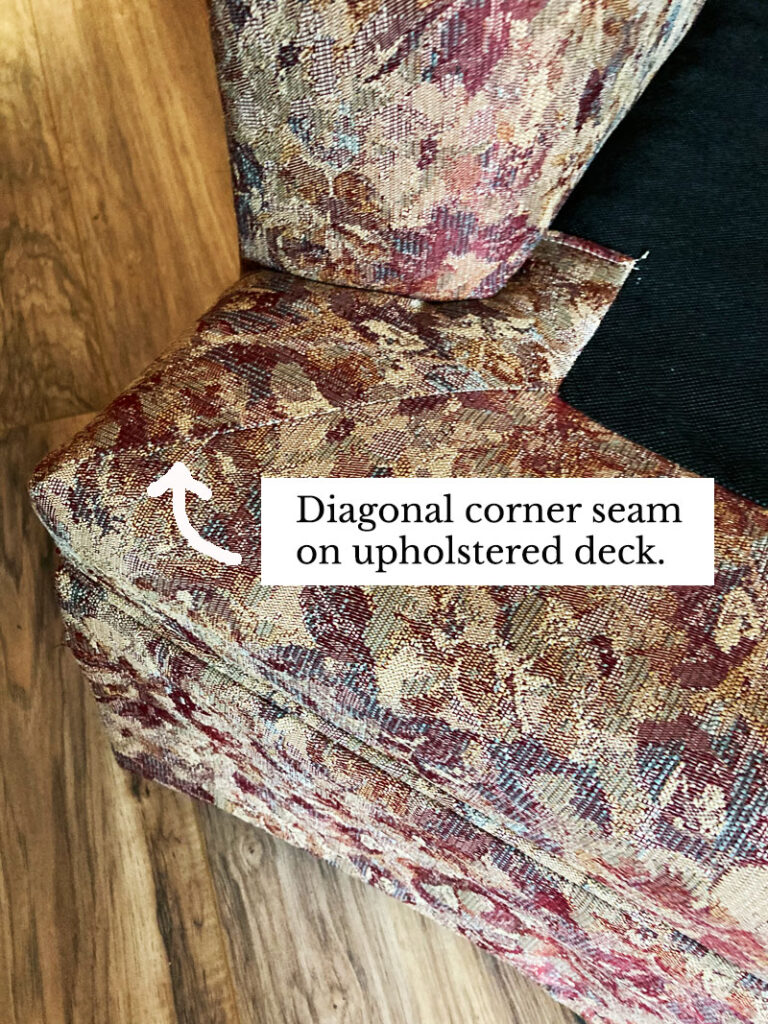
Most upholstered T-shape decks are constructed with three pieces of fabric and a diagonal corner seam. See above.
By comparison, a slipcover T-deck is less complicated. It can easily be created by covering both the deck and nose with one piece of fabric, and shaping the front corners with a dart.
Determining the best dart placement for your project will depend on your furniture shape and slipcover design, as well as your fabric choice.
Here’s how I decide to use a horizontal dart at top of deck, or a vertical dart on the nose corners.
Horizontal Dart Placement
I like placing the dart horizontally on the top side edge of the T-deck when the furniture has square, straight up and down front corners.
This placement works great when the chair or sofa doesn’t have a skirt.
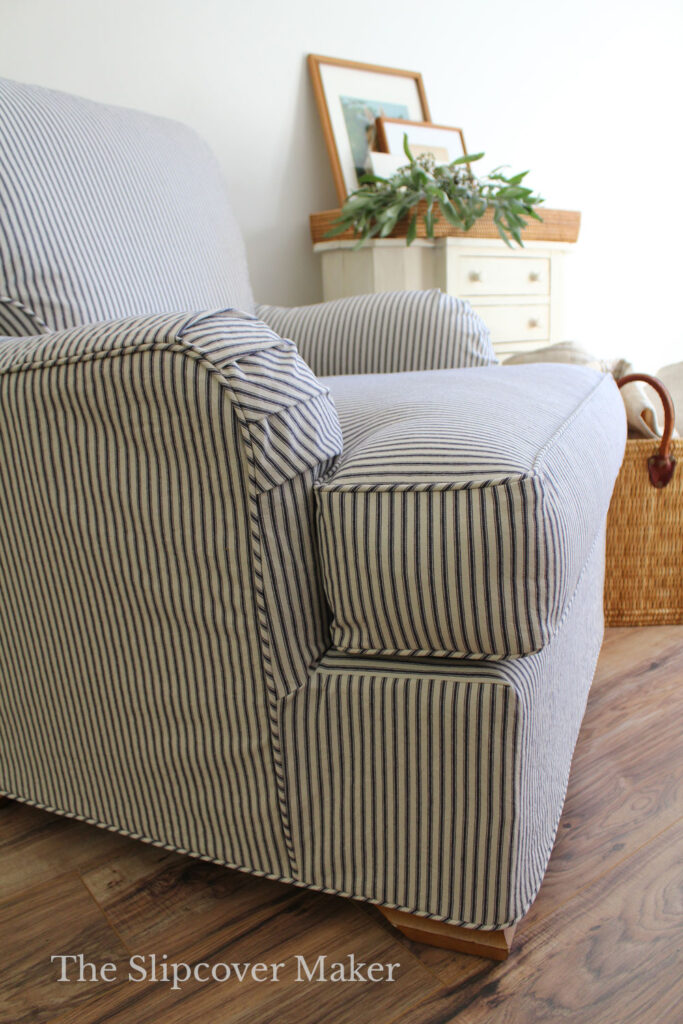
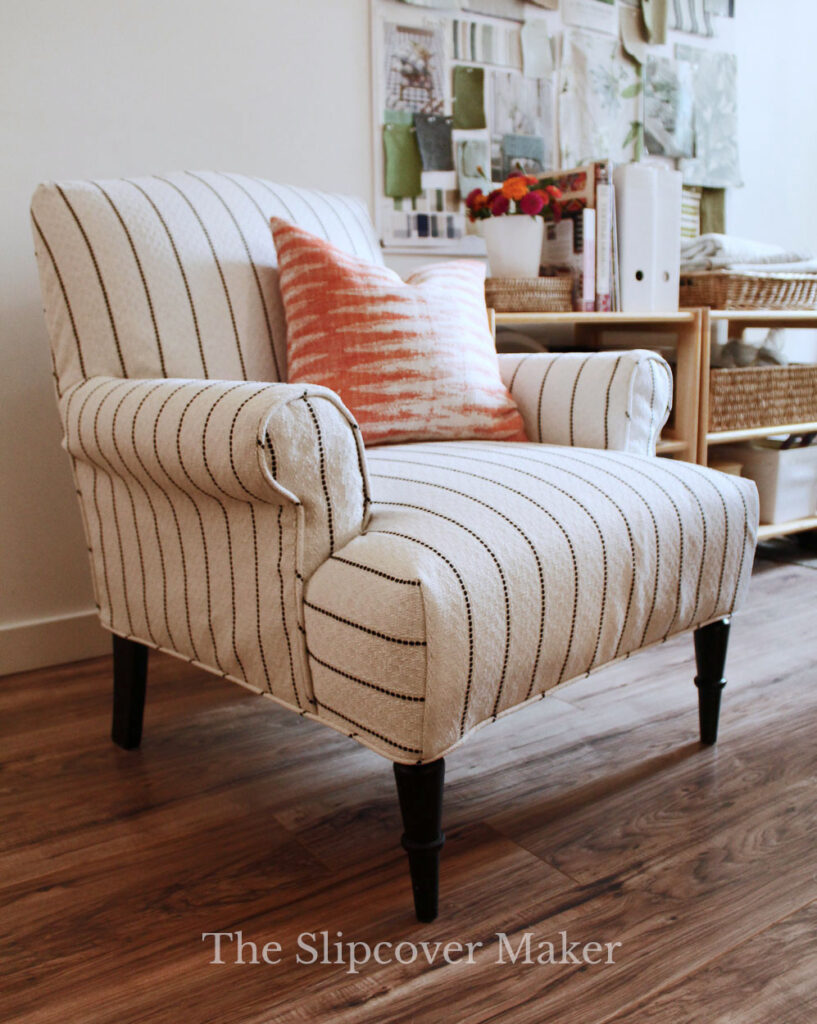
The ticking slipcover above has a one piece deck that covers the entire area under the cushion, and the nose. I shaped the front corners, and controlled fabric fullness with one horizontal dart at the front corners.
As you can see, the fabric drapes straight and smooth on the nose and around the corners. No gaps along the hem at the feet.
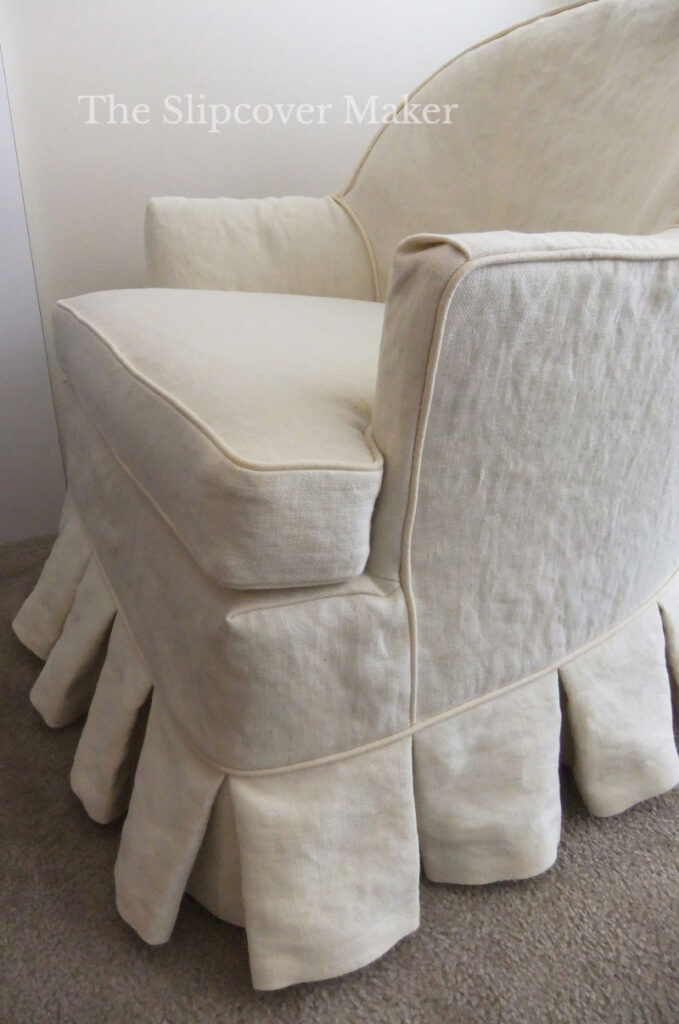
The horizontal dart also works well for slipcover designs with a dropped skirt line. See above. As long as the front corners are square and straight (no angle or curve) this dart placement will work beautifully.
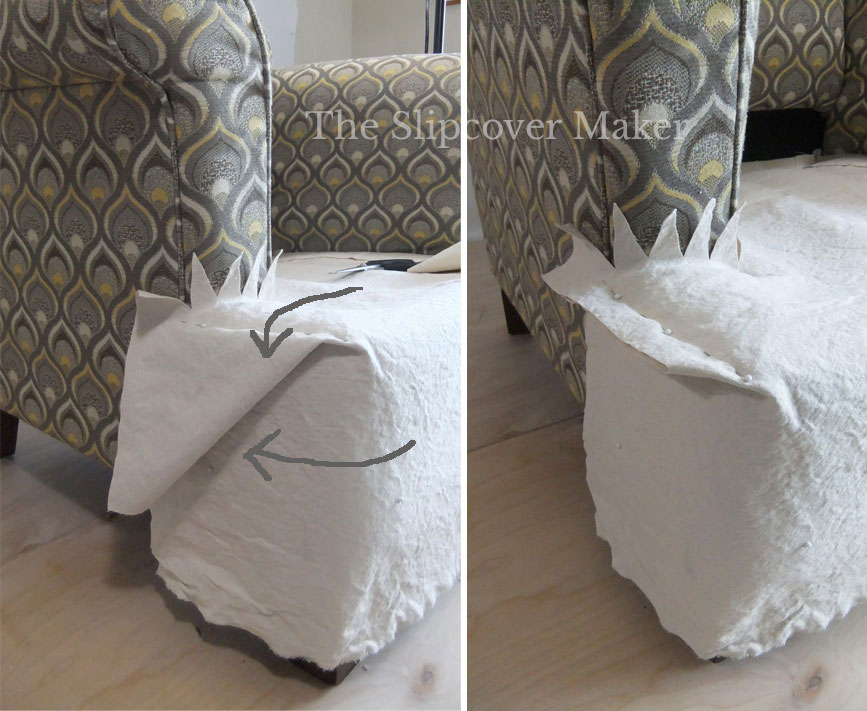
The photo above gives you an idea of how a horizontal dart on a T-deck is pinned.
Vertical Dart Placement
For furniture that has curved, or angled front corners, a vertical dart placement works best.
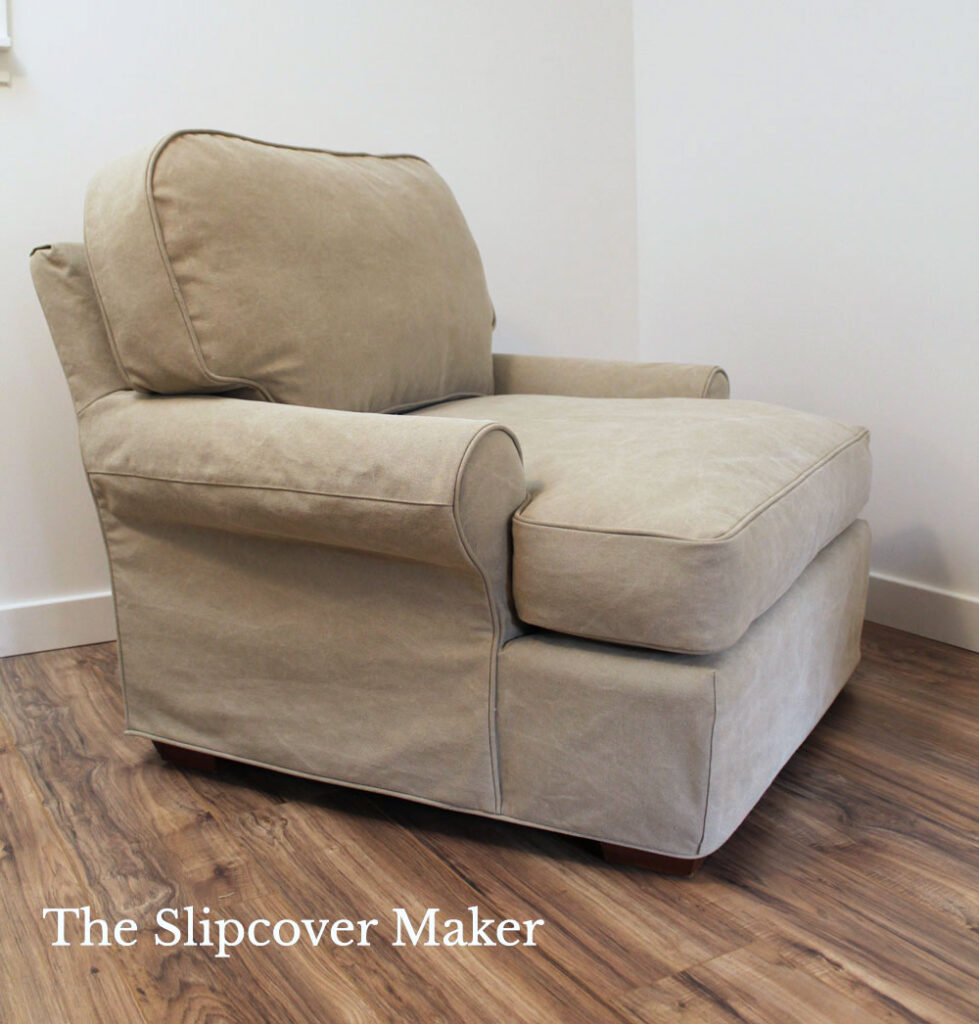
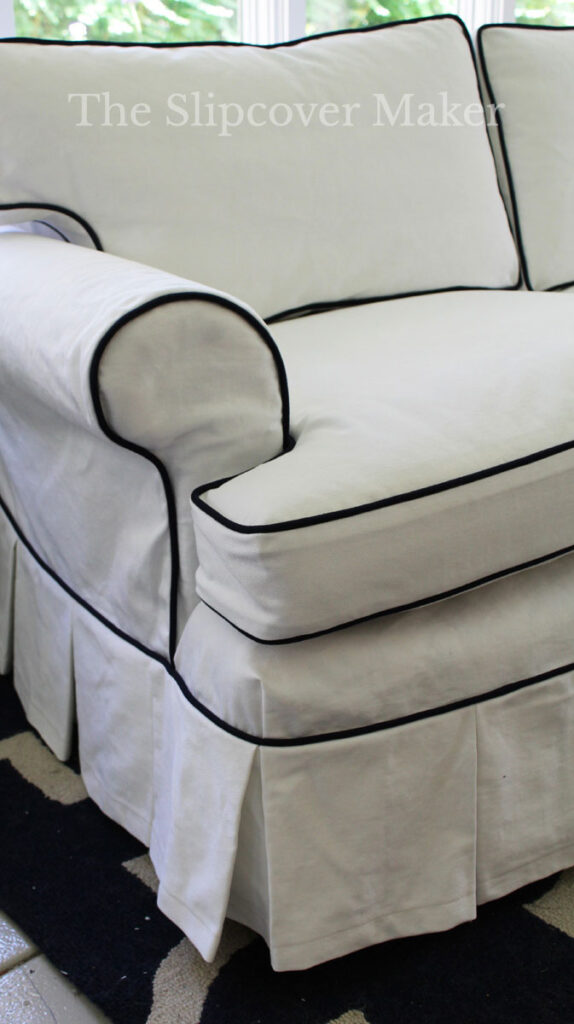
Take a look at the big canvas chair above. The front corners angle inward towards the bottom. I shaped the dart to follow the angle. That allowed me to keep the hemline close to the chair bottom edge.
Here’s an example of a tight seat / T-deck. The front corners slightly bulged out, which required curved darts. That was easy to do with a vertical dart placement.

The vertical corner dart also works great for fitting a L-shape deck on a chaise that has angled or curved front corners.
And, finally, if you have a T-deck that has square and straight corners and a shallow dropped skirt, a short vertical dart works much better than a long horizontal dart at top.
All for now! Have a creative week! — Karen
I love your blog! I have been struggling with slipcovers for years and you make it so simple. I am now 78 so getting up and down is a challenge so if you have any suggestions on how to do this, please let me know. I love to make slipcovers – so fun to change seasons.
Mary — slipcover making is very physical for sure. I’m 65 and starting to feel the strain in my body. Putting the chair or sofa up on upholstery saw horses helps quite a bit. You can pin the piece without constantly bending down and getting up. However, you will need someone to lift the furniture onto the saw horses and remove it when you finished pin fitting. Know anyone with a hammer and a saw? Here’s a DIY video showing how to make the saw horses. https://www.youtube.com/watch?v=yS0FyEyWdcM&feature=youtu.be
Thank you in particular for the photos that show the slipcover dart when the fabric is inside out. I appreciate the close up, detailed view!
You’re welcome, Tracey. Pinning the dart that way works well for both the reverse pin fit method and the right side out method. I use the right side out method.
I have been doing slipcovers for many years and love to create new looks for my furniture. I have been following your work for awhile now and have gleaned so much from your techniques. Thank you for sharing! I was wondering if you have worked with velvet much and if you have a source where you like to buy from? I’ve used your sources for linen, but I have a couple of chairs that I’m thinking of doing in a velvet.
Hi Mindy — no washable velvet recommendations right now. When I find one I will add to my favorites.