How To Slipcover a Chair with Side Panels
This easy slipcover tutorial shows how to pin fit a tight back and side panels on a classic armchair. I share where to cut and shape the fabric to create a custom fit.
Several years ago I made this custom slipcover for a Lazy Boy chair. Don’t you love the grey yarn-dyed canvas and flange trim?
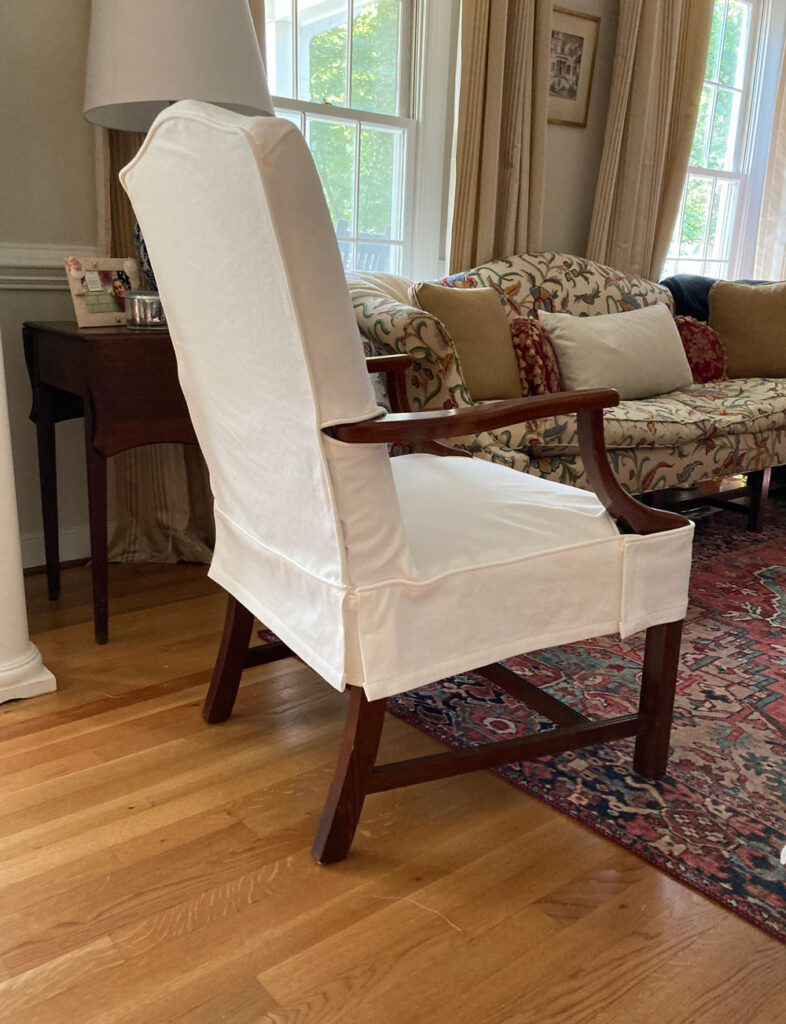
The classic chair design was easy to pin fit because it has a tight inner back that is seamed directly to the inner arms. No tuck-ins.
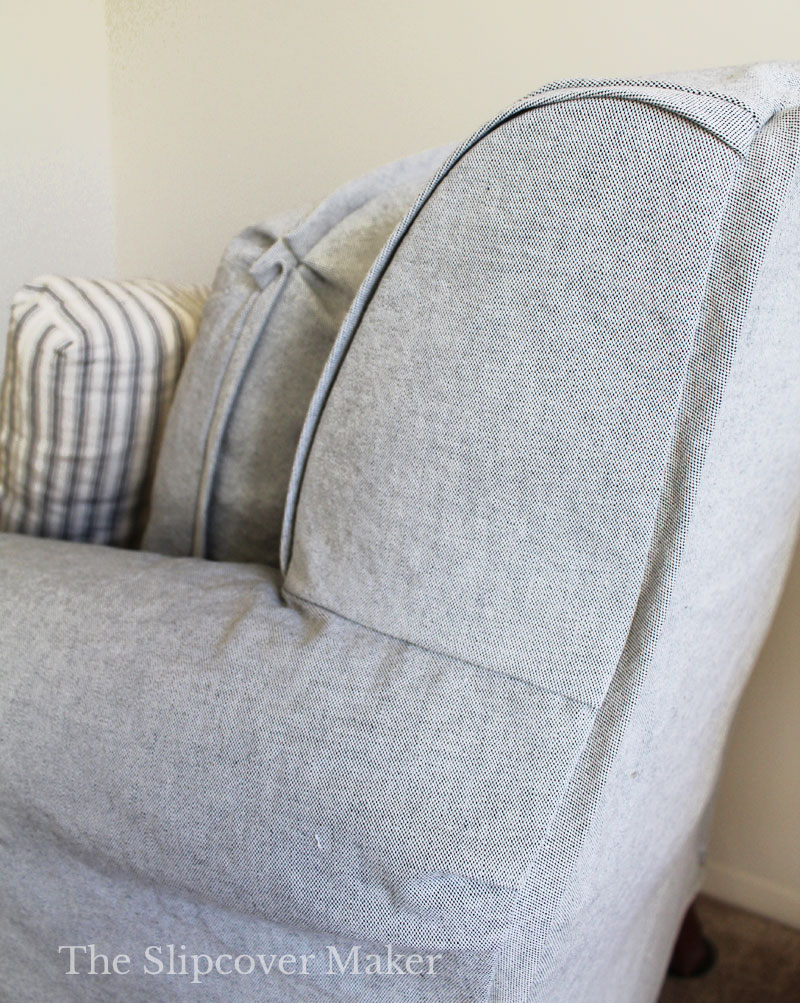
It also features a pretty detail. Instead of the inner back wrapping around to the side and shaped with a corner dart like this chair, it’s sewn to arched side panels. They were also easy to pin.
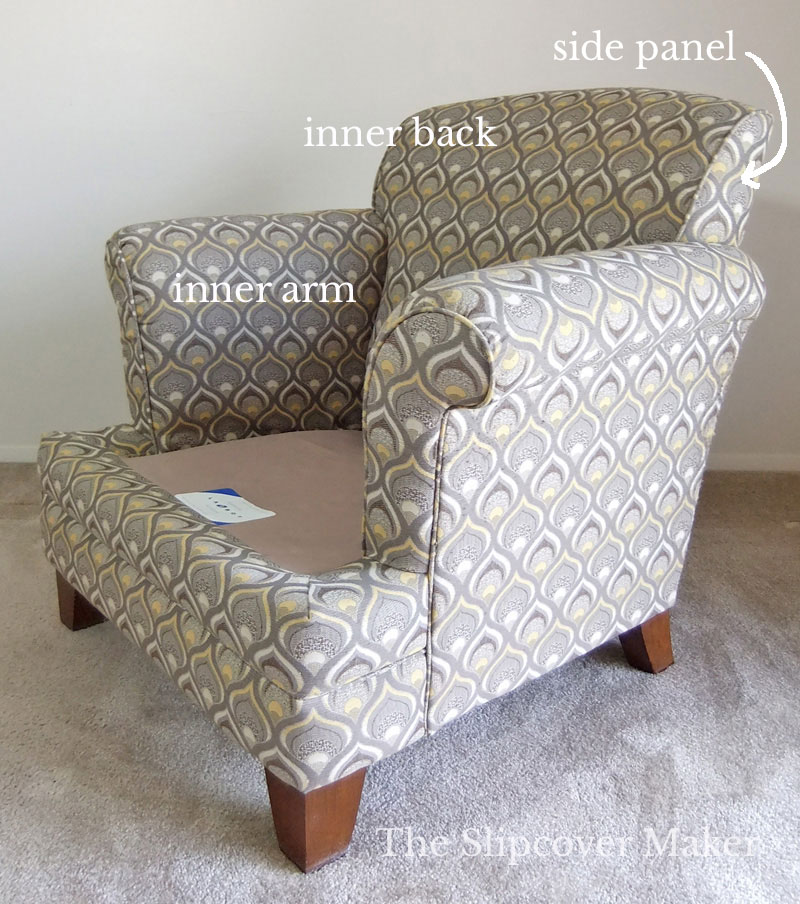
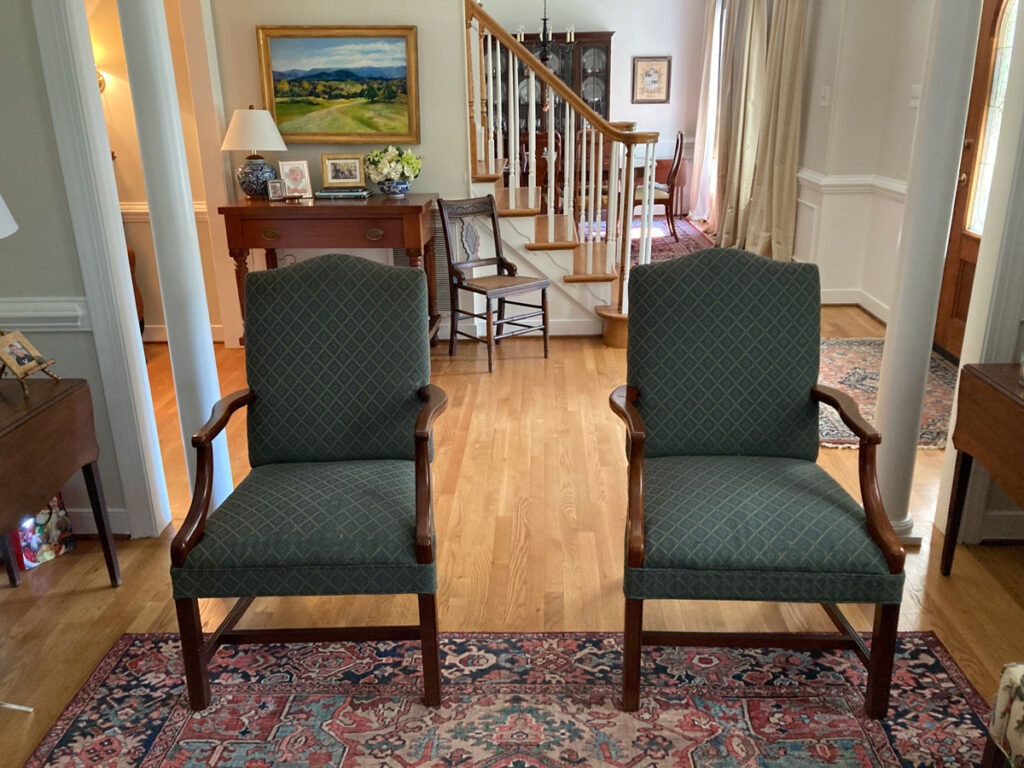
Here’s the chair without the slipcover. You can see where the inner back attaches to the side panel above the outer arm and where it connects to inner arm.
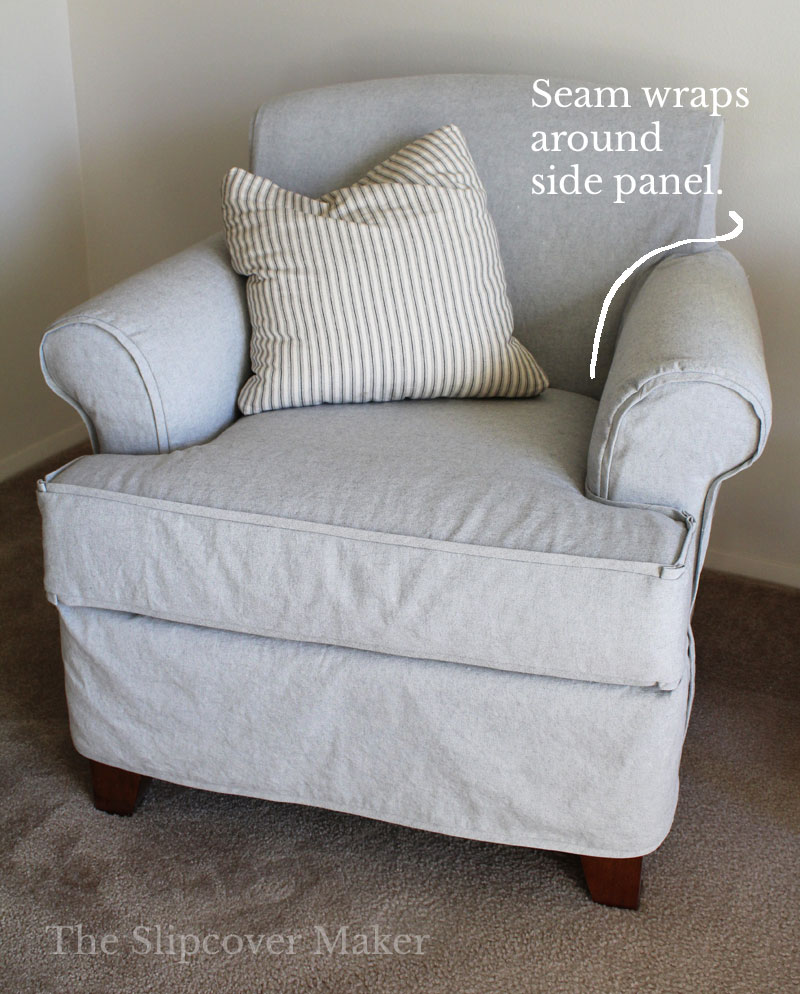
When I made this slipcover, I constructed the inner back / arm seams to wrap around the side panels to mimic the upholstered design.
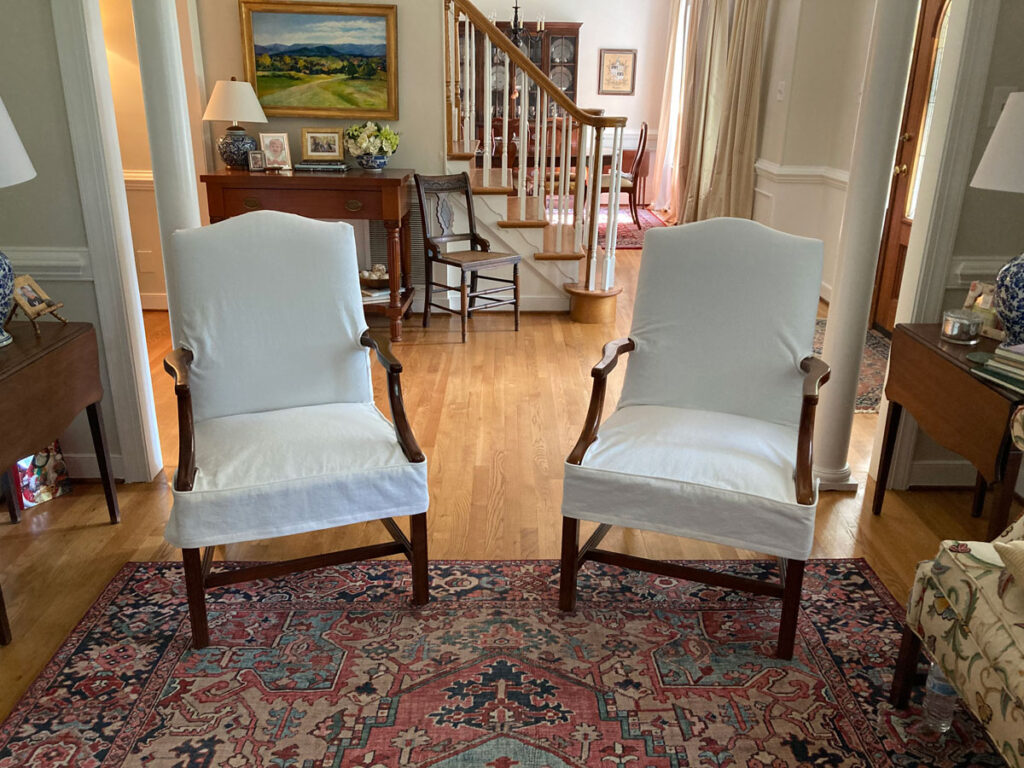
The results are a smooth fitting tight back and inner arms with well defined panels.
I completely forgot I shot step-by-step photos of my pin fit process. So, here you go!
If you have a tight back armchair with flat side panels, this tutorial will give you a close-up view of how to cut and shape the inner back.
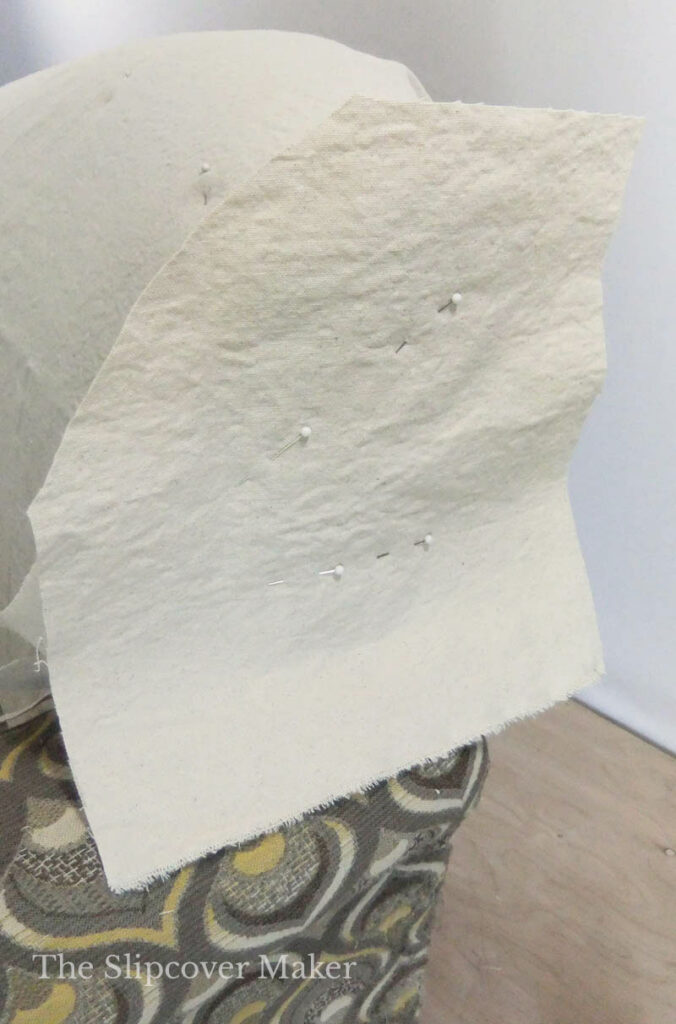
1. Pin Fabric to Inner Back
Center fabric on the inner back and pin to secure. I like to pin the inner back after I have the deck in place. Find how to pin fit the deck here.
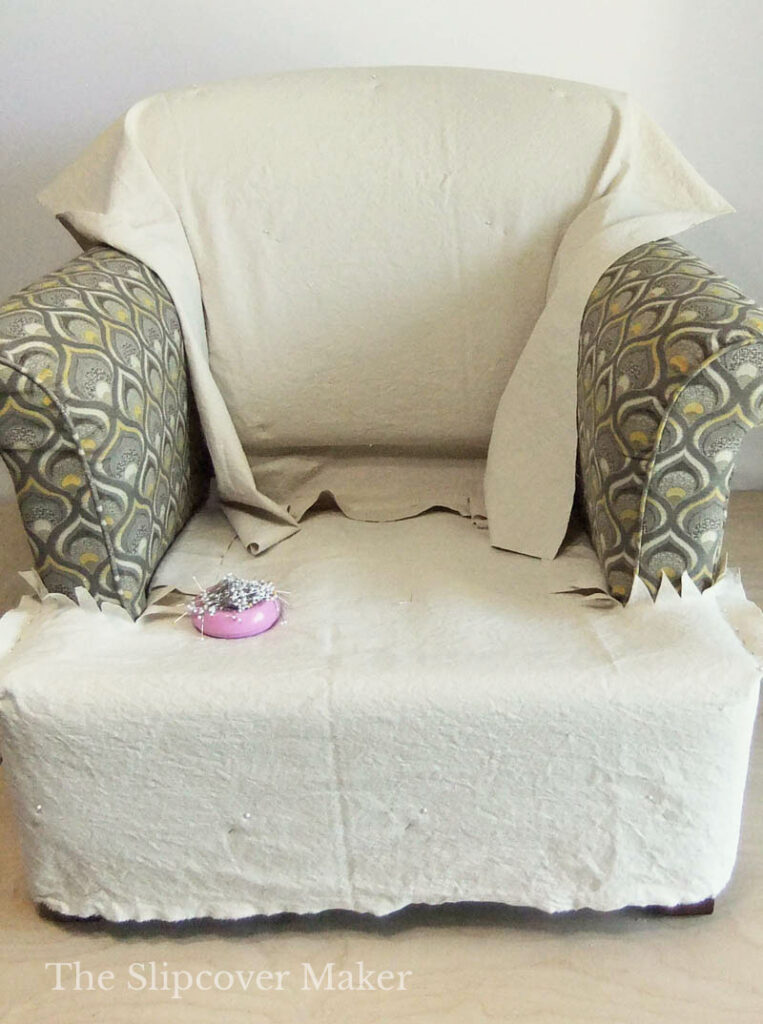
Note: I used natural canvas to create a pattern for this project instead of pin fitting the slipcover in the grey canvas. My customer wanted to have additional covers made in other fabrics later on. In this case, making a pattern was a must.
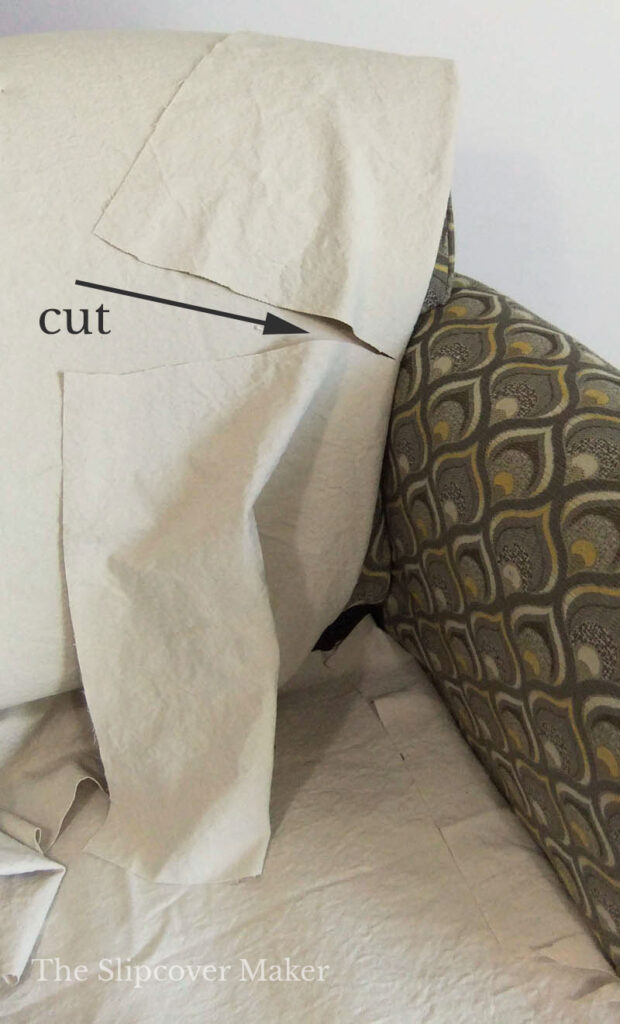
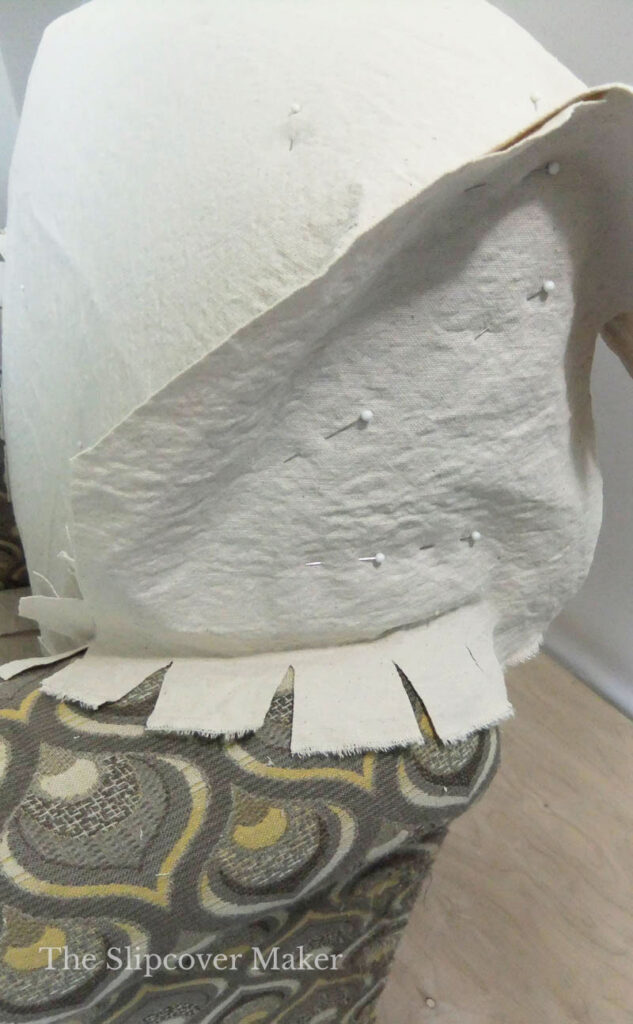
2. Make First Release Cut
Fold fabric away from the inner arm. Let the fold touch the arm at the spot where the arm curve begins to roll downwards.
Make your first release cut. The cut should be made at an downward angle towards the arm. Stop cut about 1/2″ away from the folded edge.
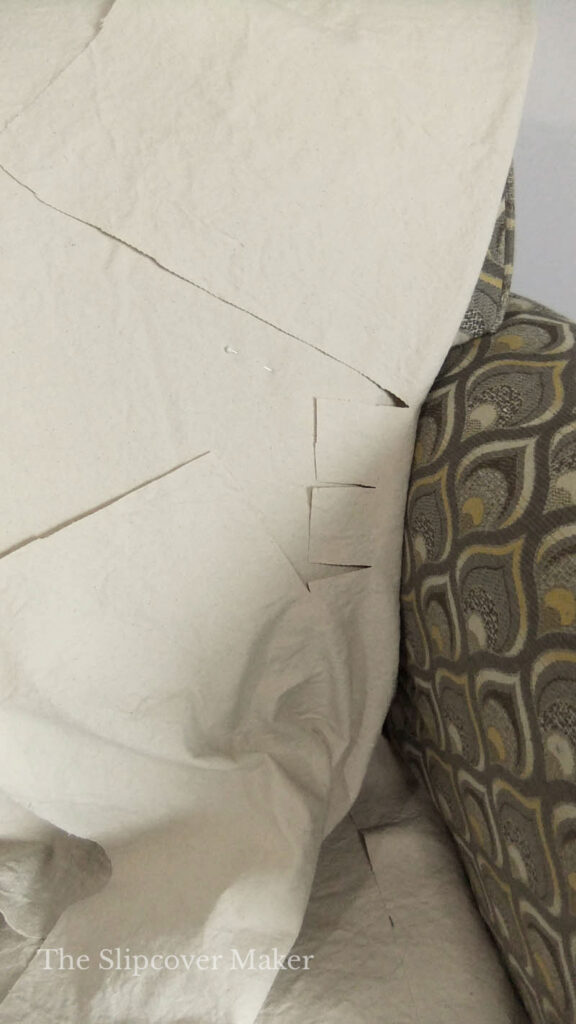
3. Cut & Shape Inner Back at Arm
After you make your first release cut, work down the inner back to cut and shape the fabric along the inner arm all the way to the deck. This will become your inner arm seam on your slipcover.
Make small release cuts every inch or so. These little cuts help the fabric bend around the curve and lay flat. Stop cuts about 1/2″ away from the fabric fold.
The photo above shows what the lower inner back at the inner arm looks like after it’s cut and shaped.
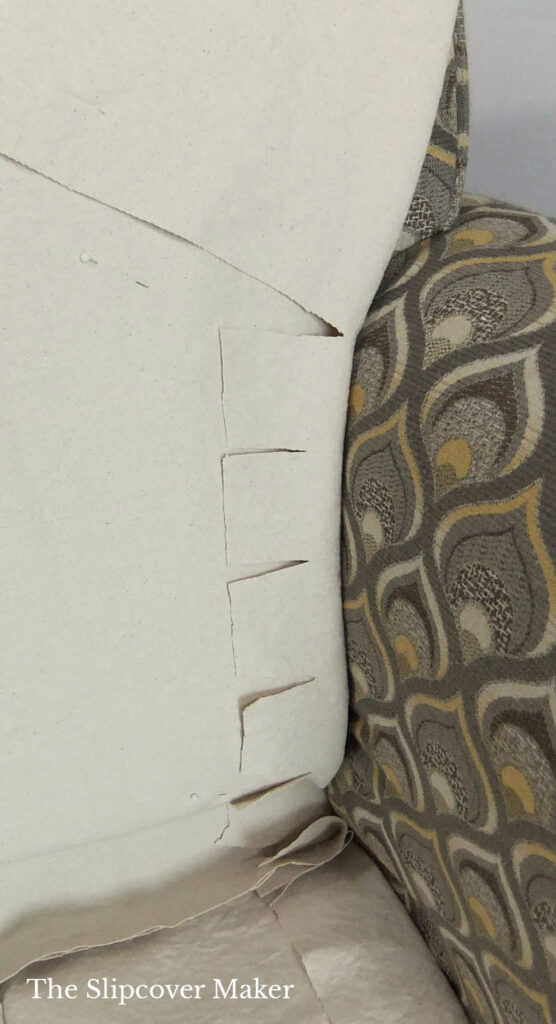
4. Cut & Shape Inner Back at Side Panel
Now, go back up to your first release cut. Cut and shape the remainder of the inner back / arm working towards the side panel seam.
Stop at the side panel seam where it joins to the inner back. Then, cut and shape the fabric up and over the side panel. Leave a one inch seam allowance.
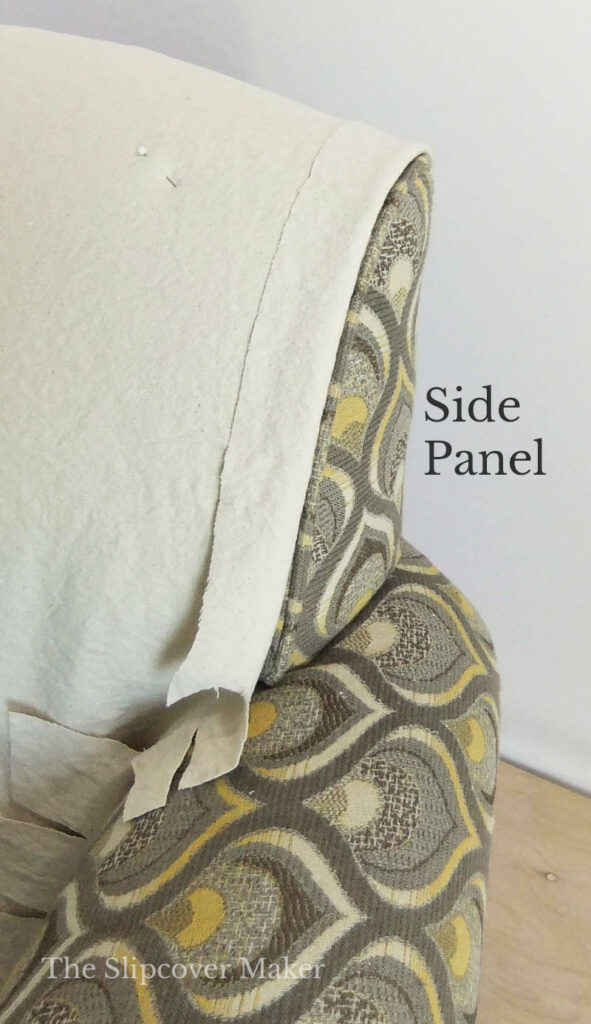
5. Pin Fit the Side Panel
Start by pinning fabric to the side panel. Make sure the fabric extends about 1.5 inches past the panel on all sides.
Then, cut and shape the fabric around the bottom of the panel where it joins to the arm. Follow the upholstery seam for placement.
Make little release cuts as you shape fabric around the base of the panel. Stop cuts about 1/4 to 1/2 inch from the seam.
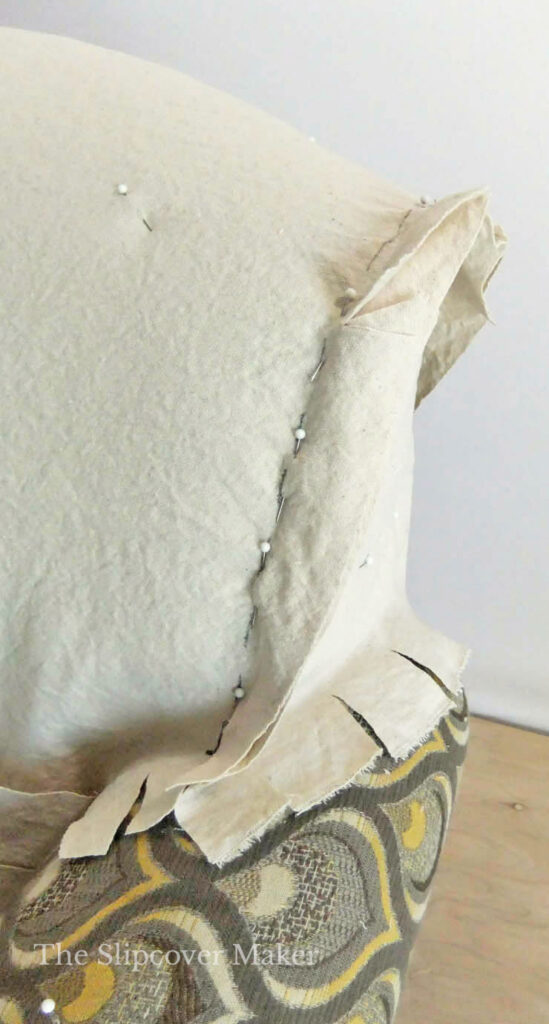
Now, pin the side panel seam where it the connects to the inner back shoulder.
Depending on how steep the curve is on your chair, you might have to make a few release cuts to help the fabric bend around the top of the inner back.
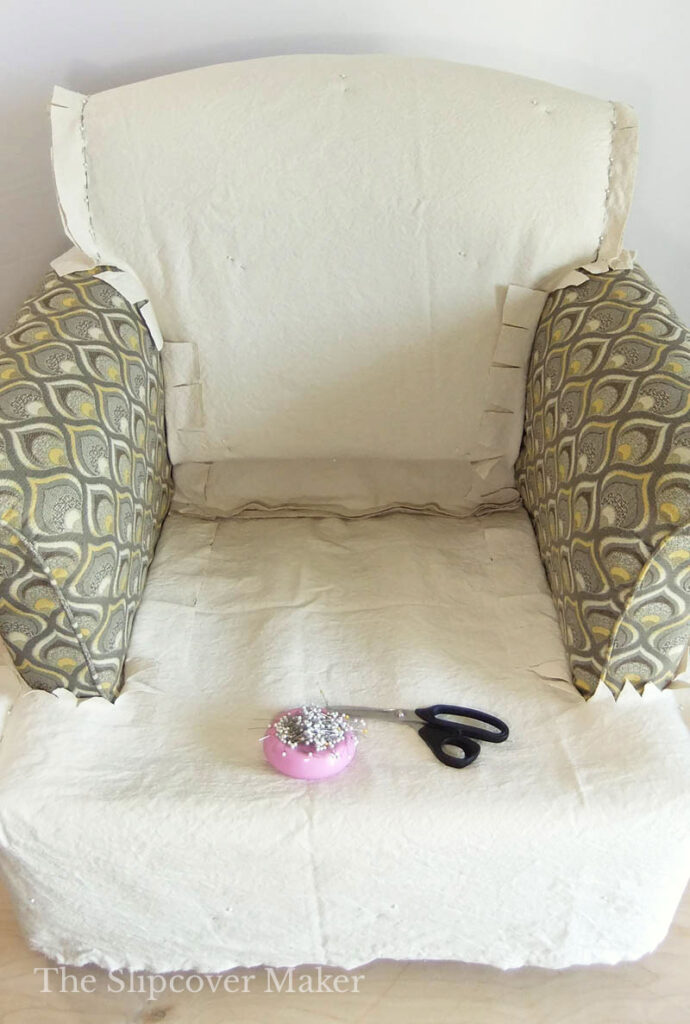
Voila! Here is the inner back and side panels cut and pinned. From here, I added the arms and the outer back.
Want to learn more about pin fitting a slipcover?
Check out my free 4-part tutorial series. It includes:
- Part 1: How to Pin Fit a Slipcover Right Side Out
- Part 2: Sewing Prep
- Part 3: Sew the Slipcover Body
- Part 4: Skirt & Cushion Cover
The right side out pin fit method is what I use for all of my projects and I get great results!
Gina, a recent visitor to my blog, loves it, too. She wrote, “I just wanted to say THANK YOU for your tutorial for pin fitting. I had 2 Ethan Allen chairs that I wanted to cover. I found your website when I was sourcing fabric and then used your tutorials for the process of making the slipcovers. The chairs turned out great! I had made slipcovers before but this technique is genius! I WILL be using this method on future projects!“
And, Rebecca also had great success. She emailed me to say, “I read, re-read, and read again your slipcover tutorials, I bought the right supplies that you directed, and I was able to stitch and complete slipcovers for two, $12 auction house chairs. I have attempted making slip covers before, but not with any real success.
Your tutorials made all the difference in the world, and I can’t thank you enough! From the step-by-step directions for prewashing fabric, to pin fitting right side out (which is completely genius), cutting notches to ensure a proper fit, and even how to sew welting (I’d been doing it all wrong before), I finally felt like I had the tips and tricks to complete the job.”
She even sent photos of her finished slipcovers. I’m so impressed!
Rebecca’s $12 auction chairs before she made slipcovers.
And, here are the 9 oz. white denim slipcovers she made. Don’t they look fantastic!
She told me, “I can never claim to have magnificent sewing skills that you have, but I am pretty dang proud of what I, and my cute Walmart Brother sewing machine, accomplished!”
Look how nicely it fits! Bravo, Rebecca. I’m proud of you, too!
Thanks everyone for following ! –Karen
Thank you for explaining this!
Thanks for giving me the encouragement I need. Love Cath
I’m cheering you on, Cath!
Thank you so much for sharing your extensive knowledge of slipcovered. I have learned so much!
You’re welcome, Frances!
Those blasted side panels! Thanks for this! 😌