Slipcover Pin Fit Tutorial Part 2: Sewing Prep
Pinning and cutting a slipcover right side out is a simple method for creating a really good fit. In this tutorial, you will learn how to prep your pinned cover for easy sewing.
Hi there! I’m so happy Part 1 of my pin fit tutorial series has inspired you to make your own slipcover.
If you missed it, you can follow along here. I walk you through the six steps for pinning and cutting a slipcover right side out.
In today’s tutorial (Part 2), I will show you how to trim, mark, notch, label and unpin your slipcover. These are the steps needed to prep your pinned cover for sewing.
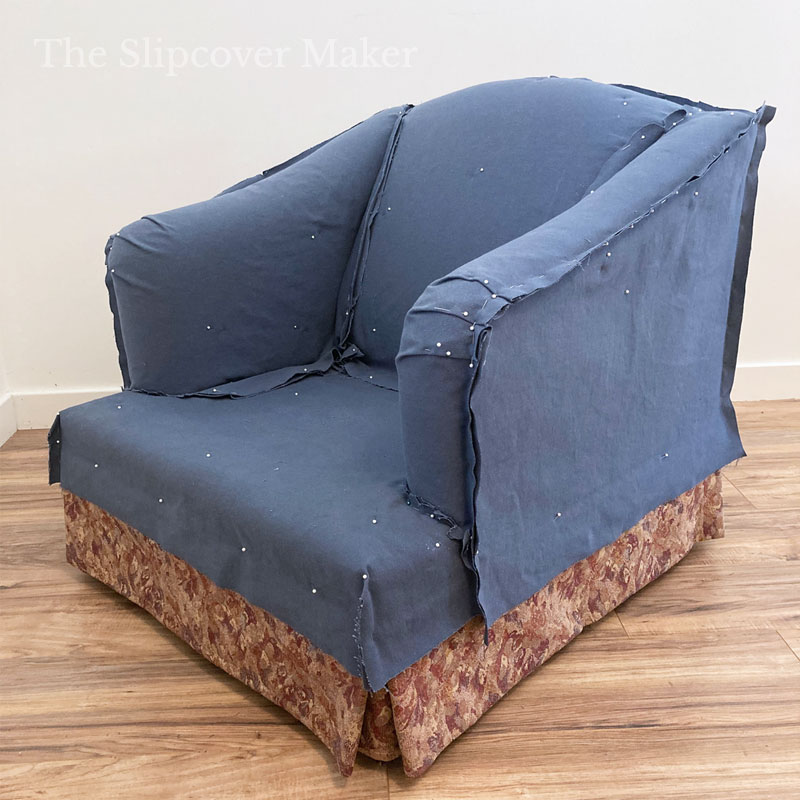
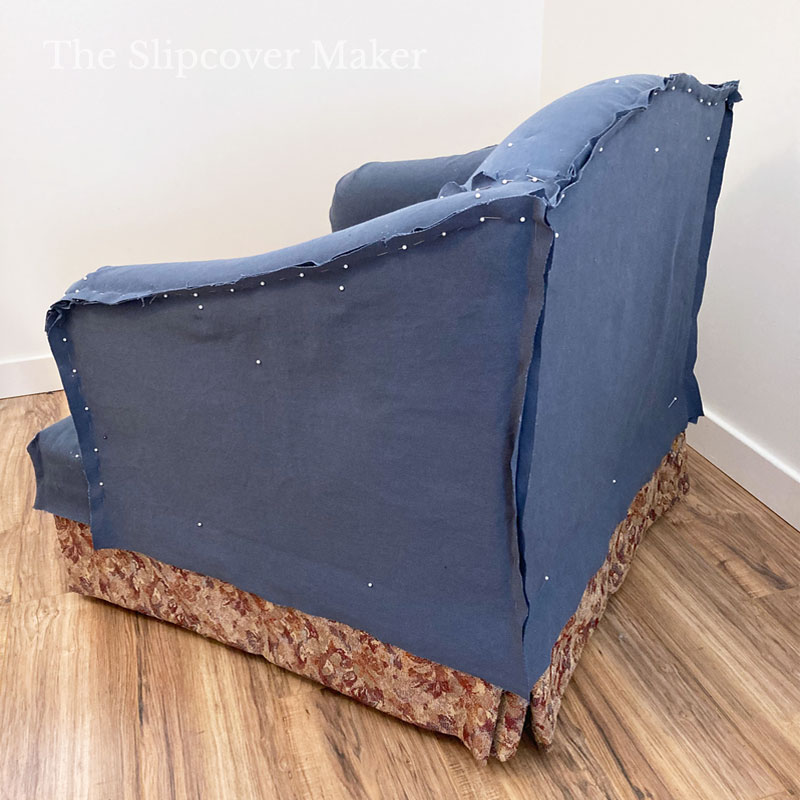
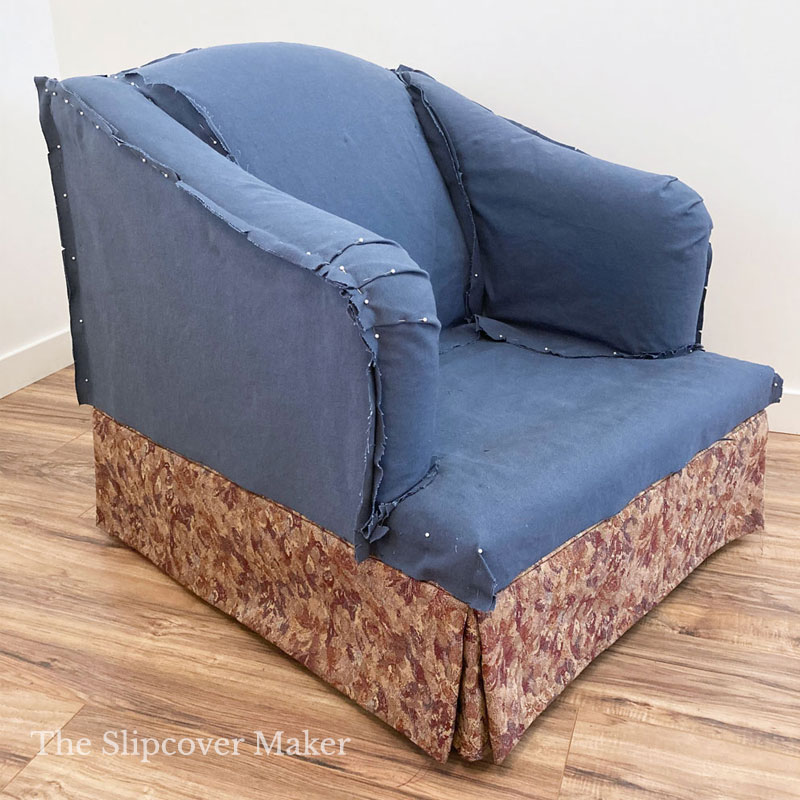
Below is how my chair looked after I completed pin fitting the body using the right side out method.
As you can see, all sections fit smoothly and are not too tight. And, there is at least 2 inches of fabric that hangs below my desired skirt seam.
At this point in the pin fitting it’s a good idea to check if there is any pulling, or other weird fit issues. Now is the time to make any corrections.
All of the seams are trimmed to 3/4 inch. That’s the seam allowance amount I prefer to work with.
Most of the time I trim seams after I pin each section. A good habit to get into!
However, for some projects I wait until after I complete the fitting to trim all of the seams at once. That way I have a little wiggle room incase I need to repin certain seams to make minor fit adjustments.
Now, it’s time to prep the slipcover for sewing!
A slipcover pin fitted right side out requires specific preparation before you can remove it from the furniture. The following steps are crucial to successfully assemble and sew your slipcover. Don’t skip over them!
Step 1: Trim, Mark & Notch Seams
The pins you stick in the seams represent your stitch line.
Later you will unpin the entire slipcover, so it’s very important to trim, notch and mark the seams before you lift the slipcover off of your chair.
At this point, I like to double check to make sure I trimmed all of my seams. Last chance!
Then, I notch them. I use the sharp point on my Kai scissors to snip little V-shapes. Notches show you where to match up the slipcover pieces accurately as you sew.
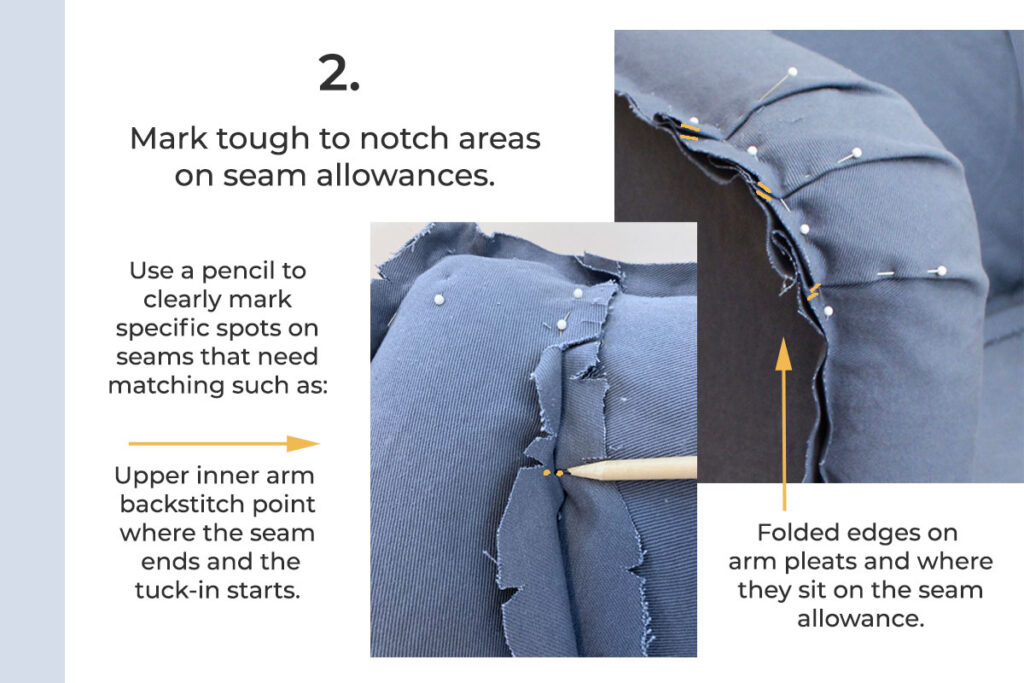
Some areas are hard to notch. In that case, I make a mark instead. I explain in this slideshow.
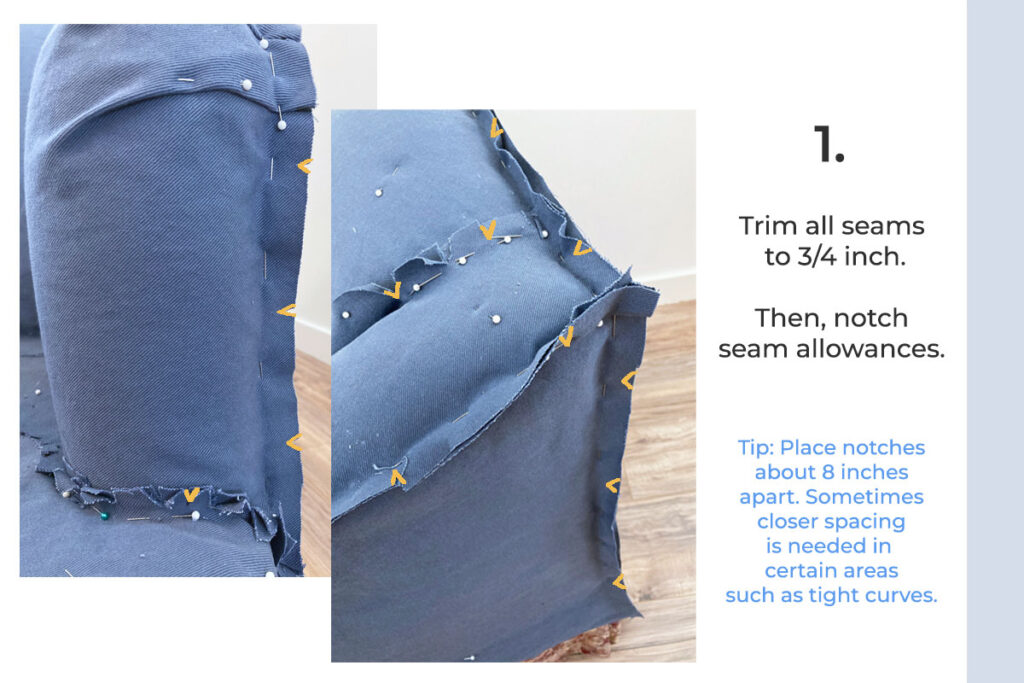
A few notes about trimming the seams — I’ve been cutting 3/4 inch seam allowances for so long that it’s easy for me to cut accurately without measuring.
If you are new at this and don’t feel you can cut a consistent 3/4 inch seam width just by looking at it, I recommend using a 6 inch metal sewing gauge to get your started.
Measure and mark 3/4 inch every so often along the seam allowance. Use the marks as your cut guide.
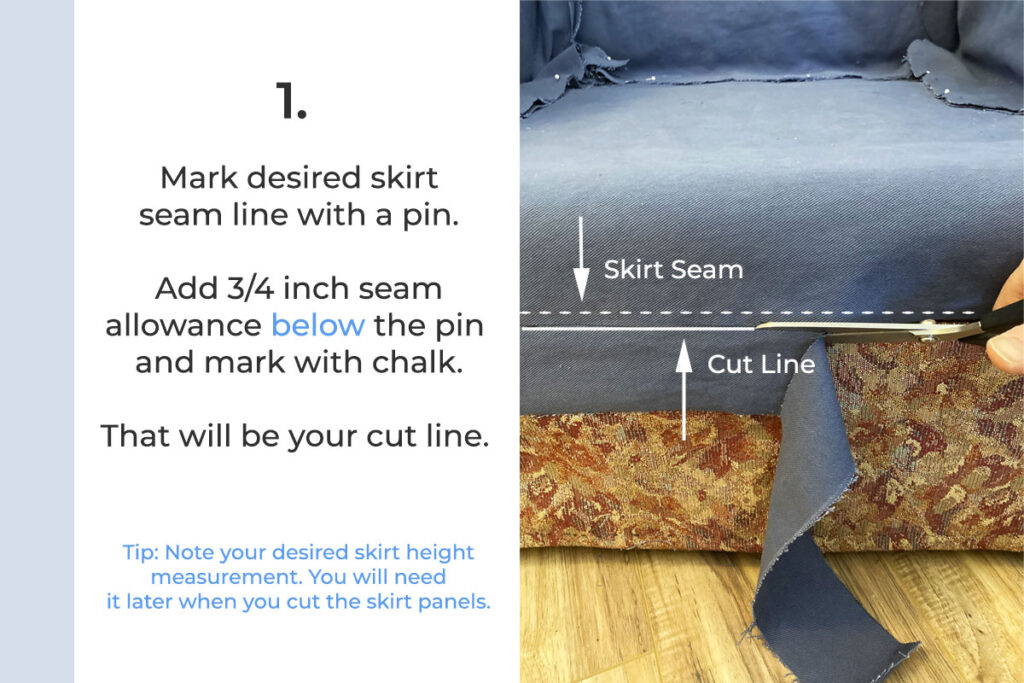
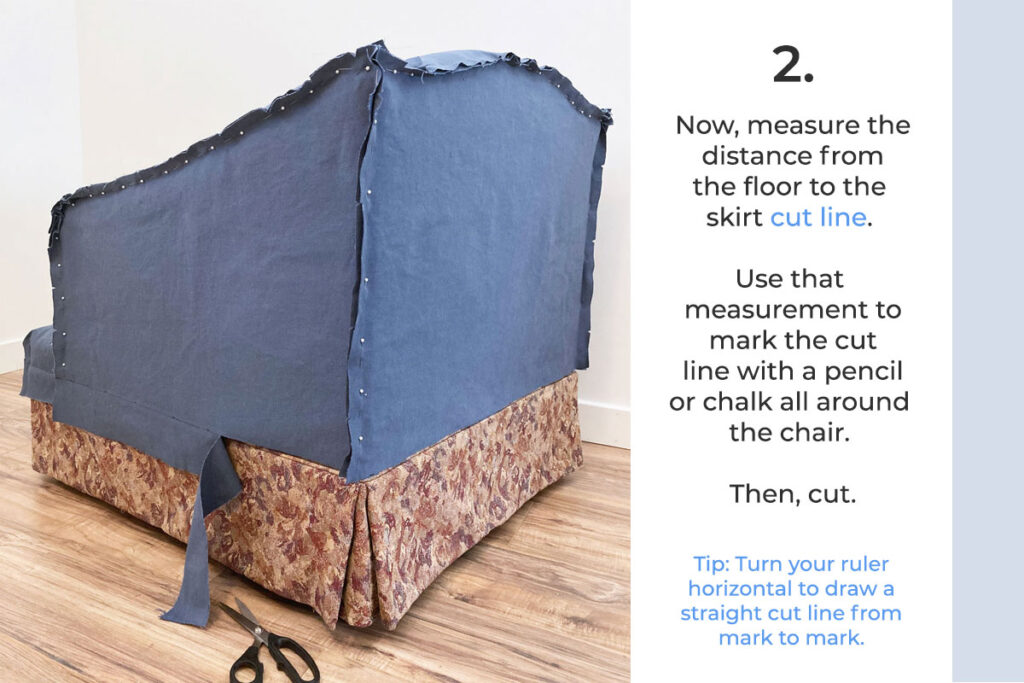
Step 2: Mark & Cut Skirt Seam
My slipcover has a dropped skirt line. It doesn’t join to the deck edge. Instead, it sits a couple inches below.
Therefore, I need to mark and cut the skirt seam placement and cut line before I remove the slipcover.
Take a look at this slideshow to learn how I do it.
If your chair doesn’t have a skirt, you will still need to mark your desired hem edge on the slipcover body.
Determine what type of hem finish you want i.e. turned and stitched, welt cord finish, banded, etc.
Factor in the seam/hem allowance needed. Follow the basic mark and cut instructions as shown in the slideshow.
This is what my slipcover looked like after I trimmed, notched and marked the seams.
- All pieces are pin fitted right side out.
- All seams are trimmed to 3/4 inch, notched and marked.
- Skirt seam edge is cut straight all around the chair.
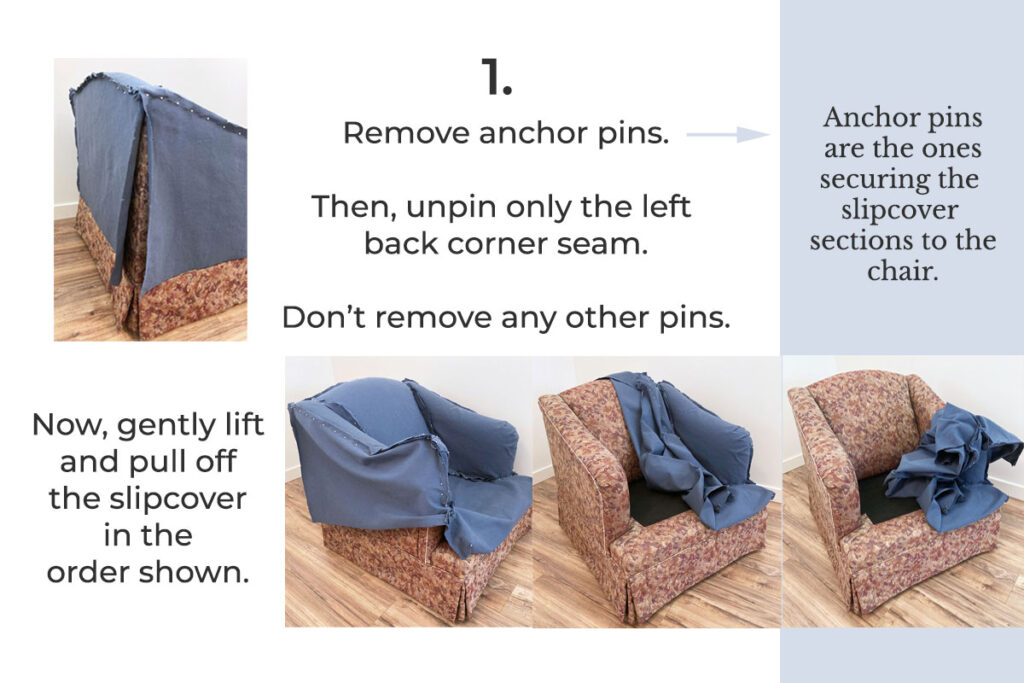
Step 3: Remove, Label & Unpin Slipcover
Get ready to unpin your slipcover! This is the last step in prepping the slipcover body for sewing.
First, remove the anchor pins. Those are the first pins you used to secure each slipcover section to the chair. They are not the ones you pinned the seams with.
Then, unpin the left back corner seam. This the only seam you need to unpin in order to remove the slipcover.
Now, gently lift and pull the slipcover off the chair in the order shown in this slideshow.
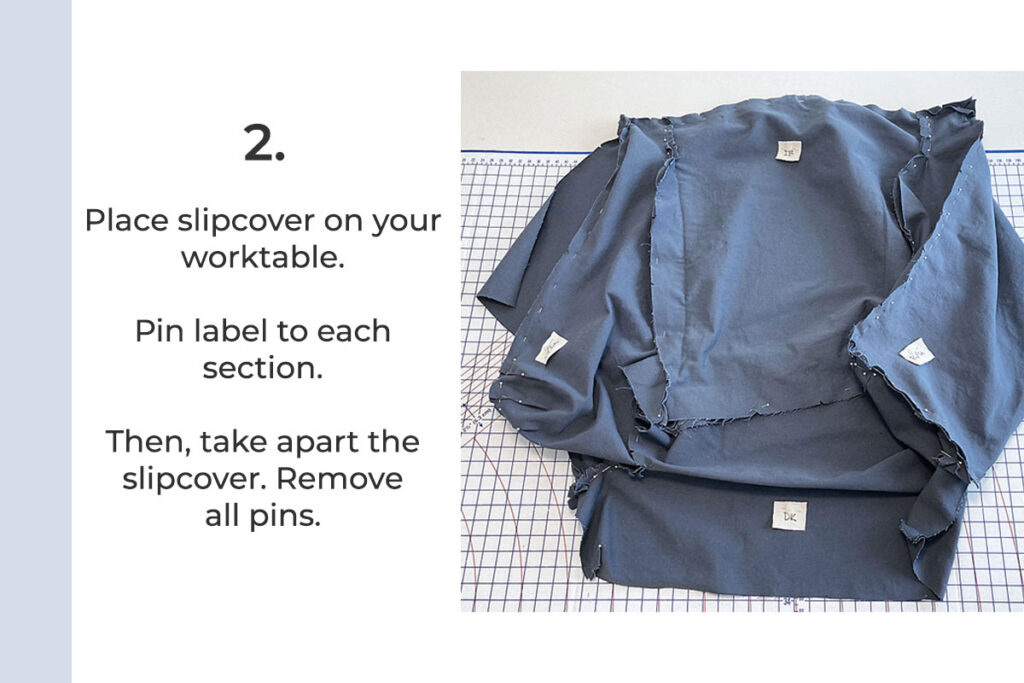
After you removed the slipcover, place it on your work table.
Check all of the seams one last time to make sure they are trimmed, notched and marked.
Before you unpin the slipcover, it’s important to pin a label to each section. Labels make it easy to identify each piece as you assemble and sew.
Create a name label from cloth or paper scraps. I use abbreviations instead of writing out the entire name. See below:
- R/IA (right inner arm)
- R/OA (right outer arm)
- R/FA (right front arm)
- L/IA (left inner arm)
- L/OA (left outer arm)
- L/FA (left front arm)
- I/B (inner back)
- BK (back)
- DK (deck)
That’s it for this tutorial Part 2! Complete these prep steps and your slipcover sections will be ready to stitch.
Coming up next….
In Part 3, I will share step-by-step instructions and tips for sewing the slipcover body together, piece-by-piece in a specific order.
It’s a straightforward process that goes faster then you might think.
Until then, have fun pin fitting! — Karen
Very helpful series! I like the idea of pinning right side out, and your directions are very clear — thanks for creating this! Could you tell what marker or fabric pen will work well on most heavy upholstery fabrics? What do you prefer? ( I’ve not had good luck with the ones I’ve tried in the deep past. ) Or do you ever use chalk? Thanks!
You make it look so easy. Your instructions are so easy to follow. Hopefully I’ll be able to do a good job. Love your work
Thanks, Bev! I’m cheering you on!
Karen, I’m so glad to see you’re sharing this with us! My husband and I are planning to slipcover a sofa and chair in July. Would you consider offering this in a digital book form? I’d be happy to purchase your wisdom and skills!!
Theresa
🙂
You’re welcome, Teresa! The tutorial content I’m sharing on my blog is taken from an ebook I developed earlier this year. For a number of reasons, I decided the information would be better received by me “teaching” it on my website. I will be offering advanced level tutorials / classes in the future to purchase. Have fun making your slipcover!
Thank you so much for sharing your knowledge ! This is a fantastic tutorial.
Oh good, Karen! I’m glad you find the tutorial helpful.
Your step by step directions are fantastic! Thank you for sharing! I have learned so UCB from all of your posts! Thank you!!
You’re welcome, Natalie! I appreciate your feedback!
Great detailed instructions, and photos…thank you!
I appreciate you following along, Katy!
Thanks for posting this! I’m trying to decide if I’m brave enough to make my own slipcover and can’t wait to see the rest of your series! 🙂
Hi Kate — Definitely read through the entire tutorial series first before buying fabric and tackling your project. I hope the instructions inspire you to give it a go!
Brilliant tutorial. I love the photos and easy to follow steps. An afternoon well spent reading Steps 1 & 2 ! Can’t wait for you to post the rest of the tutorial as making a Slipcover has been on my job list since the first lockdown when I bought lots of calico from IKEA to have a practice go without making a mess of expensive fabric. We then decided to move house so my sewing project was put on hold but I’m raring to go now and make our new house feel like home… ABSOLUTELY LOVE THIS INSPIRATIONAL WEBSITE – THANK YOU X
You’re welcome, Nicola. I’m so glad you want to give the right side out pin method a try! I think you’ll love results.
Love this and can’t wait to try this technique on my next project – my couch! If not in ebook format, how about a PDF? I can do lots of screenshots to make a printable copy but it’s pretty tedious. I like being able to write notes on my instructions.
In a future post I would love your thoughts on changing the # of couch seat cushions, like from 2 to 1 long one, or 2 to 3.
Thanks!