
Sewing a Right-Side-Out Pinned Slipcover
When I share photos of my pin fittings in progress, I’m often asked, “How do you sew the slipcover seams when the right side of the fabric and the pins are facing outward? Do you unpin one section at a time, flip it inside out and repin it so the fabric is placed right sides together?”
That’s a great question. If you’re new to pin fitting a slipcover right-side-out, you might be wondering the same thing.
The good news is you don’t have to unpin and repin seams or flip pieces inside out. In this post, I will show you how to make your right-side-out pinned slipcover ready to sew in a few simple steps.
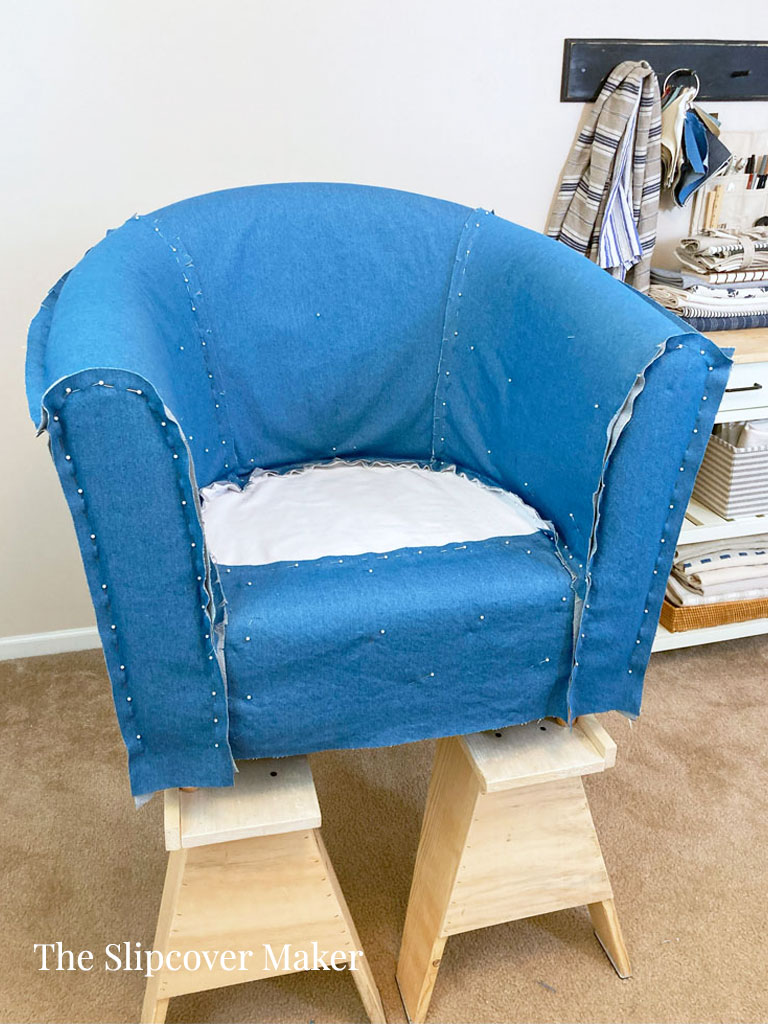
Before you remove your slipcover from the furniture and unpin it, you MUST prep it for sewing.
Follow these steps in the order shown. Consider this your Ready-to-Sew checklist!
1. Label Each Section
Pin a name label to each section of your slipcover. I like doing this as I cut out the fabric blocks for my pin fitting.
Labels help you identify which section is which when you begin to sew. Super important!!
I like pinning my labels close to the top area on most of my fabric blocks. This tells me which direction I need to position the fabric on the furniture. For inner and outer arm pieces, I attach the label close to the top front edge where it will be joined to the front arm.
Below are the label names I used for my barrel back chair pin fitting. I sometimes abbreviate them. Create labels that make sense to you.
- I/B = inner back
- Deck
- (R) I/A = right inner arm
- (L) I/A = left inner arm
- (R) O/A = right outer arm
- (L) O/A = left outer arm
- (R) Frt Arm = right front arm
- (L) Frt Arm = left front arm
- Back
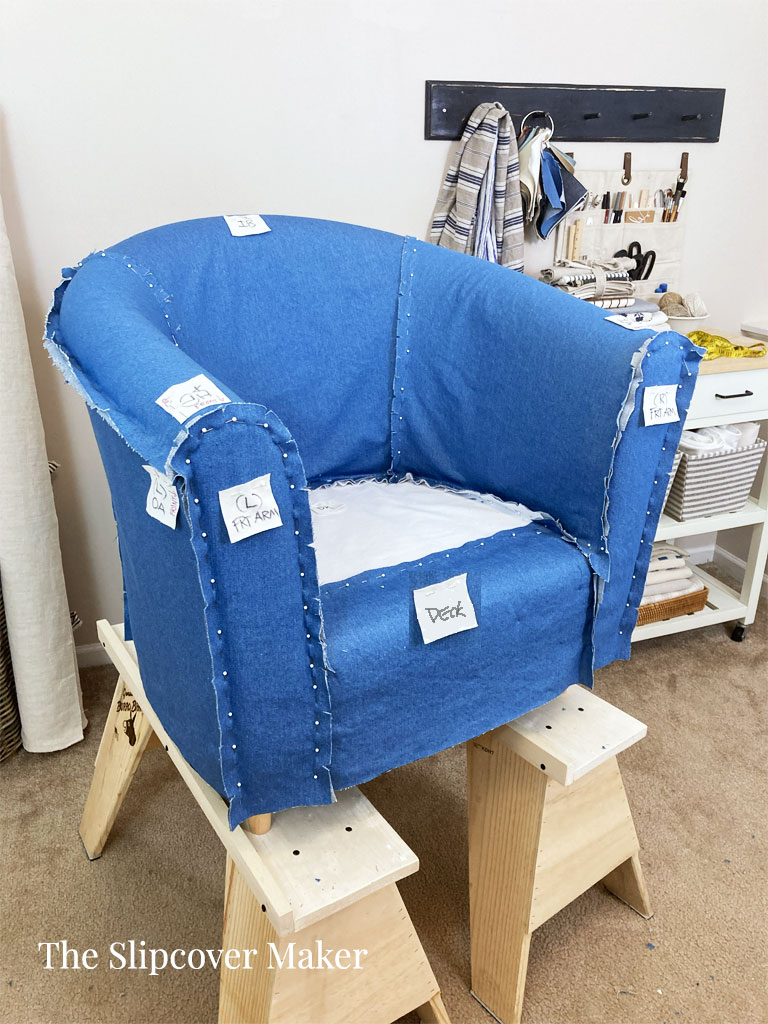
2. Trim, Mark & Notch Seams
Trim Seams: When I pin seams, I trim them to 3/4 inch (my prefered seam allowance) as I move from one section to the next. If you plan to sew with a 1/2 seam allowance, trim your seams to 1/2 inch.
Sometimes I hold off trimming certain seams until I know for sure they don’t need any adjustments. I trim those right before I remove the slipcover.
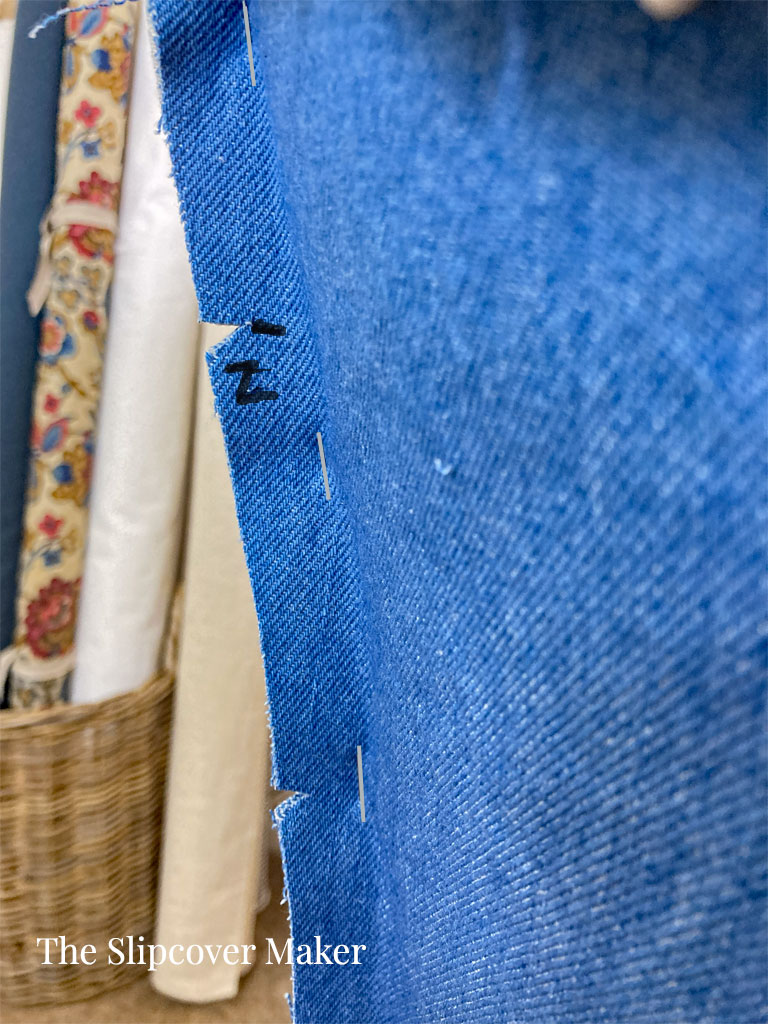
Notch Seams: Cut a little notch evey 4 to 8 inches apart on all pinned seam allowances through both fabric layers. See photo above.
Notches help you accurately line up one slipcover piece with another when it’s time to sew them together. Cutting notches MUST be done when the slipcover sections are still pinned together.
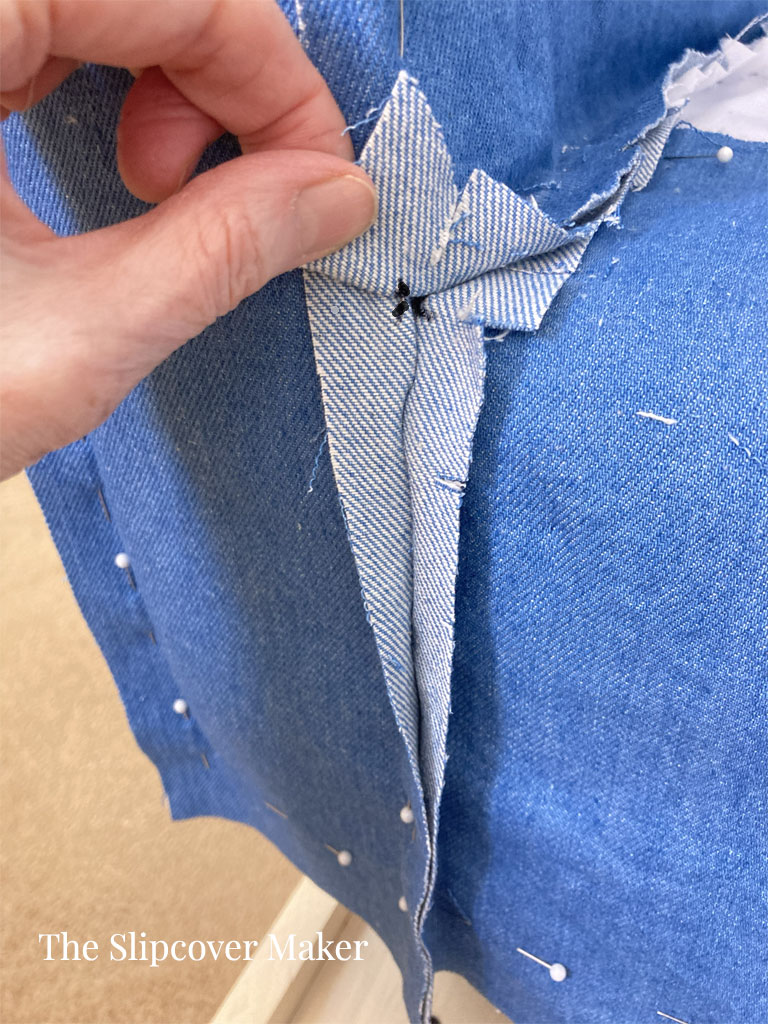
Mark Seams and Hemline: After all seams are trimmed, make markings as needed. For example, I marked the letter Z on the seam allowance where I wanted my zipper to stop.
I also marked a dot on the reverse side of the inner arm, deck and front arm where they meet to create a 3-way seam intersection. See photo above.
You can make as many markings as you wish as long as they are not visible on the front side of your finished slipcover.
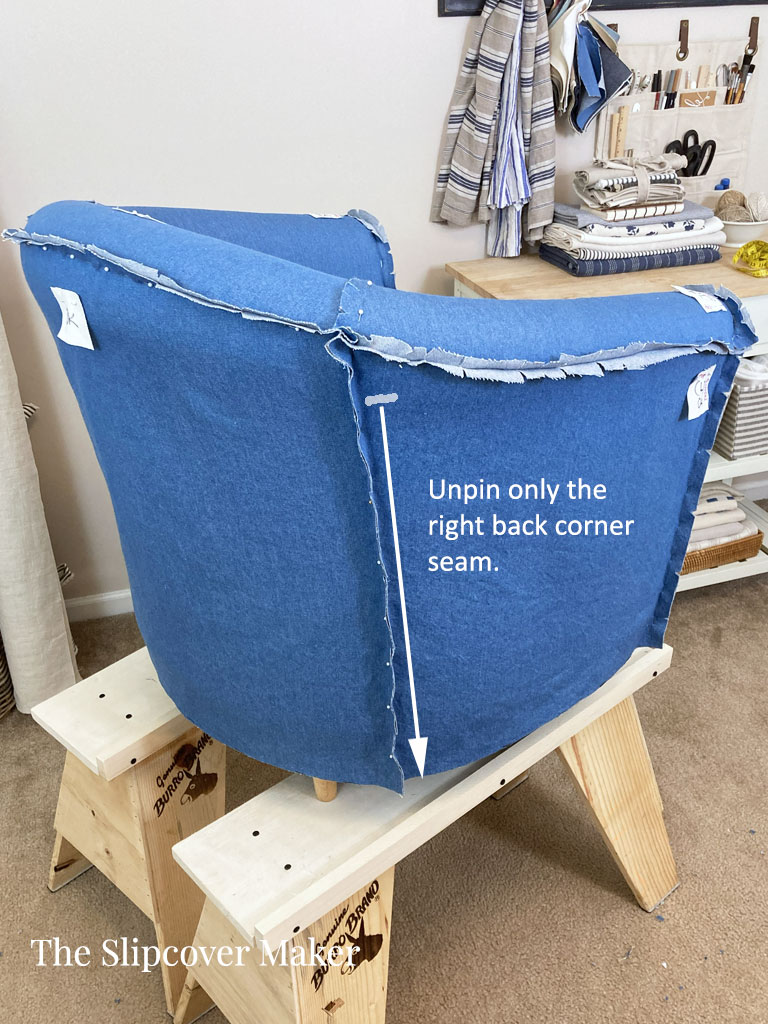
3. Unpin ONLY the Back Corner Seam
Before removing your slipcover from the furniture, unpin only the right back corner seam. It will open up the slipcover just enough for you to lift it up, over and off without too much stress on the reamaining pinned seams.
Sometimes it’s necessary to unpin both back corner seams to get the slipcover off. A piece with large rolled arms that bump out from back corner seams is a good example.
Do not unpin any other seams.
3. Remove the Slipcover
Now, with the back corner seam unpinned, you can remove the entire slipcover from the furniture.
Start by lifting it up and over the right arm and then over the top of the back.
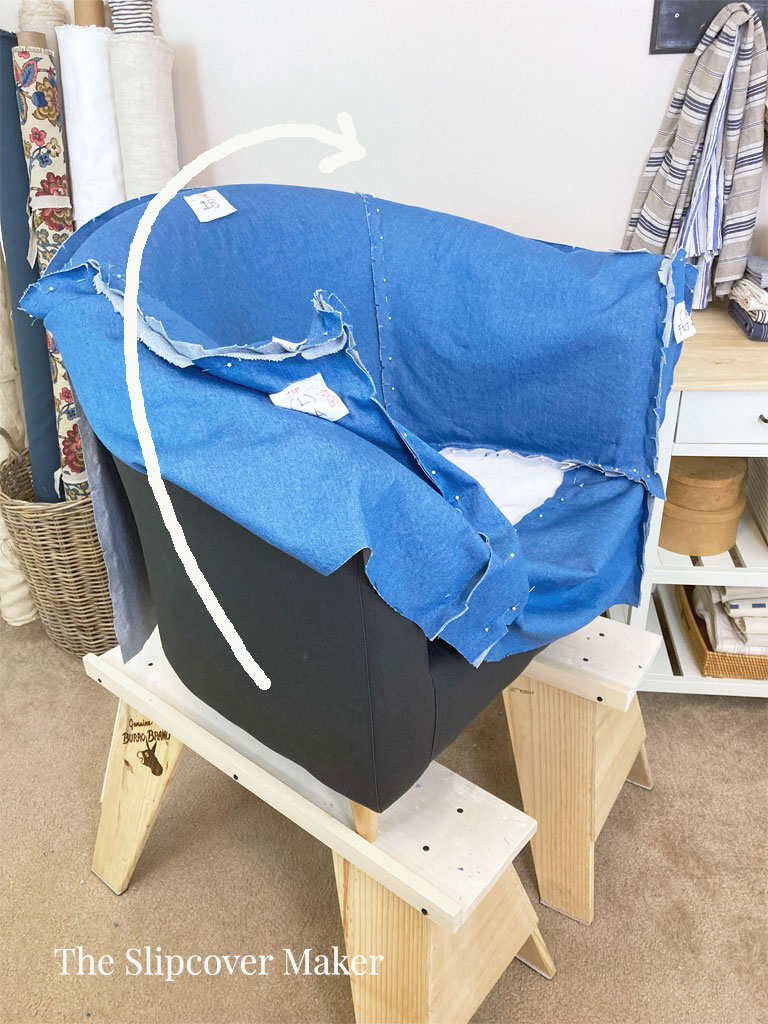
Continue removing the slipcover as you lift it over the back, inner back and then off the left arm.
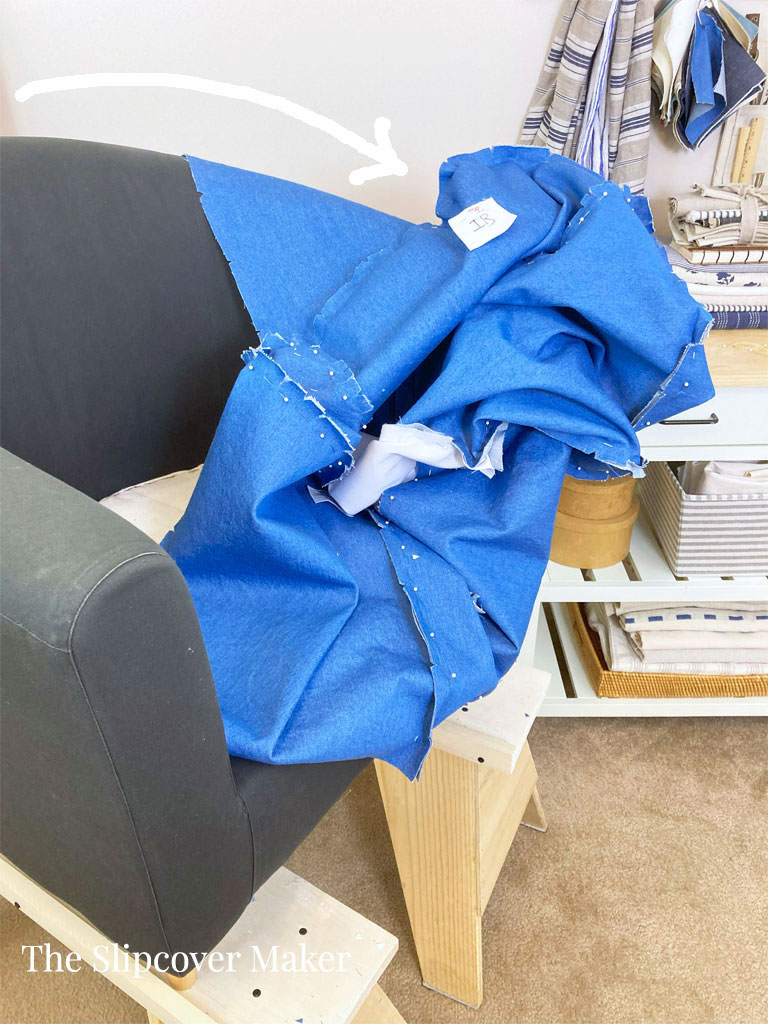
Place your pinned slipcover on your worktable. The reason to keep it pinned is to give your slipcover one last check to make sure each section has a label and seams are trimmed, notched, and marked. Double check the hemline to make sure it’s marked and cut.
Labels, trimmed and notched seams and markings are what make a right-side-out pinned slipcover ready to sew after you remove it from the furniture and unpin it.
Now, comes the best part!
4. Unpin All Seams
Unpin all seams! Yes, that’s correct. Unpin ALL seams and lay the pieces flat on your worktable.
Now you can begin to assemble the slipcover pieces, pinning them right sides together and sewing the seams in a specific order.
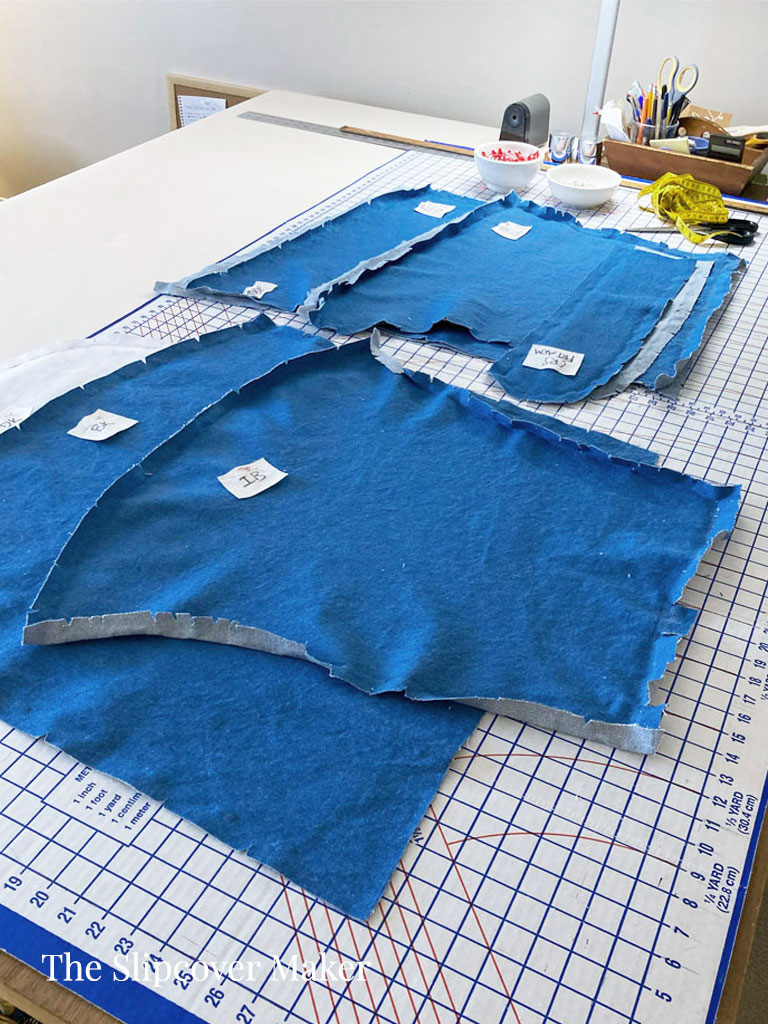
Think of the process like this:
When you cut out a garment from fabric using a paper pattern, you produce all of the pieces you need to sew it. Each piece is labeled and has notched seam allowances as well as a few markings. Everything is ready to sew. You pin or clip pieces right sides together and stitch the seams in a specifc order per the pattern instructions.
The same thing goes for sewing a slipcover that has been pinned right-side-out. However, intead of cutting out the slipcover using a paper pattern, you pin fit the fabric on the furniture to create the shaped pieces. After removing the cover and unpinning the seams, the pieces are ready to sew by placing them right sides together and stitching the seams in a specific order.
Slipcover Sewing Order
Below is the sewing order I used for my barrel back slipcover body. I use this same sequence for almost all slipcovers that I pin right-side-out on upholstered, symmetrical pieces of furniture.
- Sew the inner arm to the outer arm to create the outer arm seam. Do this for both the right and left arms.
- Sew the front arm to the inner arm and outer arm. Do this for both the right and left arms.
- Sew both the right and left arms to the inner back.
- Sew the deck to the lower front arms, lower inner arms and lower inner back.
- Sew the back. Join the back to the inner back and sides.
If your slipcover has tucks, stitch them before you sew the seams.
If you want to add welt cord (piping), stitch it to your desired pieces when they are still flat before you sew the slipcover seams.
And, if you want to add a zipper opening, sew it to the right back corner seam when you get ready to attach the outer back to the side.
To learn more about pin fitting right-side-out, hop over to my 4-part pin fit and sew series on the blog!