
How To Design Your Slipcover Like a Pro
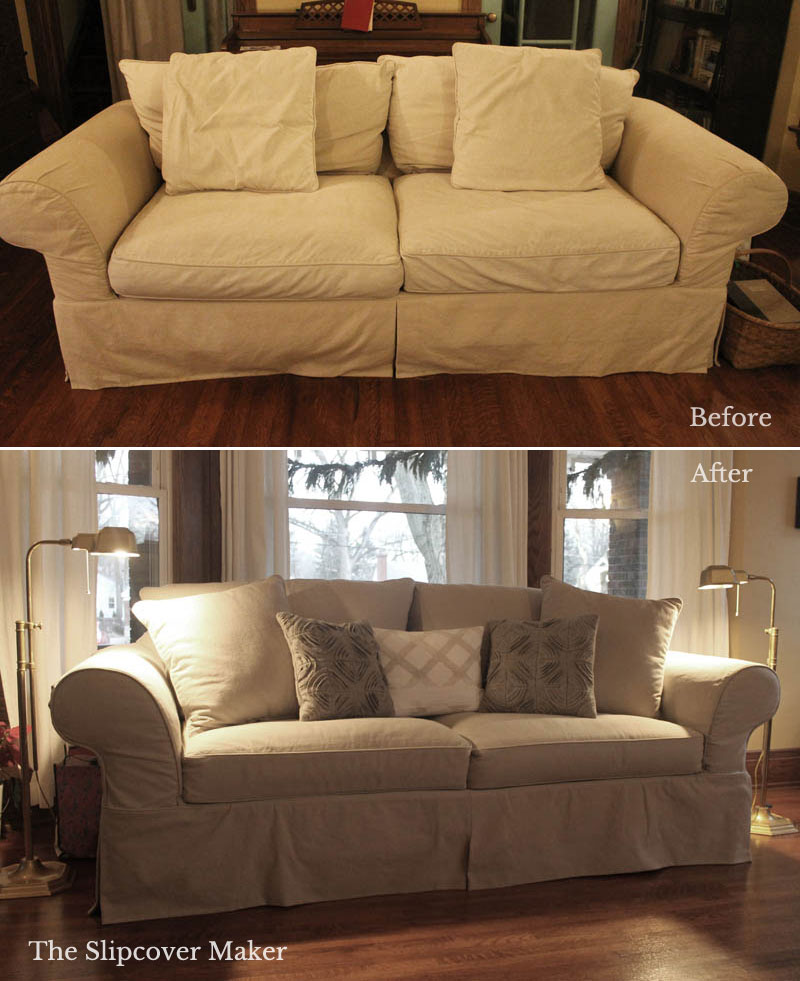
When you look at a before and after slipcover photo what do you notice?
My guess is it’s the fabric and color that catches your eye first. Then the fit, right?
What you might not see right away are the many subtle design details that went into making the slipcover look and perform it’s best. They are creative updates and functional fixes that make all the difference between a so-so slipcover and one that is awe inspiring.
How do you know which design details to add, omit or improve when you make a slipcover?
I’ll use Leah & Scott’s sofa project as an example to show you how I do it.

1. Do a walk around.
Before I began pin fitting Leah and Scott’s worn & loved sofa I took a close look at the design, upholstery seam details and the overall condition.
Like most old pieces, my customer’s sofa showed obvious signs of age: loose upholstery in certain areas, a droopy skirt, compressed back cushions and stretched out seat covers. I also noticed pleats on the back arms, which is a detail that does not translate well in a slipcover.
As I walked around the sofa I made a mental note of all the things I could design into the slipcover to simplify details, enhance the overall beauty and add excellent function.
I also considered the type of fabric Leah chose and her vision for the new slipcover in her space.
2. Come up with a design plan.
A well thought out slipcover design is not only about the obvious: fabric choice, color, welt cord vs. topstitch, etc. It’s also about strategically placing certain seams and tucks so the fabric drapes and shapes better or placing the zipper in the right spot to give the slipcover easy on and off function.
Once I identified the details I wanted to add or fix I was ready to think through my design plan.
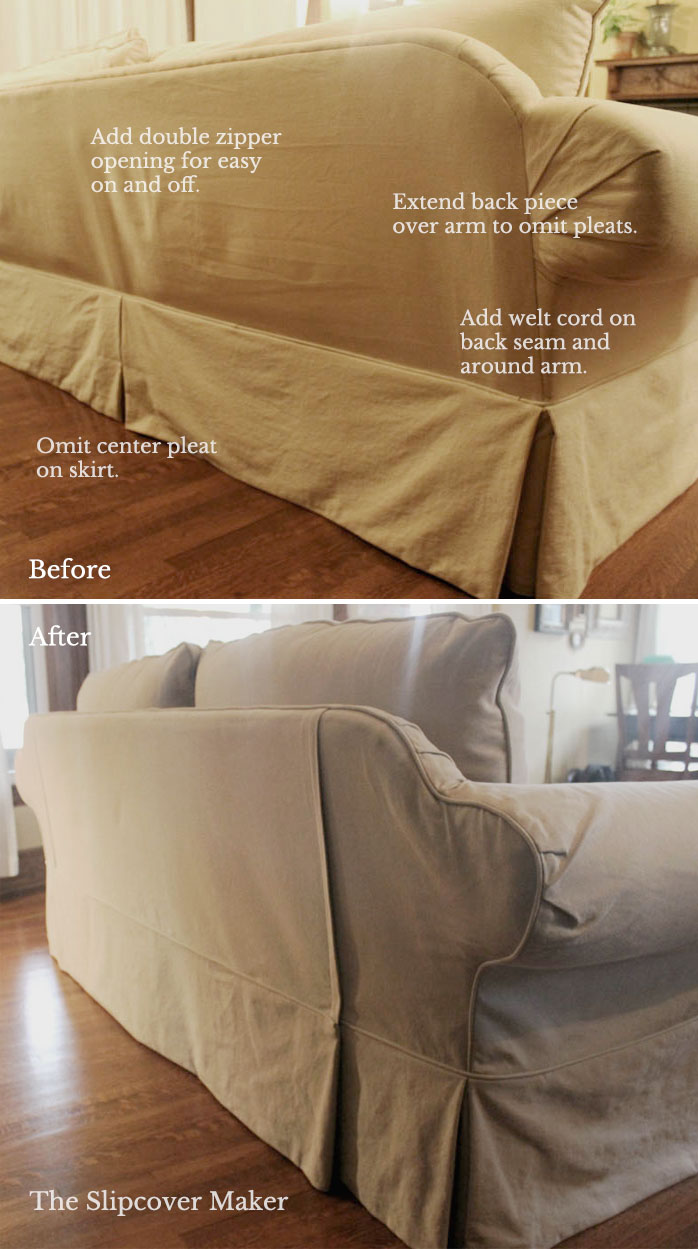
Take a look at the before photos and you will see my design revision notes. I also list them below:
- Refresh back cushions by adding poly cluster fiber fill. FYI — Leah ended up doing this herself with my tutorial. Great job!
- Tighten up fit on seat covers.
- Cut off original skirt. It was too long, pooling on the floor. It would have peeked out from under the new slipcover skirt had I left it in place.
- Add a double zipper entry on back. A slipcover made for a big, wide rolled arm sofa goes on and off so much easier with two zippers placed on the back.
- Omit center back pleat on skirt. Simplify!
- Extend the back to cover the back arms. No need to duplicate those fussy upholstery pleats.
- Add welt cord along the upper back seam and around the contour of the back arms. This adds a professional finish to the slipcover and gives definition to the curves.
3. Pin fit the new details.
With the design plan in my head I got to work pin fitting the sofa. I didn’t have to stop and think about which details go where or how I was going to do it. Having all of that figured out before hand saved a lot of time.
I made the necessary changes to the seat cushion covers and skirt at my workroom since they didn’t require pin fitting.
Have fun designing your slipcover!
Do you offer on-line classes? Thank you. Cathy
Sent from my iPad
>
Hi Cathy,
I currently don’t offer online classes. However, plans are in the works. Be sure to sign up to receive my blog posts.
That’s where I share what’s new.
Hi Slipcover Maker,
Enjoyed this post. I like the way you handle the back of the arms.., it’s much neater looking and appears stronger.
So here’s a question….do you ever top stitch your covers? If not, may I ask why?
I’d really like to try it as a light change from cording, but I can’t think when to apply the top stitching during assembly…any tips? Maybe it’s just not a good idea?
Any thoughts welcomed.
Have a lovely day.
Much thanks, EV Hudson
On Sun, Apr 21, 2019 at 3:46 PM The Slipcover Maker wrote:
> slipcovermaker posted: ” When you look at a before and after slipcover > photo what do you notice? My guess is it’s the fabric and color that > catches your eye first. Then the fit, right? What you might not see right > away are the many subtle design details that went into m” >
Hi Ester,
Yes, topstitch is a good looking alternative seam finish to welt cord. Stitch the seam and then turn it right side out and topstitch. I pin fit right side out so it’s easy for me to topstitch sections as I build the slipcover. If you pin fit reverse side out I guess you would have to sew the entire slipcover together and then turn it right side out to do the topstitch. I often do edge stitch or 1/4″ topstitch.