Simple Slipcover for a Fussy Old Armchair
Learn how I designed this simple canvas slipcover. I share my 3-step design process for giving an old fashioned armchair a brand new look with clean lines and a contemporary fit.
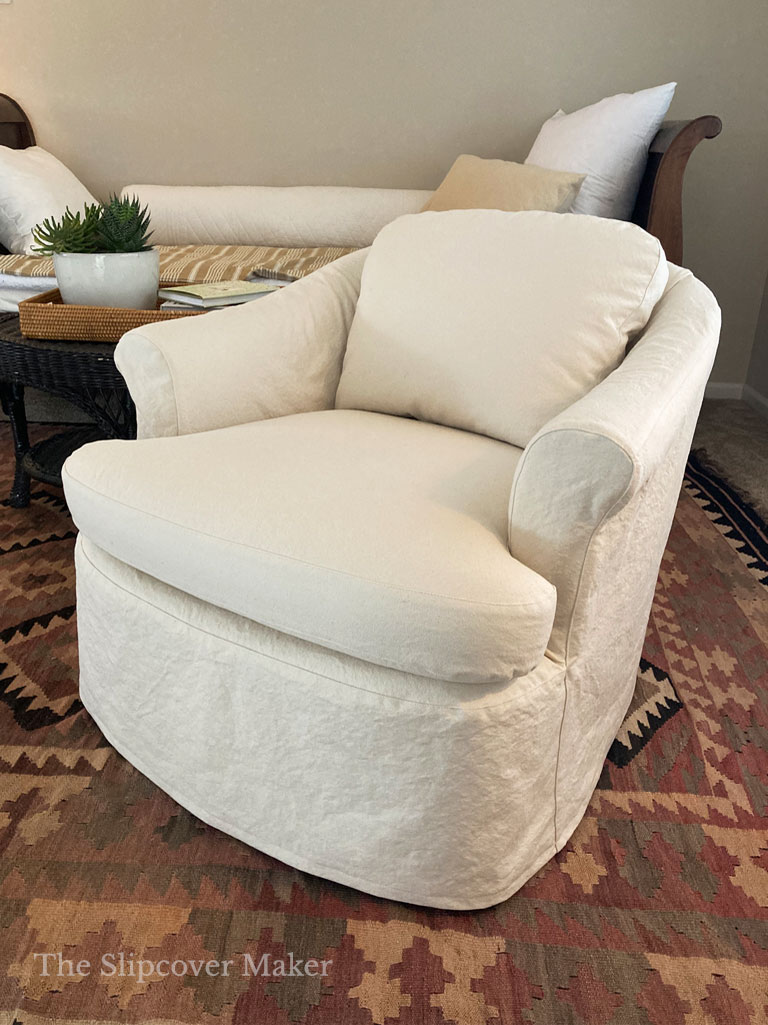
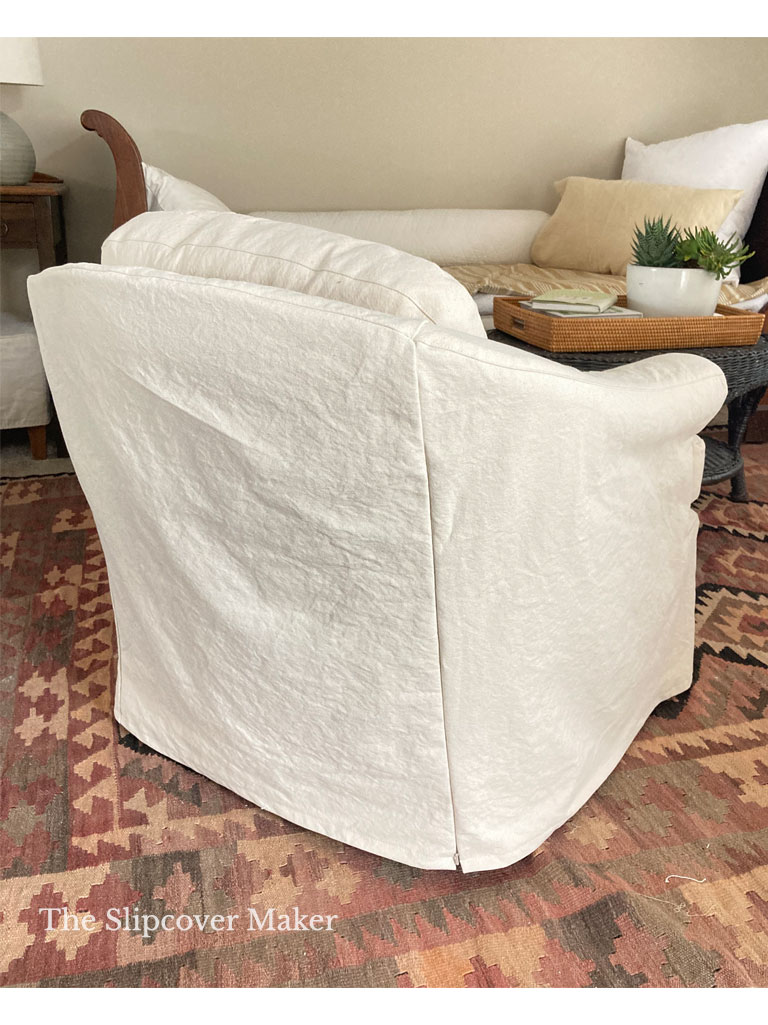
You’d never know by looking at this simple, stylish slipcover that there is an outdated, traditional upholstered chair underneath. I mean, really outdated.
Take a look at the before photo below. See what I mean?
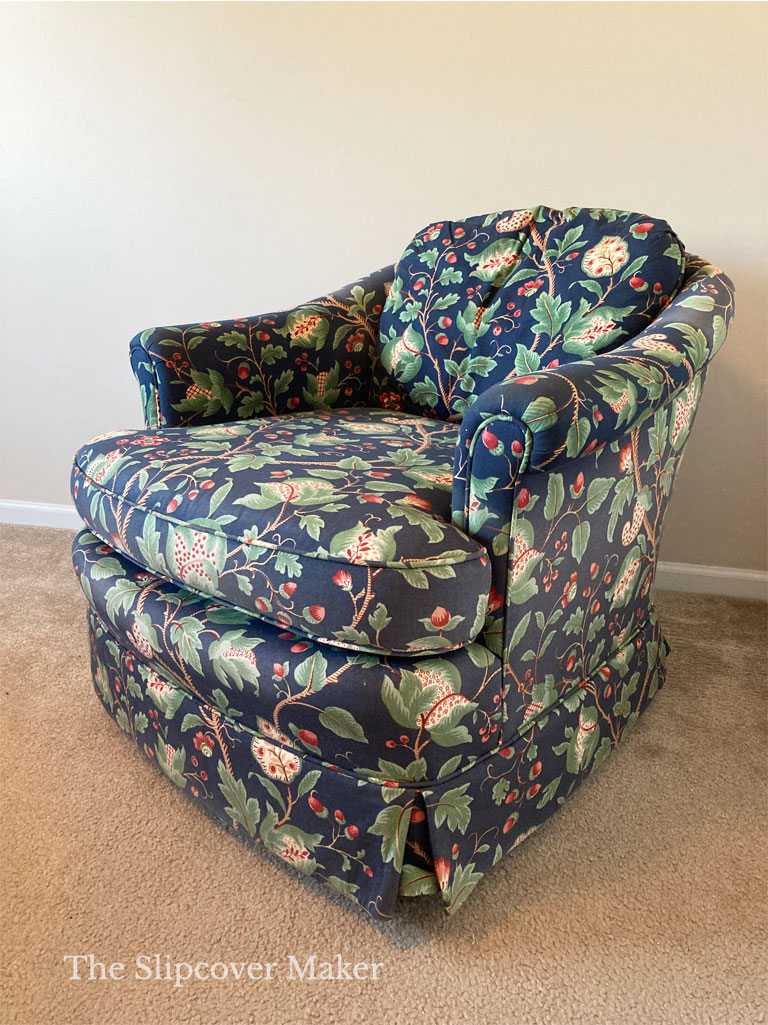
It’s a late 1990’s design with a swivel base, a modified barrel shape, sloped/rolled arms and a bunch of fussy, old fashioned details. That’s a lot going on!
Of course, I could have designed a tailored slipcover with an upholstered fit and all of the same details as the original. The trouble with that approach is the chair would still look outdated.
Designing a simple slipcover for this piece was a better option since I was going for a more dramatic transformation. I wanted to create a design that looks “now”.
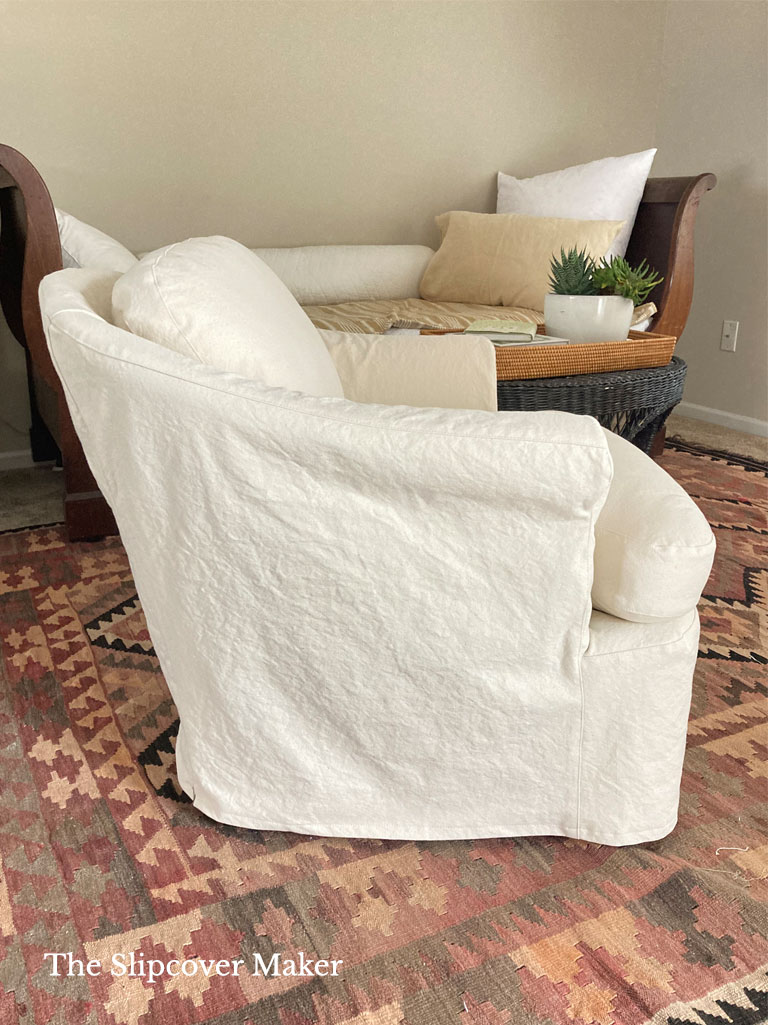
What do I mean by “simple slipcover”? It’s an uncomplicated design that not only suits the style of the furniture but also updates it. It should have a good fit and made with a fabric that is easy to pin-fit and sew.
A simple slipcover design doesn’t mean you have to sacrifice style or settle for a shapeless fit.
Below is my 3-step design process. You can use this to design your own simple slipcover:
1. Simplify the details.
Take a look at all of the details on your upholstered chair. Narrow down which ones to omit or keep. For those details you want to keep (or add), think about how to simplify them. This first step in the design process will help you plan the look and feel of your slipcover.
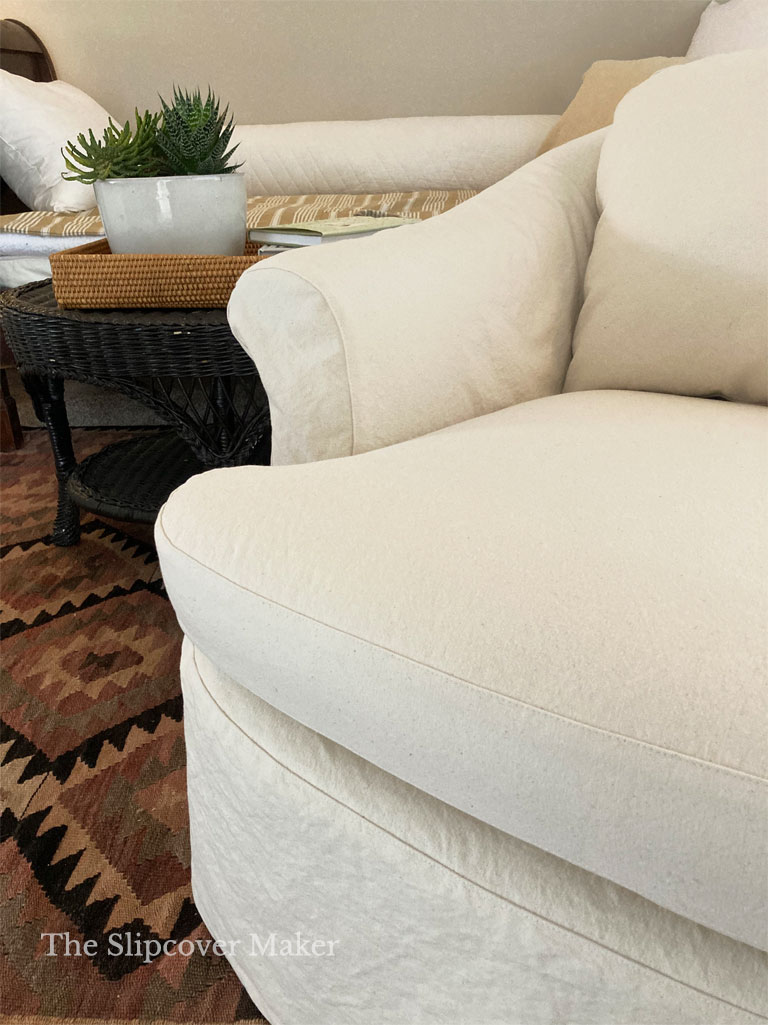
For my project, I omitted several of the original details: welt cord, the squatty tailored skirt, the puffy pleats on the back cushion and the complex front arm.
I wanted only two simple details on my new slipcover: an edgestitch seam finish and an invisible zipper opening.
2. Create a no fuss fit.
A no fuss fit is created with minimal seams that are strategically placed to give shape to the slipcover. I think of this type of fit as semi-relaxed; not too tight and not too loose.
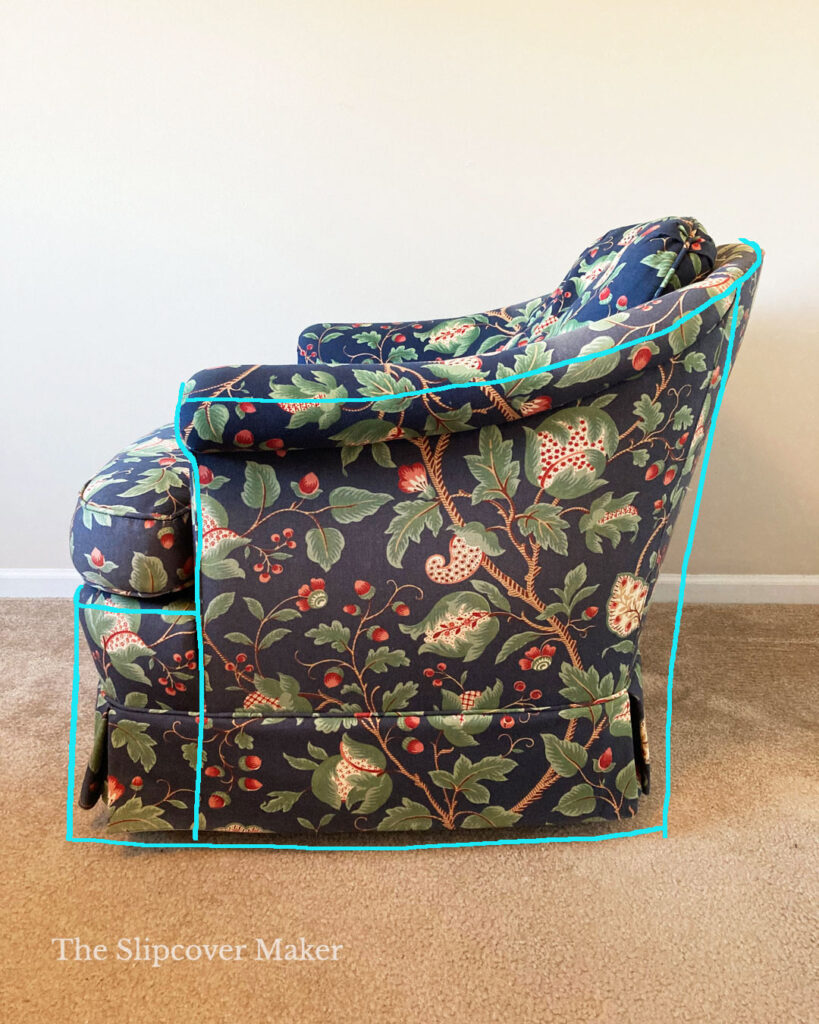
Notice the upholstered seam placements on your chair. Can you follow them as a guide to create a simple fitting slipcover? Or, will you need to modify the placement slightly for certain seams?
When I design a slipcover I work out the seam placements in my mind before I start pin fitting. Below I sketched my seams (aqua lines) on the chair photo so you can see the changes I made.
3. Choose a workable fabric.
Choose fabric weight, coverage and drape that works well with your slipcover design and fit. And, make sure it’s easy to pin-fit and sew.
For example, I designed my cover with a semi-relaxed fit and contemporary style. The slipcover body is shaped to stand away from the chair a little bit in certain areas. To achieve that, I needed a fabric that had enough weight and body to hold the shape.
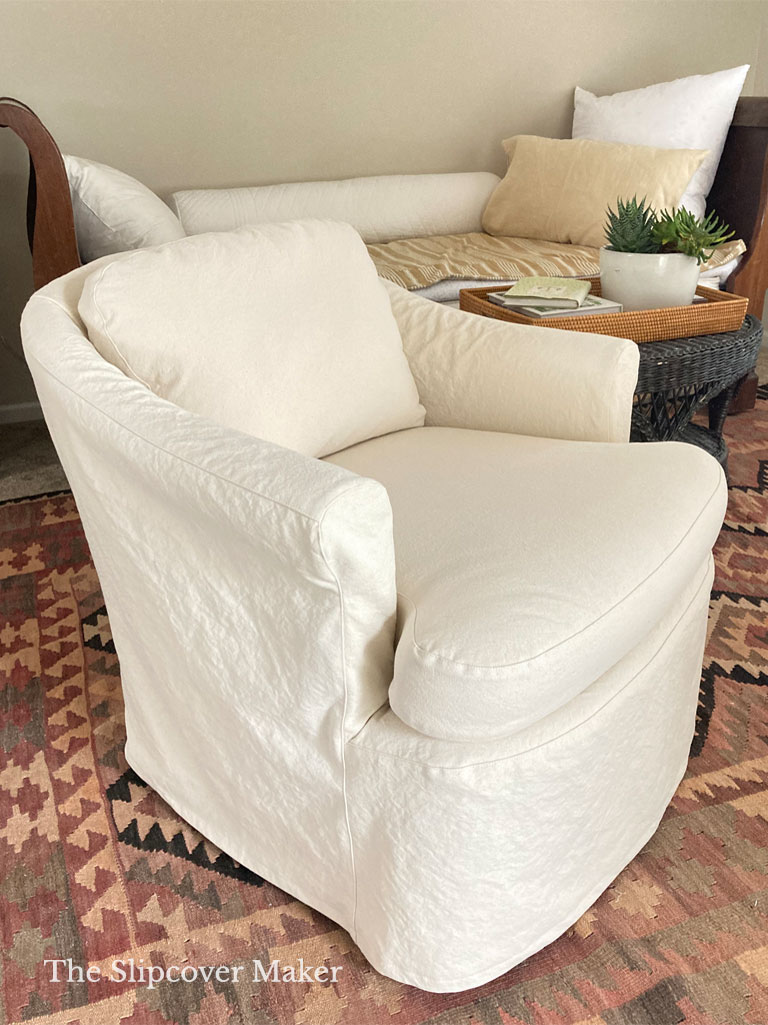
I used a #12 weight natural canvas. It’s a tightly woven heavyweight that softens up nicely in the preshrink without getting limp. A 12 ounce cotton denim would have worked just as well.
Thanks to the simple design (minimal seams with only two layers of fabric), I was able to sew my cover on my home sewing machine without any choking or needles breaking. Yay!
Designing a simple slipcover is a creative way to give fussy, complex furniture a big style boost. If you are new to slipcover making, give this design approach a try. It simplifies the pin fitting and sewing process and will save you time.
All for now. Thanks for following! — Karen
I always look forward to seeing your work. It has helped me tremendously (very amateur here, but learning!)
RO, I appreciate you following and so happy my work inspires you to keep learning!
Omg I just started pinning and planning yesterday, for a pair just like this one. I will follow your elegant choices precisely. Thank you so very much!!!!
Fantastic, Laura! Have fun with the design process. It’s very freeing!
You are a joy to follow. Your sewing and design is impeccable. Keep posting
Thank you very much, Kim!
Love your work! My question is how you do your top stitching. Also where do you get new cushions? My 4 little dogs sit on top of my couch and I’m forever fluffing and fixing the down. Any suggestions? Thank you.
Thanks Suzie! I will be posting topstitch how-to’s in the near future. For new cushion inserts, I would try Foam Order https://www.foamorder.com/ Lots of options. Or, work with your local upholsterer.
I agree with all above statements. Love all your work and learned so much. And articles on fabric has been a real blessing.
while Looking Thur your old projects trying to find one about changing my sofa from a throw pillow back type to making it a solid filled back I was not able to find a project to use as a guide. Do you have or can you point me in the right direction. To finding what I need. I did find one about removing an attached type pillow, but mine are separate fitting type.
Thanks
Hi Bev, Currently, I don’t have a tutorial for making back cushions from scratch. I would search YouTube. I found this video that might help get you started. https://www.youtube.com/watch?v=ZDEqTceAFnY&ab_channel=ucsolutions
The new look is wonderful!!
Thanks, Anita!
Fabric can make such a difference in furniture! Perfection once again Karen!
It sure does! Thanks, Cindy!