A Simple Slipcover Fix for a Complicated Wing Back Chair
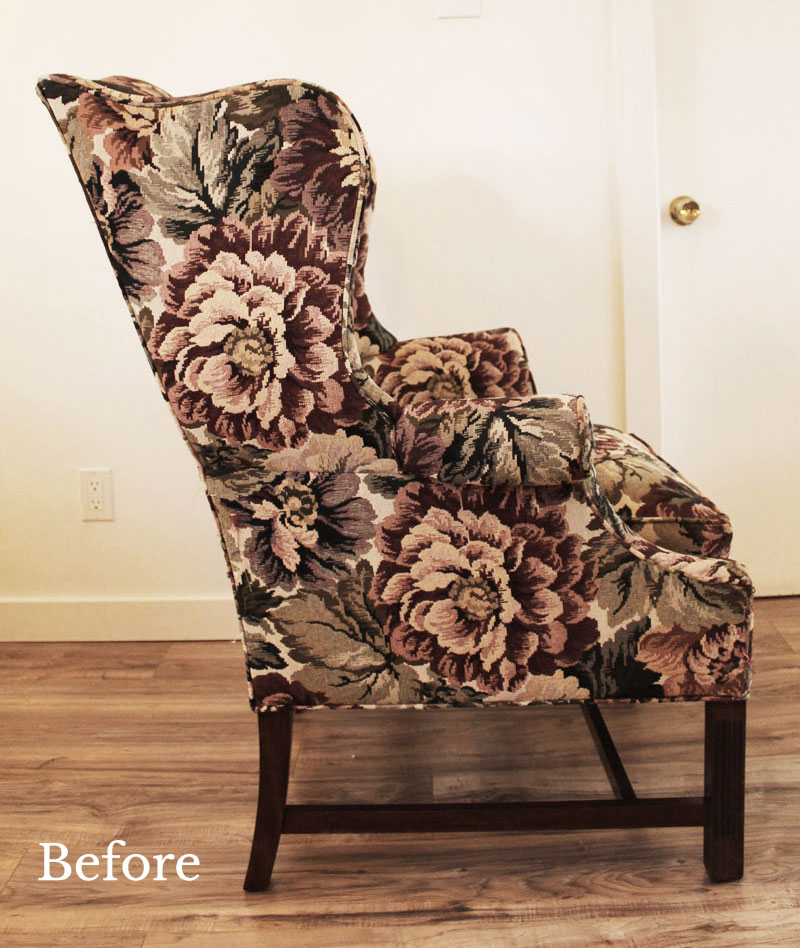
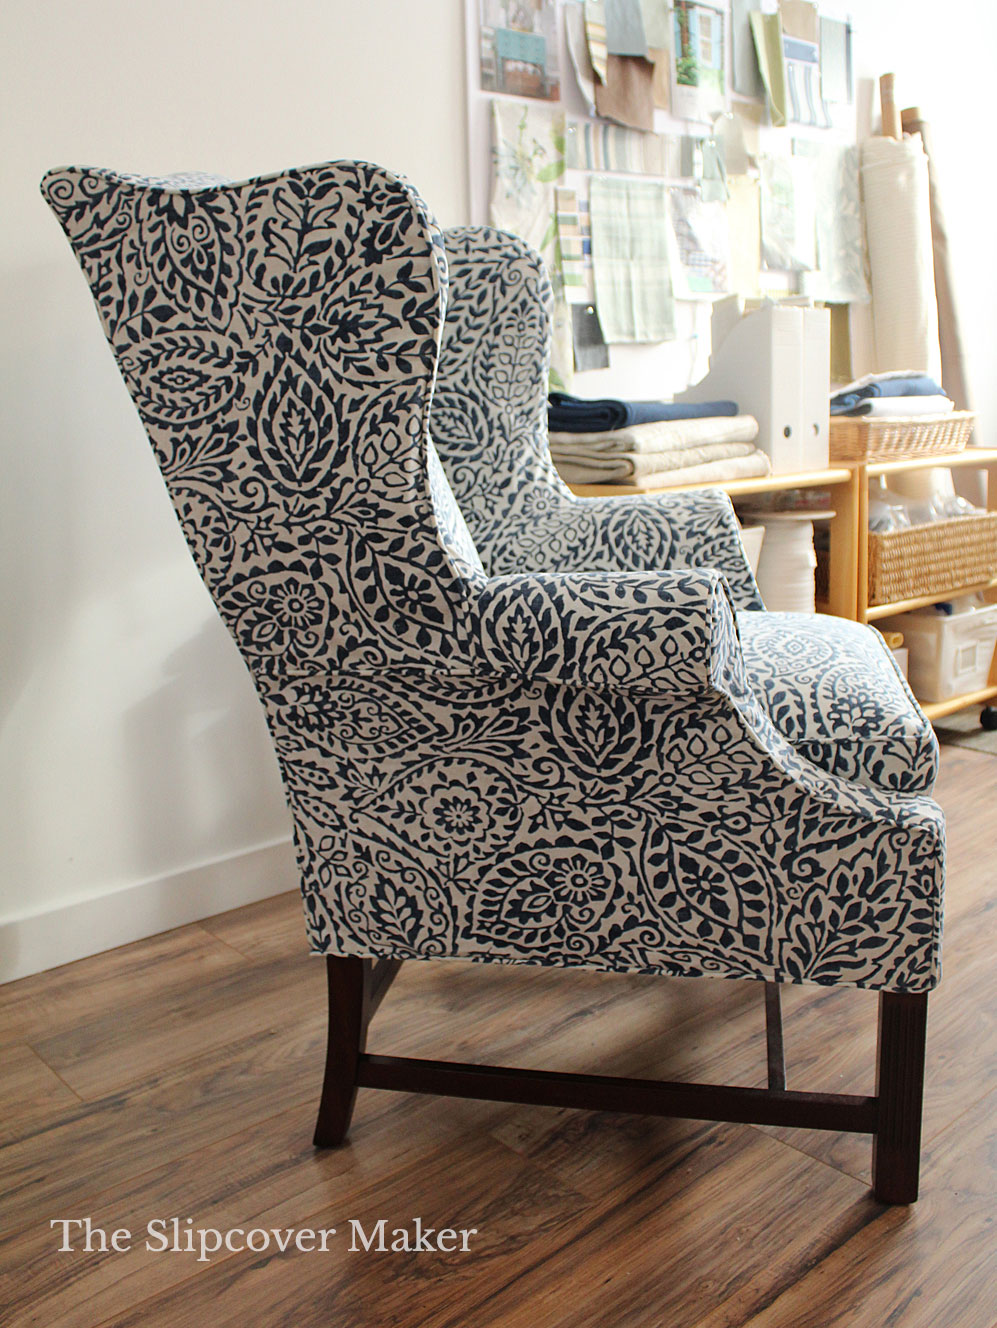
Just when I thought I knew everything there is to know about slipcovering a wing back, this Harden chair showed up to teach me a thing or two.
At first glance I thought this piece looked like any other classic wing back. I’ve slipcovered many similar designs so I was sure this project was going to be easy-peasy.
Turns out, pin fitting this chair, especially the wings, was anything but easy. Let me tell you, there was a lot of S & S (swearing and seam ripping) going on around here!
In today’s post, I share the fit problem I had with this project and how I fixed it with a surprisingly simple solution.
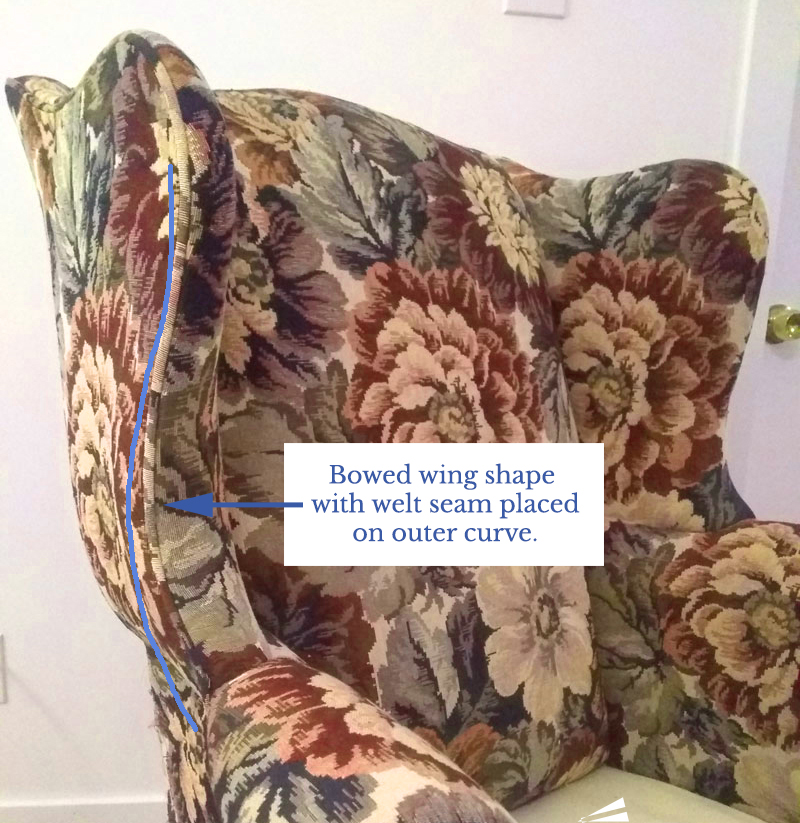
Take a close look at this wing design. The outer wing bows outward quite a bit at the mid-section instead of bending slightly inward.
Naturally, the welt cord seam, which connects the outer and inner wings, sits right on that bowed curve. Spoiler alert: this is exactly the area that threw me for a loop.
When I pin fit a wing back I like to follow the upholstery seams to ensure I capture the beautiful curved lines of the chair.
Wrapping the fabric smoothly across the inner wing to meet the outer wing usually isn’t difficult. I make several release cuts along the curved seam allowance as I pin. As a result, the fabric relaxes and lays flat.
But on this chair, no matter how many times I tried, I could not get the inner wing fabric to wrap smoothly. Each attempt I made to join that piece to the outer wing the fabric would ripple or buckle or crease. Believe me, it was not pretty.
Just as I managed to smooth the fabric in one area a new fit problem cropped up in another area. I realized following the upholstery seams wasn’t going to work.
No way was I going to use up more of my customer’s yardage for another round of problem solving. So, I did what I always do when I need to work through a challenging fit issue. I made a pattern.
Using solid fabric I had on hand in a similar weight to my customer’s fabric, I cut the pieces larger than needed and starting pinning the wing one more time. I felt free to experiment, mark on the pattern and make mistakes without worry.
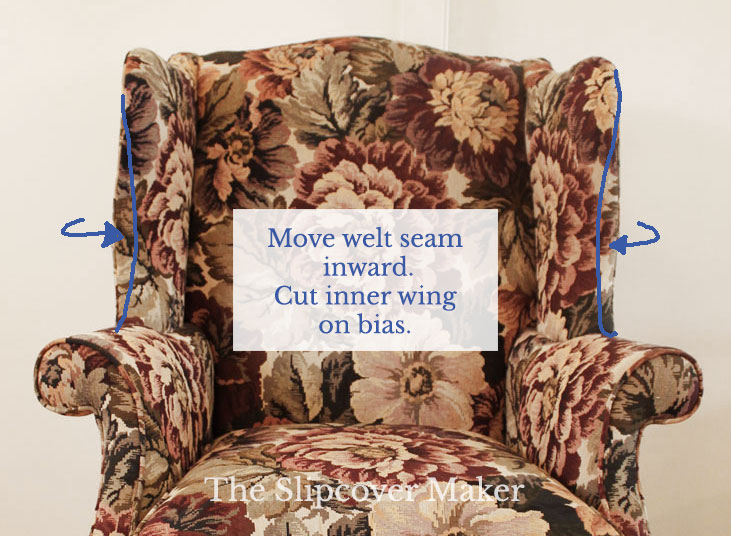
Once I stopped trying to force the inner wing fabric to go where it didn’t want to go, I discovered how to fix the problem pretty quickly: move the welt seam inwards and cut the inner wing on the bias.
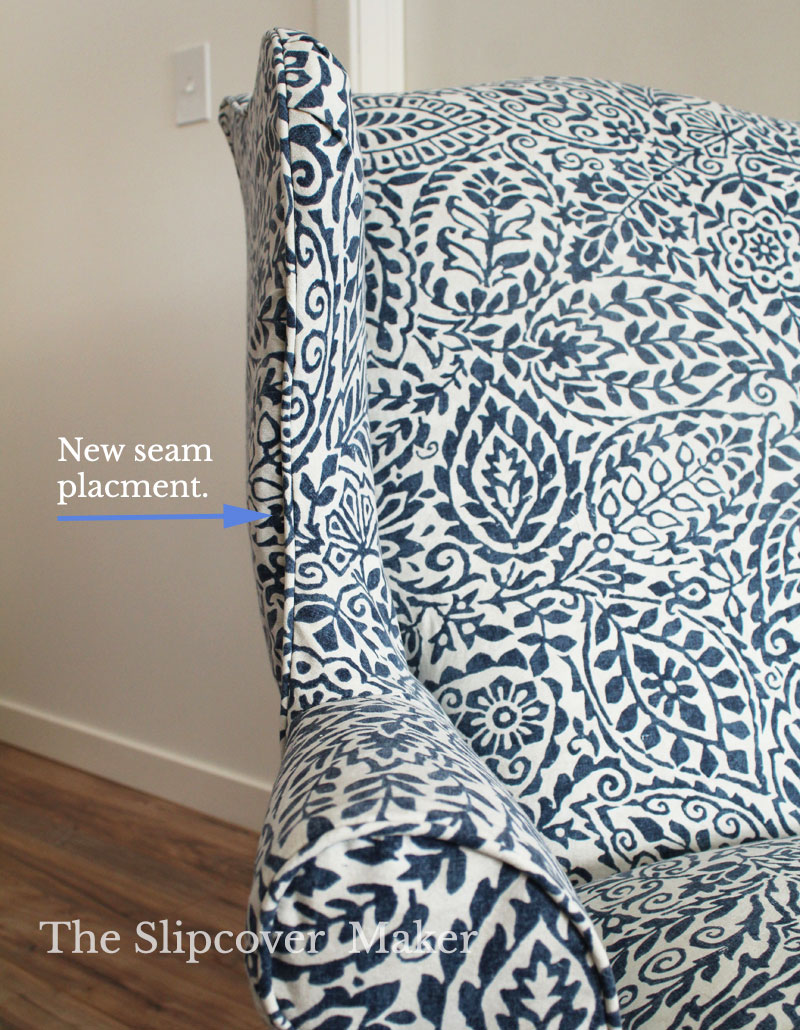
Here’s why this simple solution worked so well:
Placing the welt seam about 1 inch in from the upholstered seam straightened out the curve just enough to allow the inner wing fabric to fall into place easily.
Cutting the inner wing on the bias gave the fabric extra give, which also helped make the piece relax and lay flat over the curves.
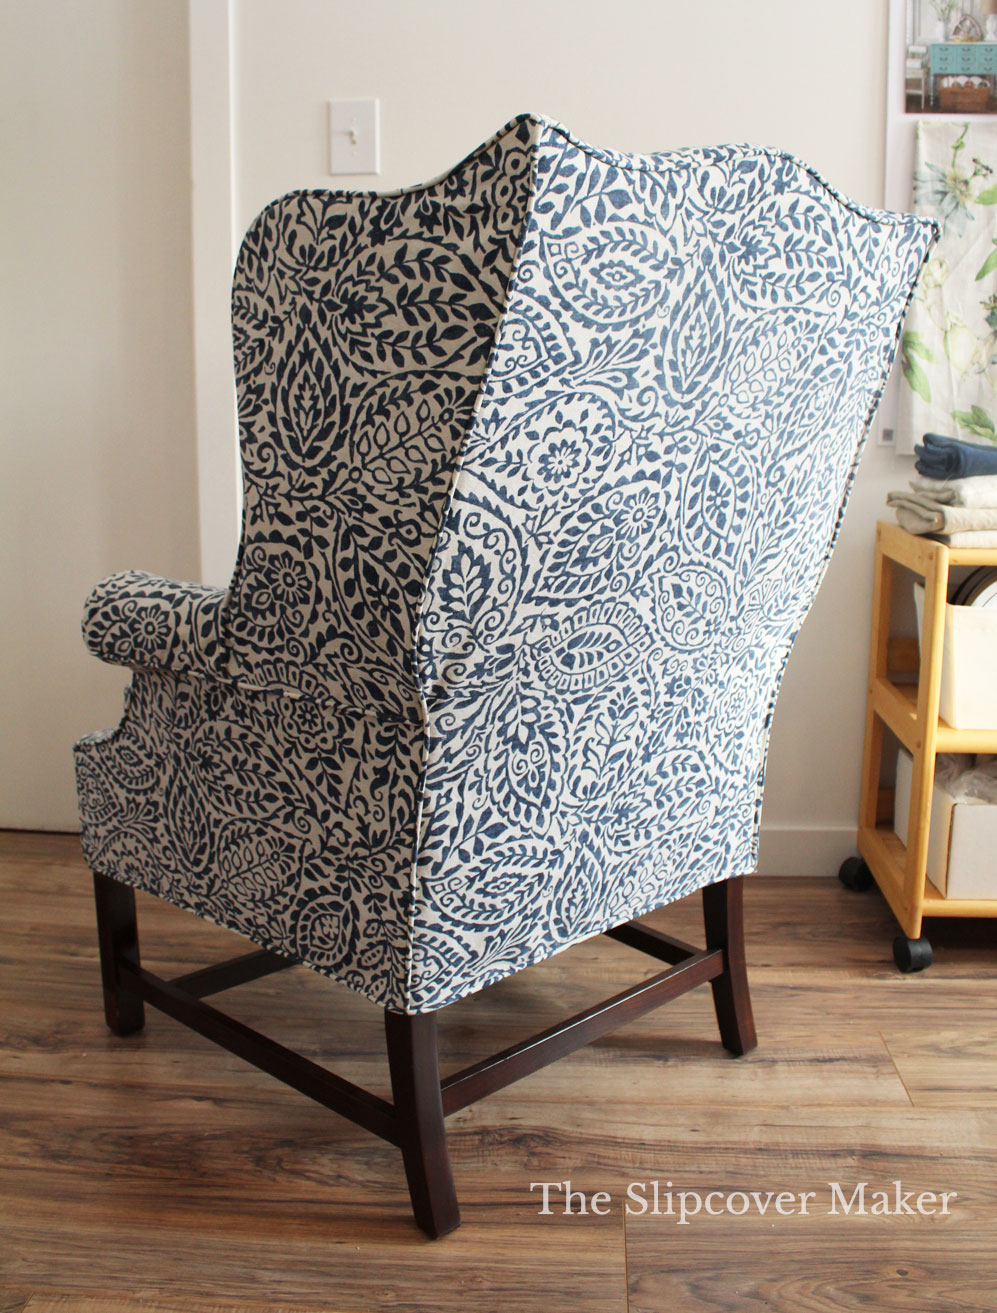
Taking the time to work through the fit issue paid off big time. My customer loves the finished piece. Yay!!
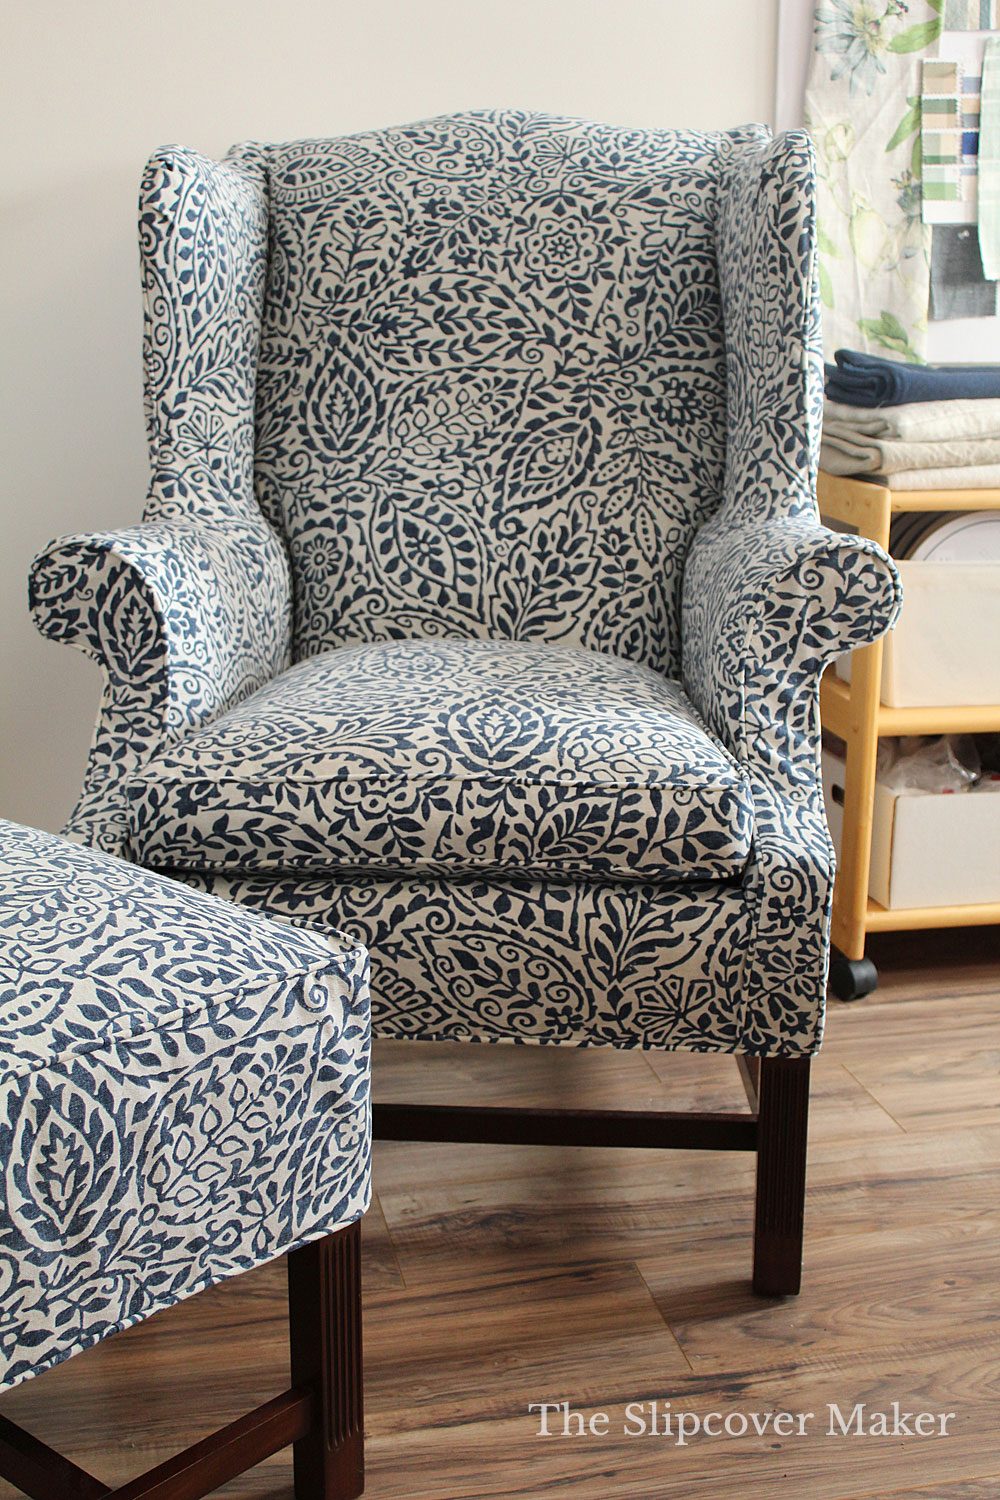
Thanks for following along, everyone! I hope this post inspires a slipcover project of your own. Dive in, experiment and have fun!

I love your work. It’s beautiful. Keep on posting
Thank you very much, Kimberlee! So glad you enjoy my posts.
Stunning work! Did you leave the original upholstery in place or remove it before putting on the new?
Thank you, Elizabeth! Yes, I left the original upholstery in place. I always do. I make the slipcover to fit over the upholstery.
I think I would have given up but not you!!! I love the lines with that beautiful fabric and a FAB job. I am almost ready for a new wingback chair slipcover myself!
Hello Paula!! I never give up 🙂 I love that fabric, too. It’s one of those prints you don’t have to match! It’s called Cast a Shadow Indigo by P/K Lifestyles https://www.sailrite.com/P-K-Lifestyles-Cast-A-Shadow-Indigo-54-Fabric I appreciate you popping in to comment!
I like the way your new wing seam lines up with the bottom sides of the chair. It gives a good straight edged, top to bottom view…it also appears you widened the front arm panel; this makes it look so soft. I must say, I’d have screaming trying to sew this.😁. It’s really lovely.❤️
Thanks, Ester! Yes, I added a tiny amount of ease around the bottom curve of the front arm. That prevents the
fabric from pulling in that area. I think that large print motif made the arm and the entire chair look wider, bigger.
Lovely! One of my favorite things about your work is how you re-proportion the looks of your pieces by re-shaping the cover to freshen it up the existing lines.I pay attention to this…alas I’m no master at slipcovers, sometimes it’s like shaping a human body..Thx for your reply, have a warm holiday season. ( No doubt you will as you have plenty of fabric!)
What a stunning finished product! Your fine skill on this piece gives the appearance of being reupholstered. Lovely work and lovely fabric.
Pamela, thank you!
OMG… this chair is beautiful.. and your work is stunning… wicked smart to cut that win on the bias… I don’ think it would have layed correctly any other way… well done!!!
It was definitely a EUREKA moment when I figured out bias was better. Thanks for your comment, Susan!
Great job! Truly a brain teaser, you win!!!
Thanks, Cj!