Best Slipcover Design for Pillow Top Ottomans
This simple slipcover design is the best for worn & loved pillow top ottomans. It cleverly hides the signs of wear and tear with a loosely tailored fit. Check out the design and take a peek inside to see how it’s sewn!
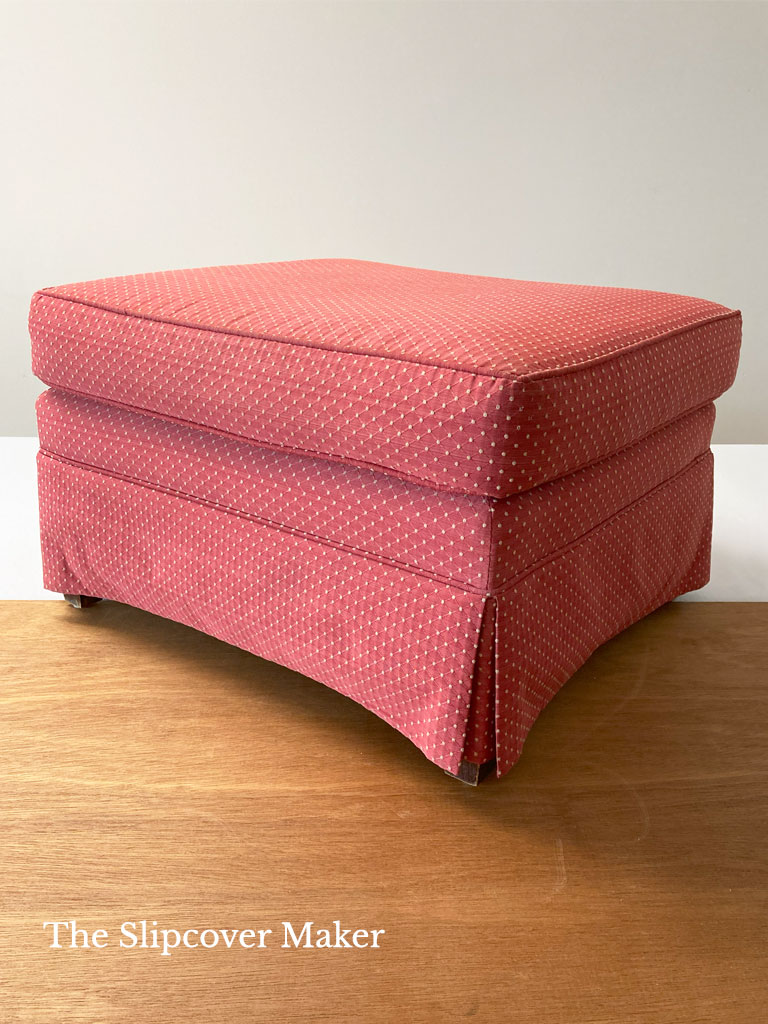
What is a Pillow Top Ottoman?
It’s essentially an ottoman with a pillow or cushion placed on the top.
Some are traditional in style with a boxed cushion like the red upholstered ottoman shown here. And others are much more contemporary with an overstuffed down-filled pillow.
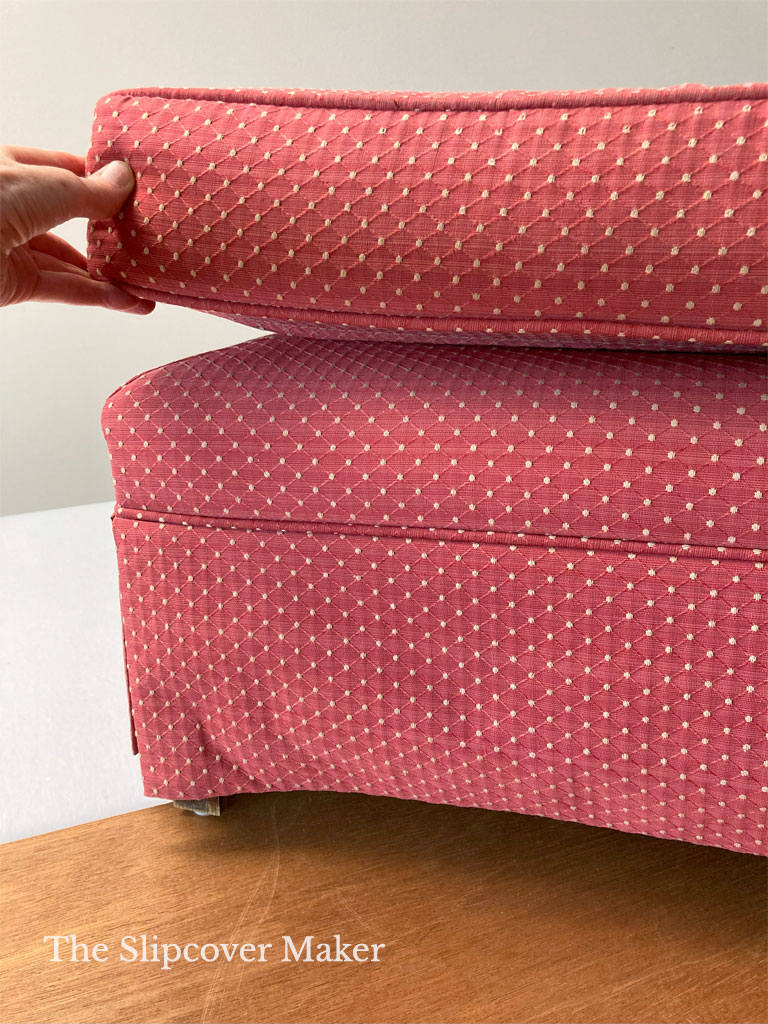
At first glance, you might think the pillow is just resting on the ottoman.
Look closer, you’ll see it’s sewn down. The join seam is positioned several inches in from the outer edges. That’s what creates the illusion of a loose pillow.
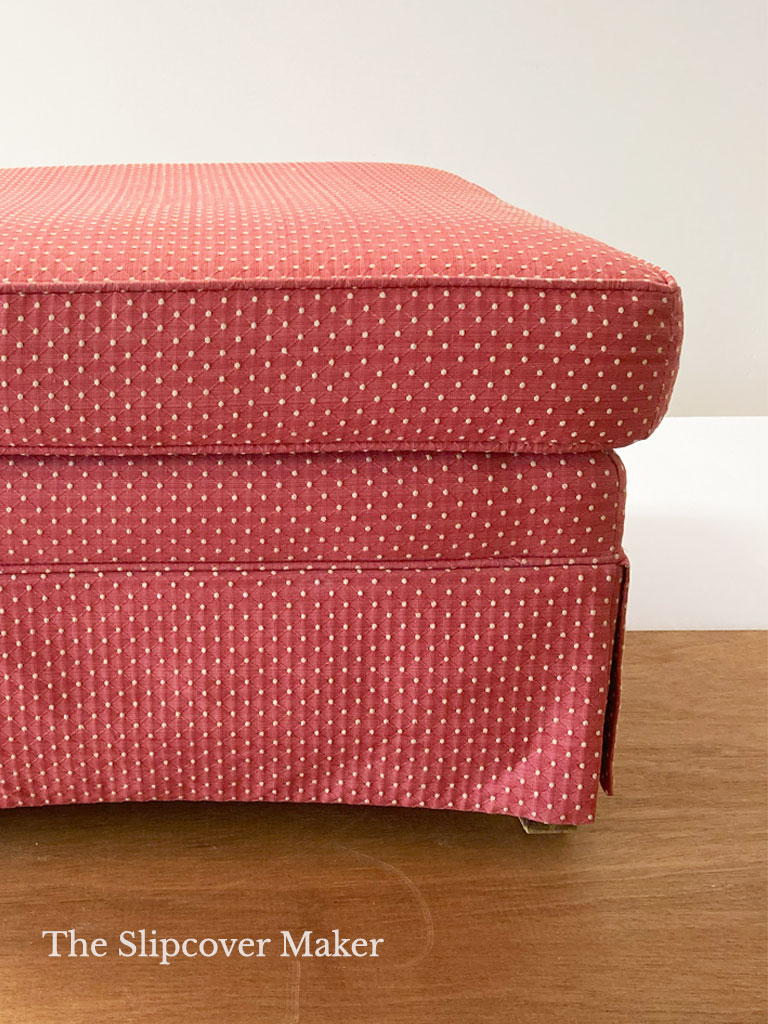
Pillow top ottomans look great when they are new. All four pillow corners are even and squared. They line up with the ottoman base corners.
However, as wear and tear takes it toll, the pillow top becomes compressed and lopsided. One or more corners don’t match up anymore. They either extend past or pull inwards away from the base. You can see what I mean in the photo above.
Simply put, the pillow corners go wonky, making the ottoman tricky to slipcover.
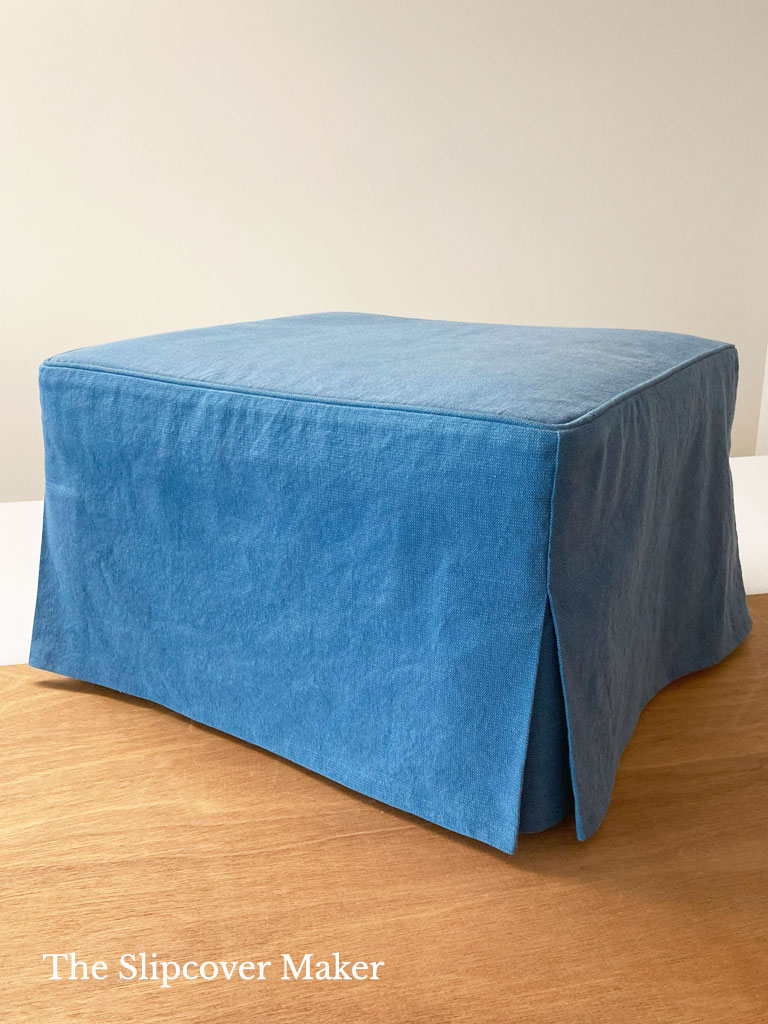
Why a Loosely Tailored Design?
Over the years, I’ve pin fit many pillow top ottomans and have tried out a variety of slipcover designs: tailored upholstery-like styles with boxing and welt cord, super simple boxy shapes void of detail, and even a two-piece cover with a zipper and Velcro.
But the design that I found works best for a pillow top ottoman is this loosely tailored slipcover. The relaxed fit and single corner pleats hide the uneven corners and lumpy areas beautifully.
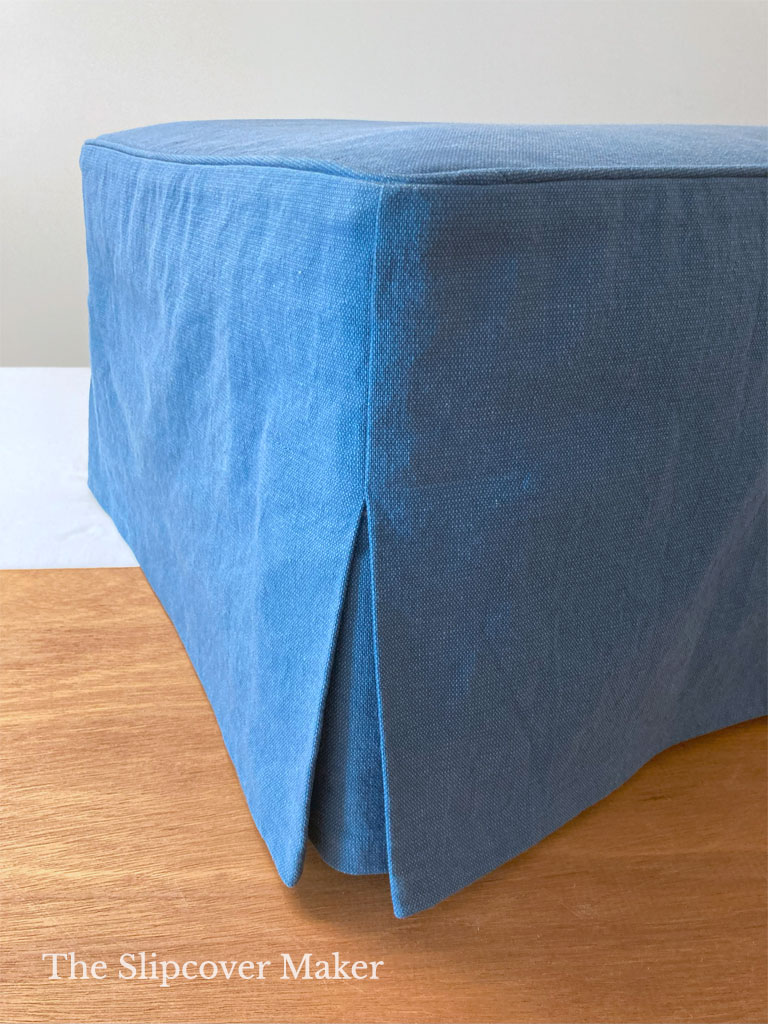
Think of this design as a simplified version of a classic tailored slipcover.
It’s made up of a top with welt cord and four side panels, each with a single pleat at the corner. No boxing panel or attached skirt!
I love the pleats. They are stitched down 6 inches from the top and then released, giving the slipcover a lovely, soft shape and forgiving coverage over the uneven spots.
Keep in mind, the length of the stitched pleats on your slipcover might be shorter or longer, depending on the height of your ottoman.
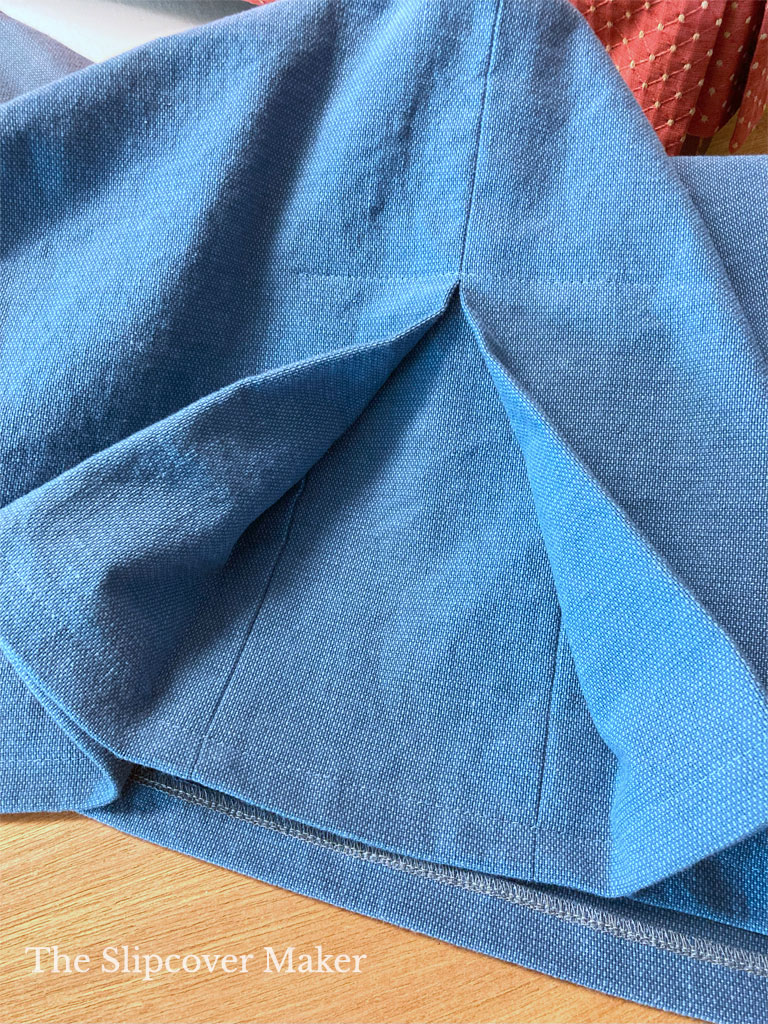
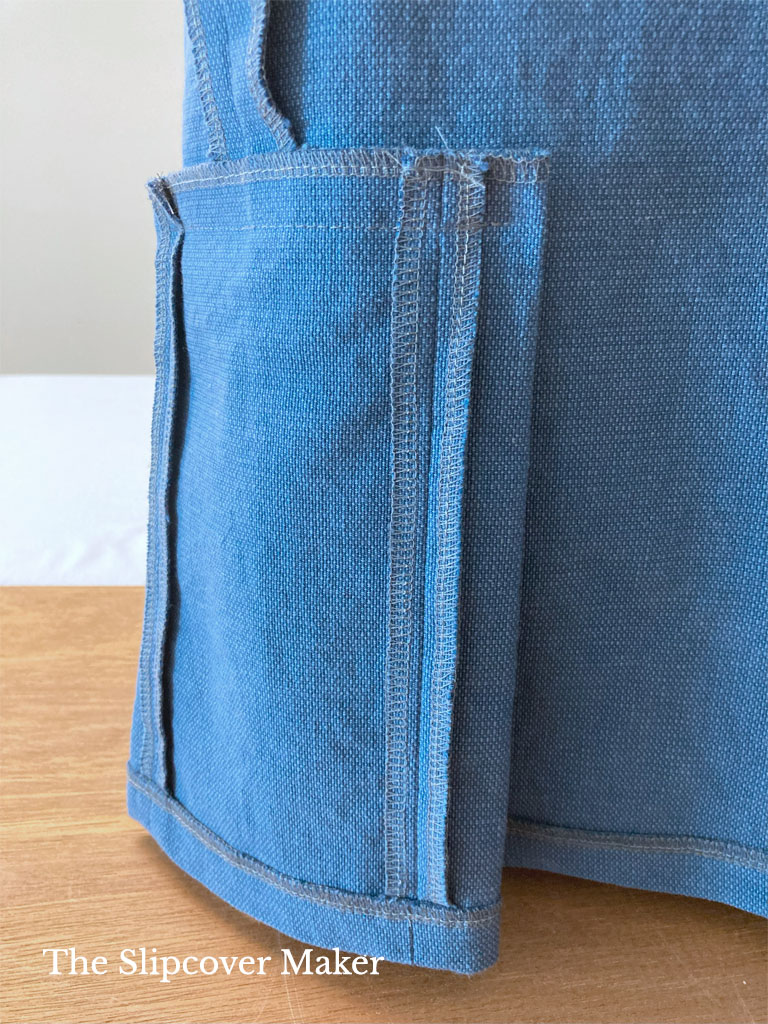
Here’s a closeup of a corner pleat. Both sides of the pleat measure 3.5 inches deep when closed. They are stitched to a flat panel on the inside, which becomes the back of the pleat and helps create depth.
See that single row of topstitch at the top of the pleat? That’s important to do after sewing the pleat. It keeps the pleat layers in place and hang straight. Use matching thread and you’ll barely see it!
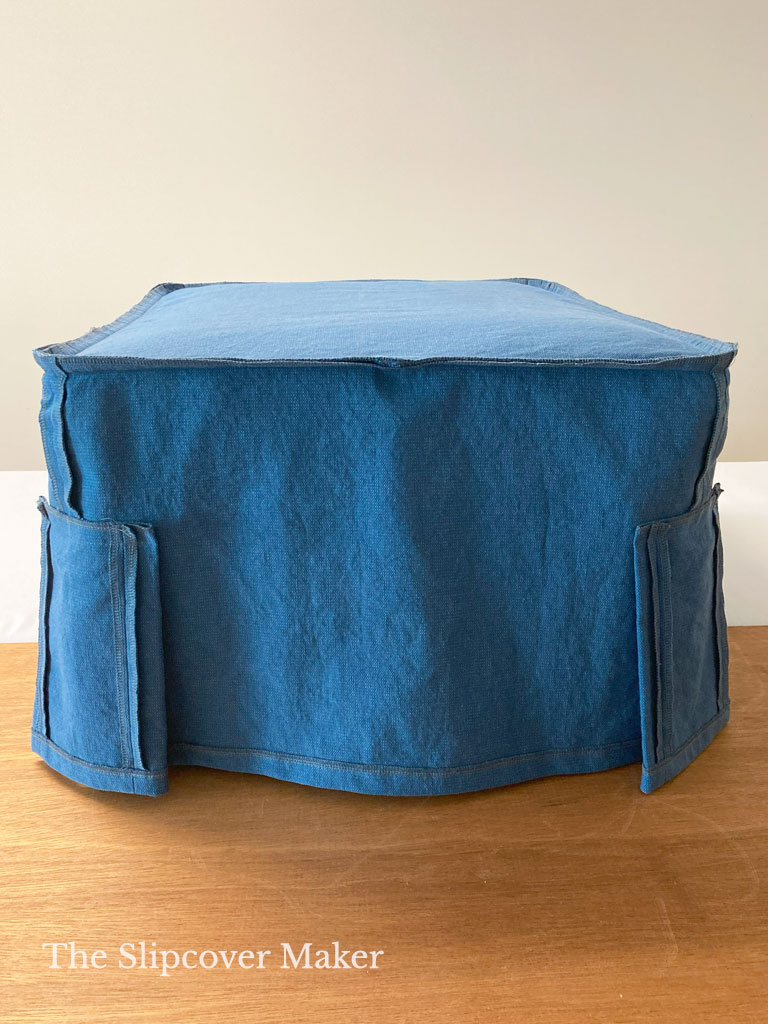
Construction Closeup
Now that you know what the design looks like, check out the inside of the slipcover!
Here it is, turned inside out and put back on the ottoman. Have a look at the next few photos to see how it’s constructed.
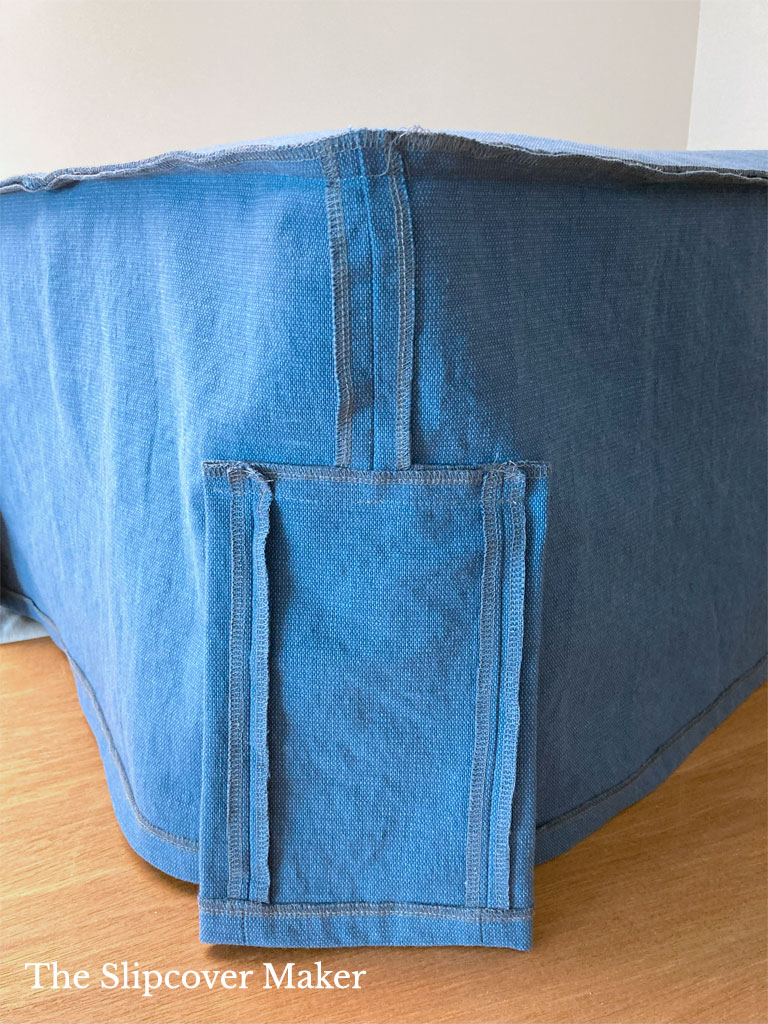
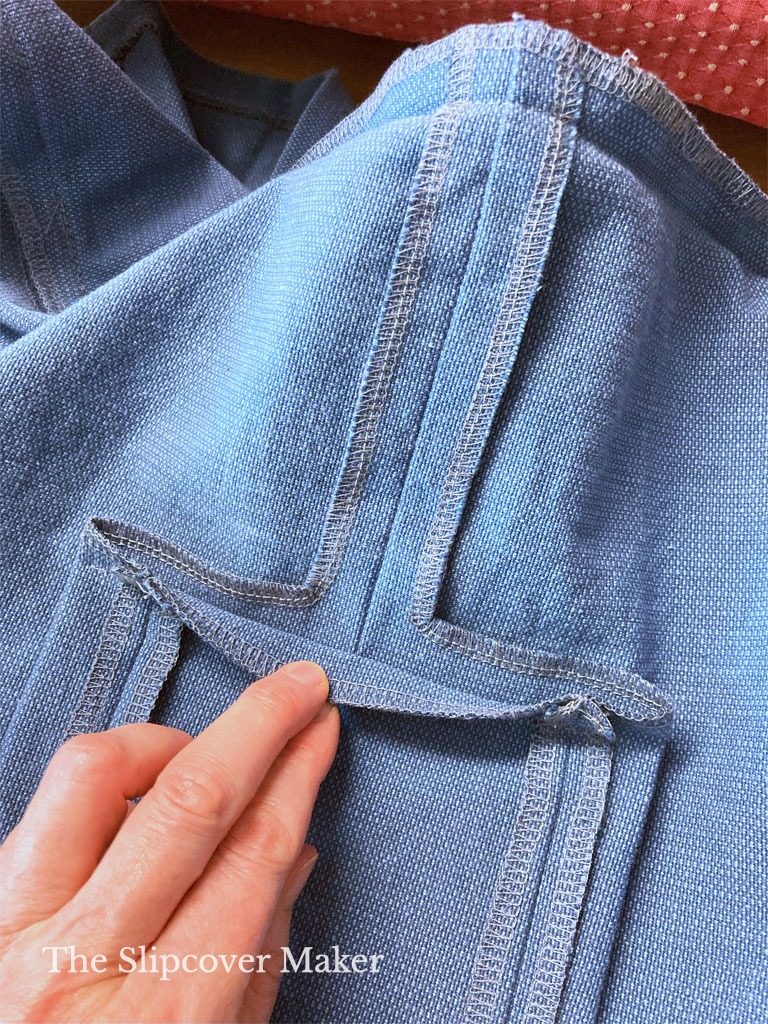
If you’re inspired by this simple design, try it out on your pillow top ottoman! It will also work just fine on other types of square and rectangle ottomans.

Thank you for this post. I have one of these coming up in the next couple weeks!
You’re welcome, Colleen. All the best with your ottoman project!
Your posts and pictures are so very helpful. I learn so much from you. I really appreciate the time you take to do these posts. Thank you!!
Fantastic, Jen! I’m happy to know my posts are useful to you.
That’s a great solution! The photo of it inside out is an awesome reinforcement of your steps! I always enjoy your posts and learn from each one! Thank you!
Natalie, thanks so much for your feedback. I’m thrilled you liked the inside out photos!
The ottoman looks new Karen! I want to go thrifting and find one to slipcover for our home now!
Cindy – I hope you find one in good shape and have fun slipcovering it!