Custom-Fit Slipcover for Bergere Chair
My French chair looks great with this white denim and hemp slipcover. The relaxed fit follows the curves with a minimal design. In this post, I share the step-by-step pin fit process.
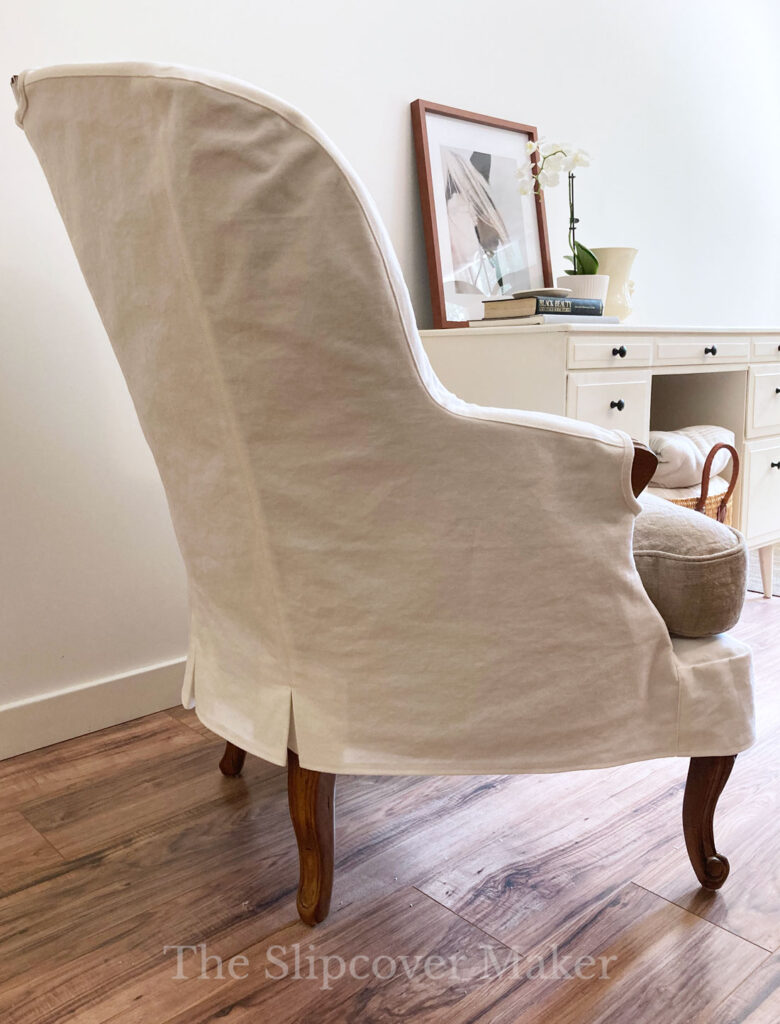
Voila! A custom-fit slipcover for my bargain Bergère style armchair.
A couple of weeks ago, I shared my slipcover design ideas for this French chair. In today’s post, I give you a look at which one I chose, and how I tackled the pin fitting. Enjoy!
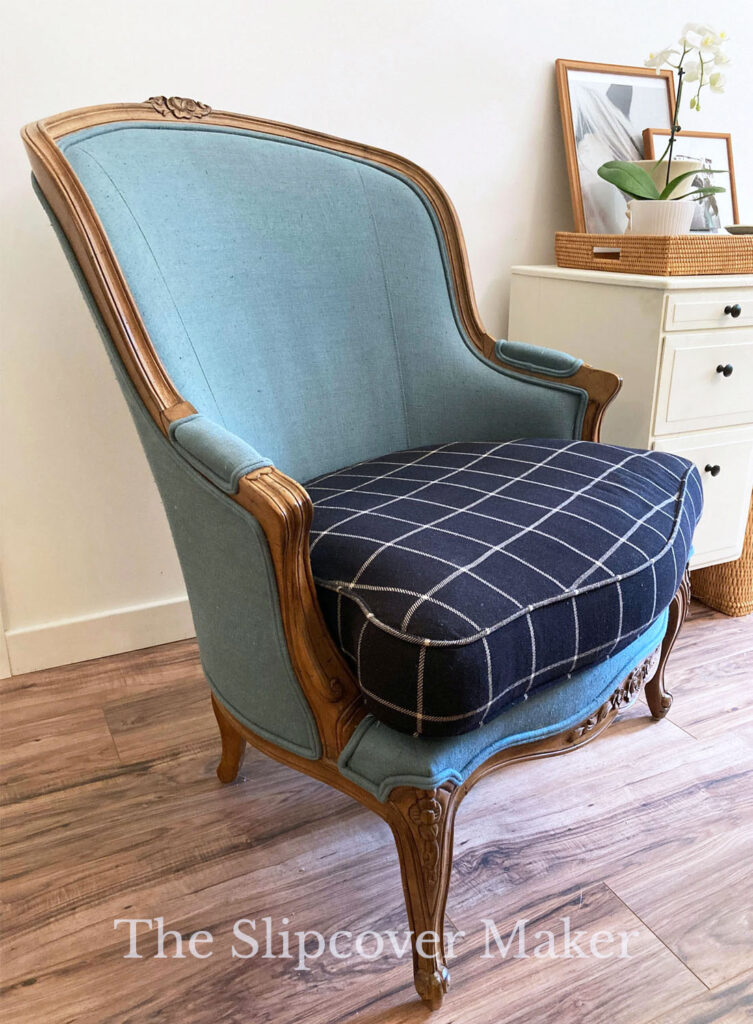
First, a look at the before. My secondhand chair is a 2010 reproduction of a Bergère design. The model is called Grande Duke and was produced by Century in North Carolina. I scooped it up from my local Habitat ReStore for only $50!
I love everything about it except for the teal and black upholstery colors. Slipcover to the rescue!
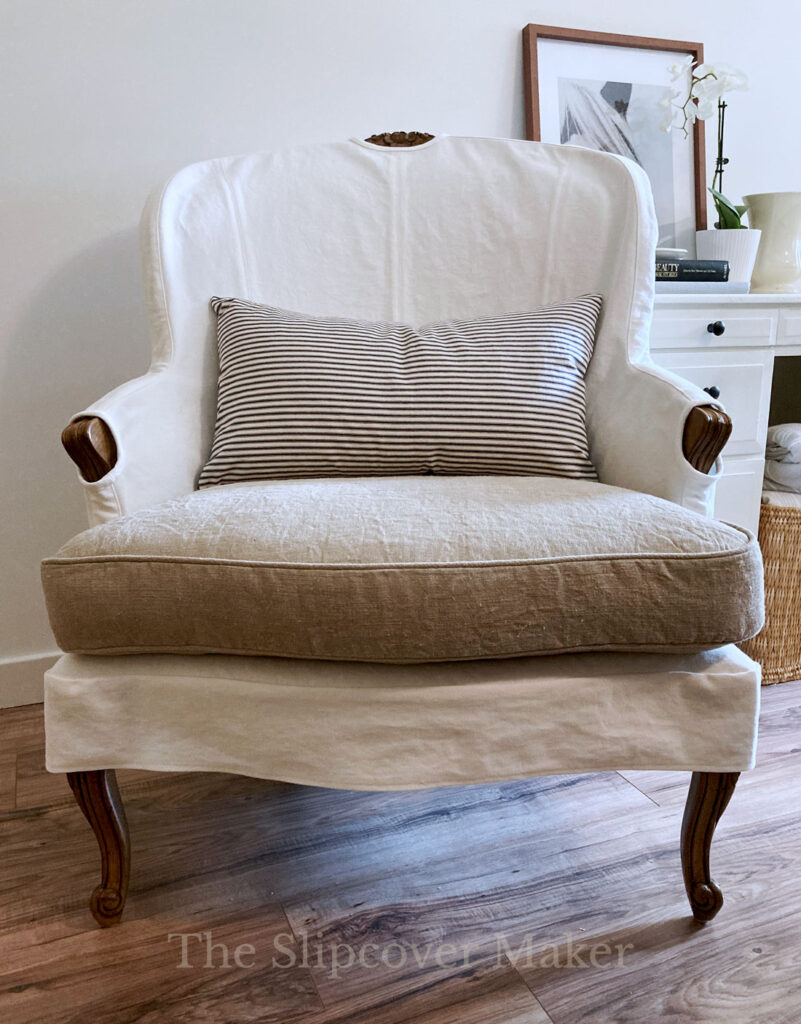
The slipcovers I make for myself are casual and neutral. It’s a look that is easy to live with and works well with my decor. So, I went with my original design idea: off-white denim for the body, undyed hemp for the seat cushion and navy ticking stripe for the pillow.
I already had these fabrics in my stash. Bonus!
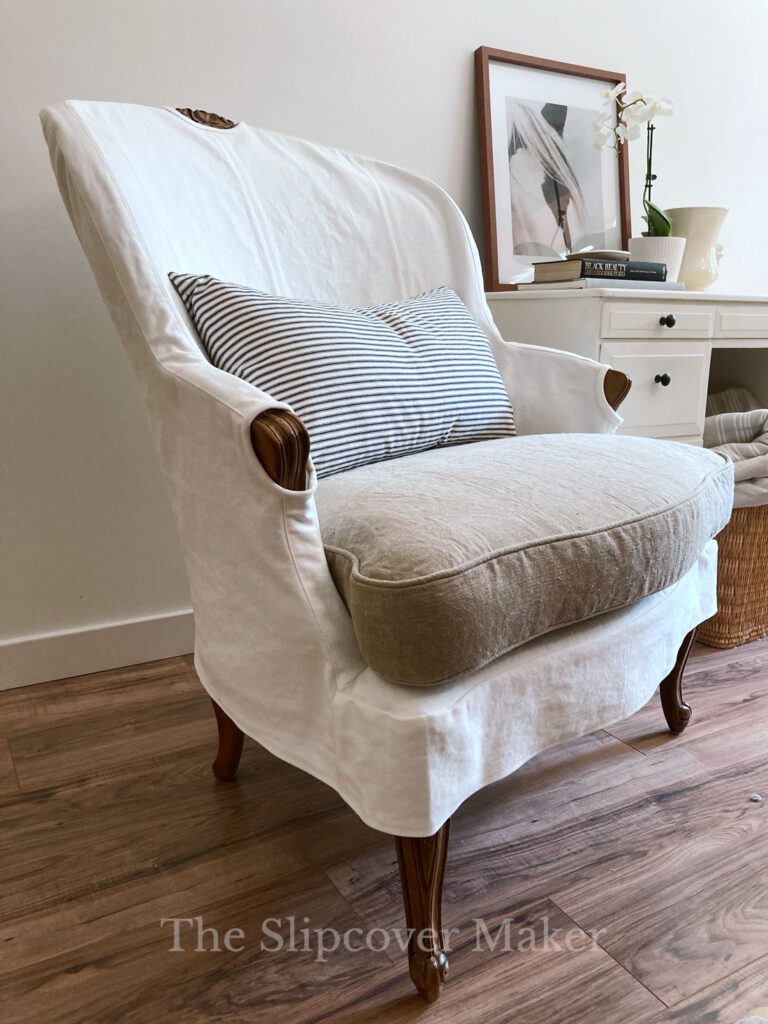
Once I got started on the project, I realized covering the exposed wood arms would be the easiest and quickest design to execute.
I’m sure I will make more than one slipcover for this chair, so I will plan on showing off more exposed wood with the help of ties or straps next time.
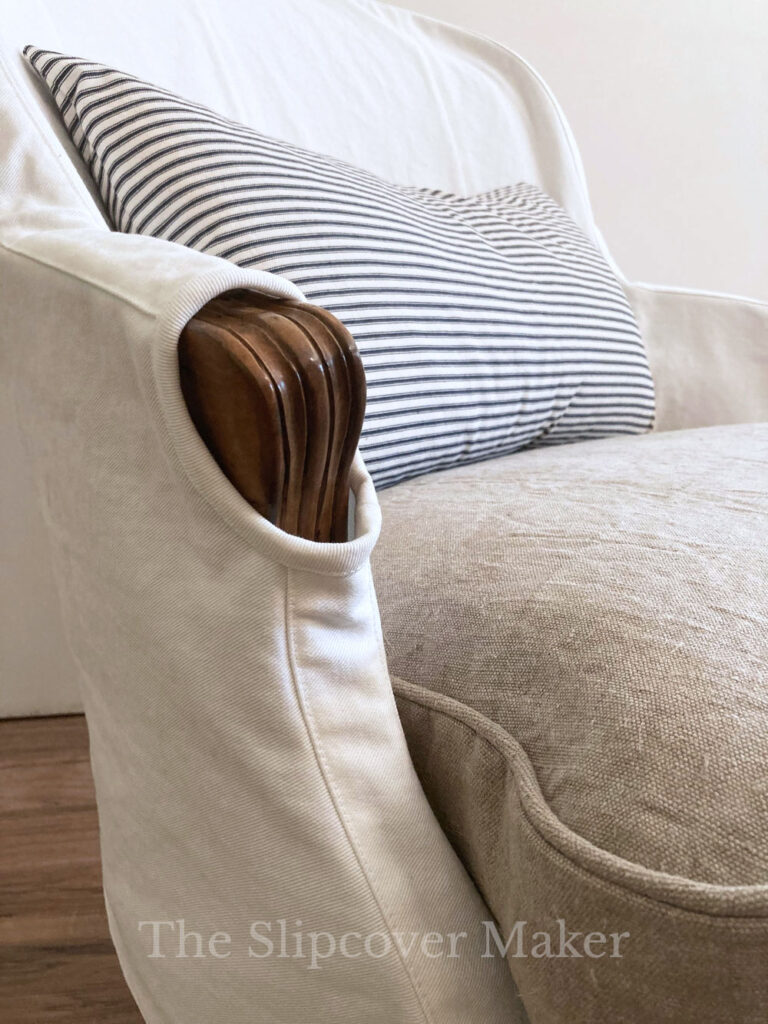
Instead of using welt cord on the slipcover body, I finished the seams with edge stitch and trimmed the “peep holes” with self bias binding. Clean and simple.
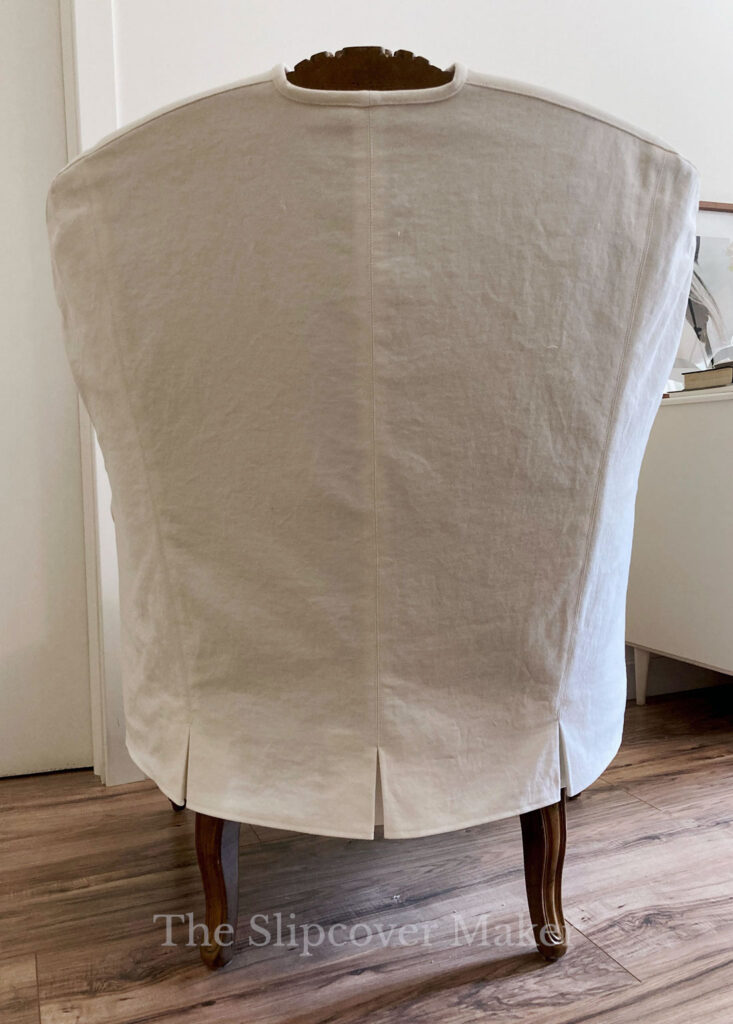
This slipcover design required a zipper opening to get the slipcover on and off because the top of the chair is much wider than the bottom. However, a zipper inserted in one of the flat shaping seams would be visible and look bulky.
The solution? I ditched the zipper and added three inverted box pleats at the lower back — one at the bottom of each shaping seam. They pop open, making the slipcover a bit roomier when pulling it over the top of the chair.
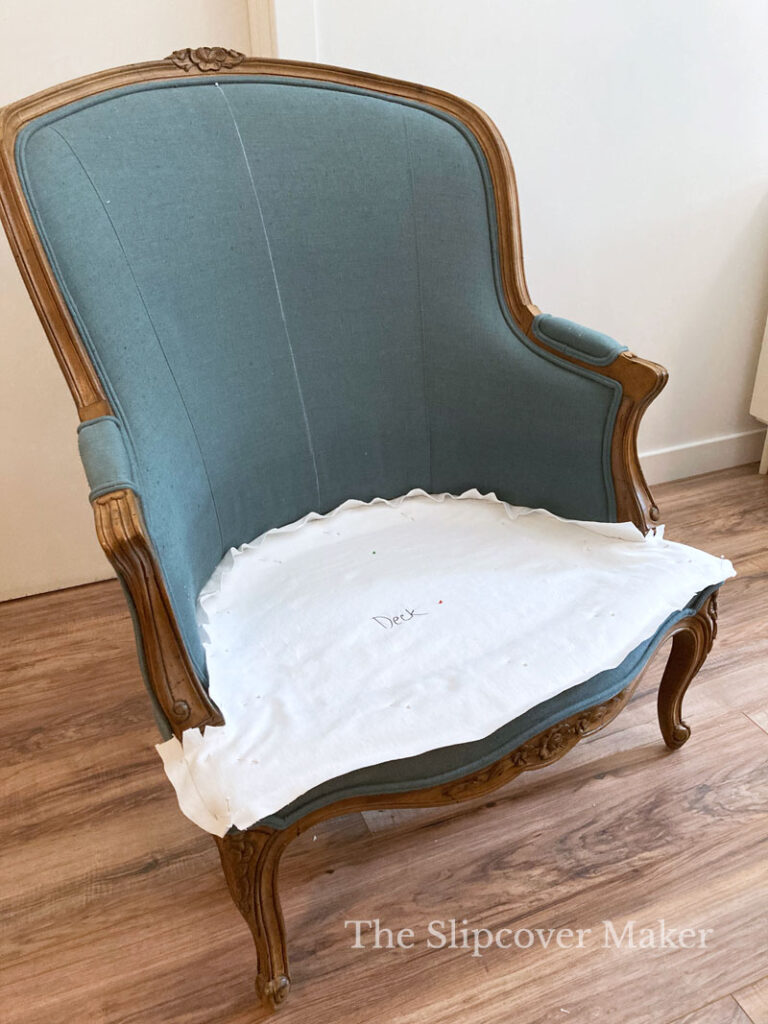
Now for the pin fitting. I created a 1/2 pattern using scrap fabric of similar weight to my slipcover fabric.
I opted to pin fit a pattern instead of pin fitting the entire chair with actual fabric because over time I will make more than one slipcover. I find it’s less work to pin fit a pattern once and use it over and over than to pin fit the chair from scratch every time I want to make another cover.
Below is an overview of my pin fit process for this project:
1. Pin Fit the Deck
I started by pin fitting the deck. This is the area that the seat cushion sits on.
2. Chalk a Center Seam Line
I marked a center line on the inner back with chalk. I used that mark as a guide for placing the center shaping seam.
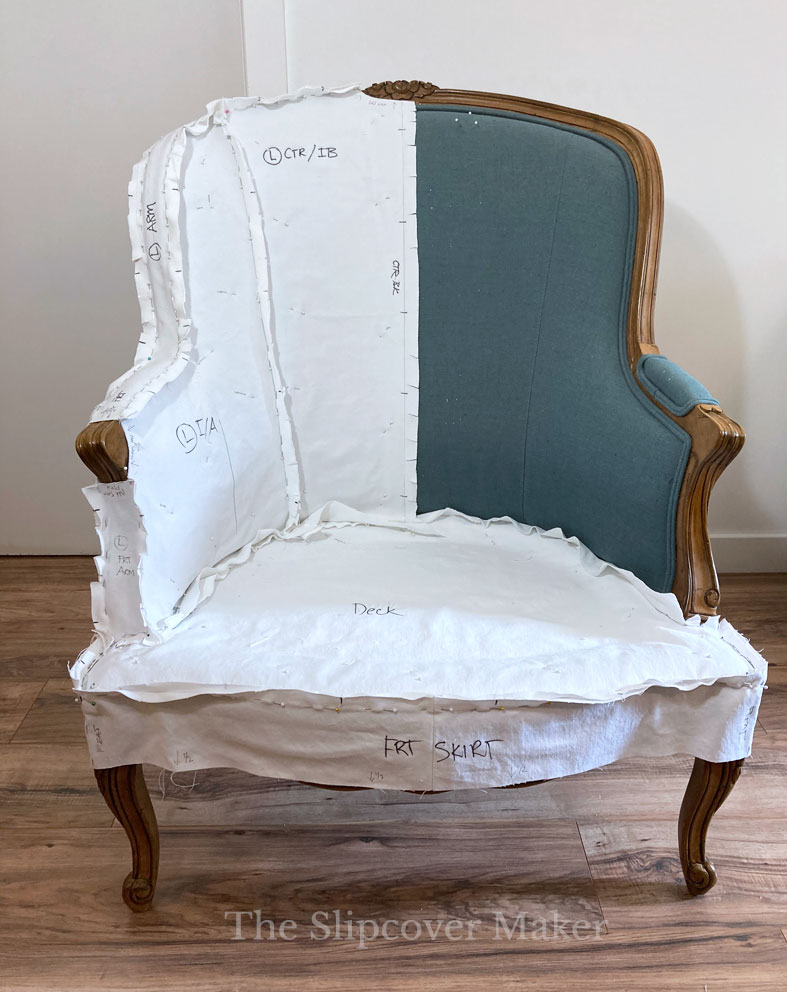
3. Pin the Inner Back & Inner Arms
There are two center inner back pieces and two inner arm pieces. But, since this is a 1/2 pattern, I only had to pin one of each.
4. Pin the Front Skirt
I created a panel skirt and pinned it to the deck, following the curvy edge.
5. Pin the Side & Back
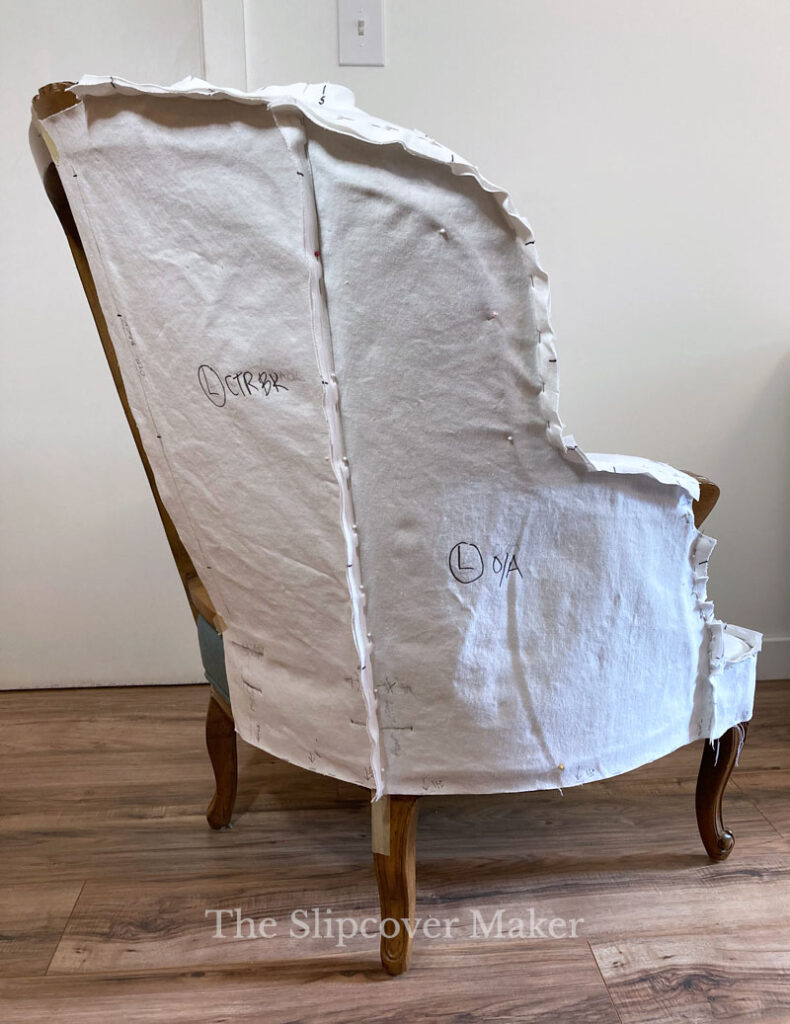
Before I could pin fit the arm panel, I had to pin the side and one-half of the back. This was a little tricky because I couldn’t pin the fabric to the top wood rail.
After a few slips and slides, I used masking tape to secure the fabric to the wood in a few places. From there, I pinned the pieces in place.
I also used masking tape to mark a straight center back line on the exposed wood frame. I followed that line as placement for my center back shaping seam.
6. Pin Arm Panel
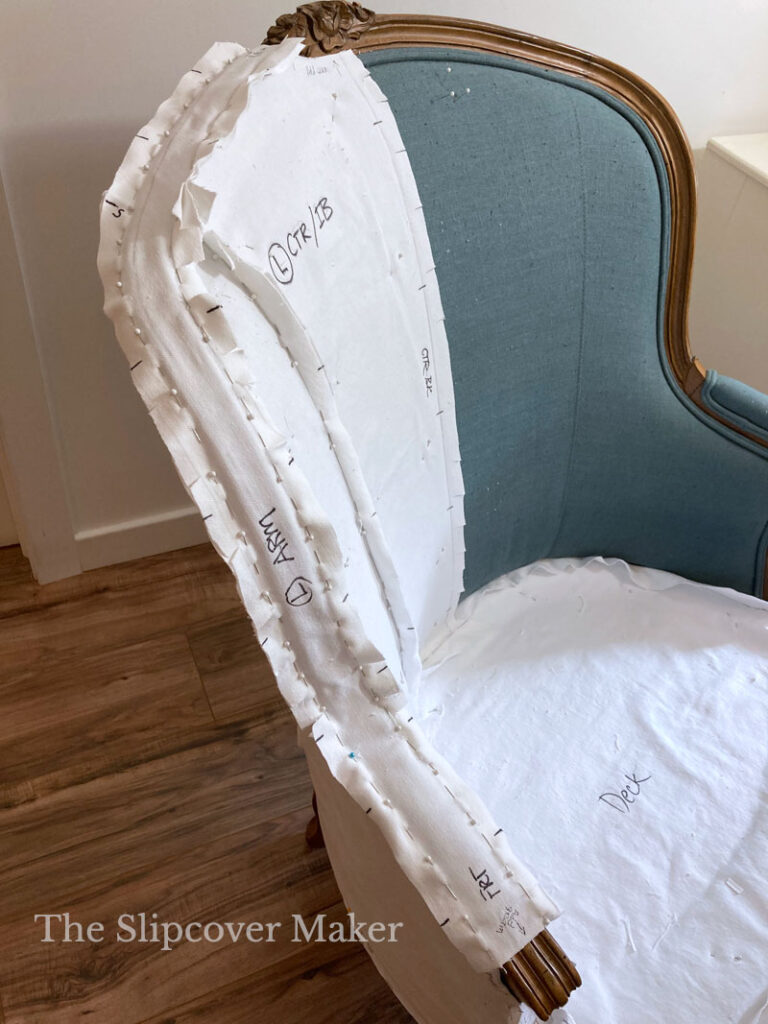
When I got the inner and outer pieces pinned, I connected them with the arm panel. I created a two-piece shaped arm,
7. Trim, Notch, Mark & Label
Before I removed my pattern, I trimmed all seams to 3/4″ (my preferred seam allowance) and notched them. I labeled each piece and marked the grain lines. Last, I marked the hem line. FYI – I added the hem allowance when I cut out the pattern.
I hope this project inspires you to create a slipcover for your own beloved Bergère.
If you are new to making a French chair slipcover, start by making a pattern to work out all the fit details before you cut into your actual slipcover fabric. You will learn a ton!
Thanks for following! — Karen

You outdid yourself…that straight back seam…those pleats..how do you do it?😍
Beautiful! But I being a novice need Clarification…when you say you cut a 1/2 pattern, I am guessing that you are creating the pattern for half the chair but cutting two of each piece (with the exception of the decking and skirt) to duplicate both sides hence the need for not having to create the other side since it is a mirror image. Did you follow that?!😀
Yes! You got it.
Amazing!! Love it!
Merci beaucoup, Karine!
I love it I’m just not a seamstress I’d need it made for me
Really nice job, I LOVE the small pleats along the bottom back. Thanks for the detailed pictures & description.
Thanks Kathy!
Stunning! You make it look so easy.
Kathy W — Thanks!
I have learned so much from your posts and blogs. This chair was a huge score and perfect for you to feature this style slipcover, it had great bones to start with. With your inspiration I started to tackle a Harden easy chair and ottoman slip cover last year. On your advice I separated the attached back t-cushion, replaced quite a bit of the filing in the chair and then tried to adjust the now detached back t-cushion with a slightly higher back. The chair is my sewing room chair, and there it sits. Covid hit and I’ve been making masks for family and friends like crazy. I was able to cover the ottoman successfully using a washed painters drop cloth, cheap and good for the first attempt. I was also able to successfully cover the t-seat cushion with a zipper, again following your instructions. You are my hero for slip cover instructions, material weight and durability, and design! Be safe and God bless.
Clintonmom — I love that you gleaned enough inspiration and tips from my website to make your own slipcovers. Hurray!
Omgoodness Karen!!! This slipcover is perfection!! I love that you used a different neutral for the cushion. I have two chairs that are in the same style that I might try this on! The tutorial is so good! Your explanations are so helpful! Thanks for sharing this with all of us out in the slipcover ad upholstery world 🙂
You’re welcome, Cindy!