DIY Modular Slipcover Worktable for Small Spaces
Learn how to create a modular slipcover worktable to fit your small space. A simple, inexpensive table with multipurpose use that can be set up, taken down, and stored easily.
Does the lack of space keep you from making a slipcover because you don’t have room for a big worktable?
I get it!
When I first started making slipcovers as a hobby, I didn’t have a worktable. I measured and cut all of my fabric pieces on the floor or bent over a small dining table.
Crawling around on the floor and hanging over a low table is not fun!
As I made slipcovers more frequently and then, as a business, I knew I needed a proper work surface. An 8 ft heavy-duty, professional workroom table on castors and built-in shelves was my dream.
But I’ve never had the room for such a large, permanent table.
What I discovered works best in my small space is a modular table that is lightweight yet sturdy and can be set up, reconfigured, taken down, and stored with little effort.
I use my table daily for a variety of tasks:
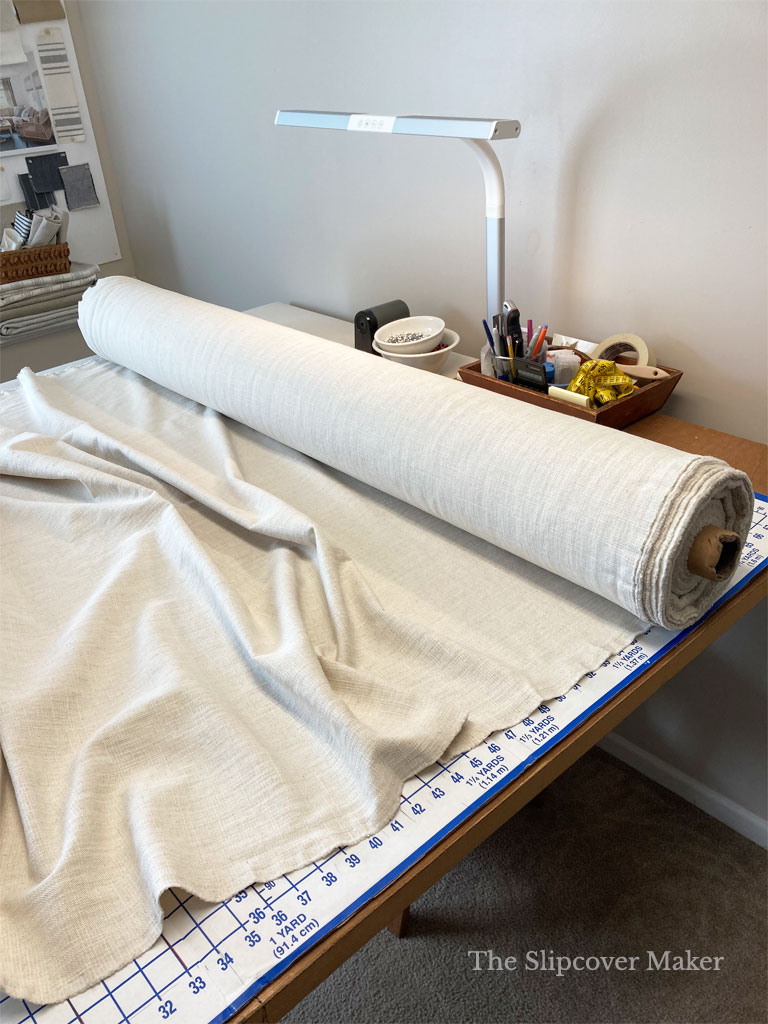
- Roll out yardage to inspect it and cut 5 yards pieces for preshrink
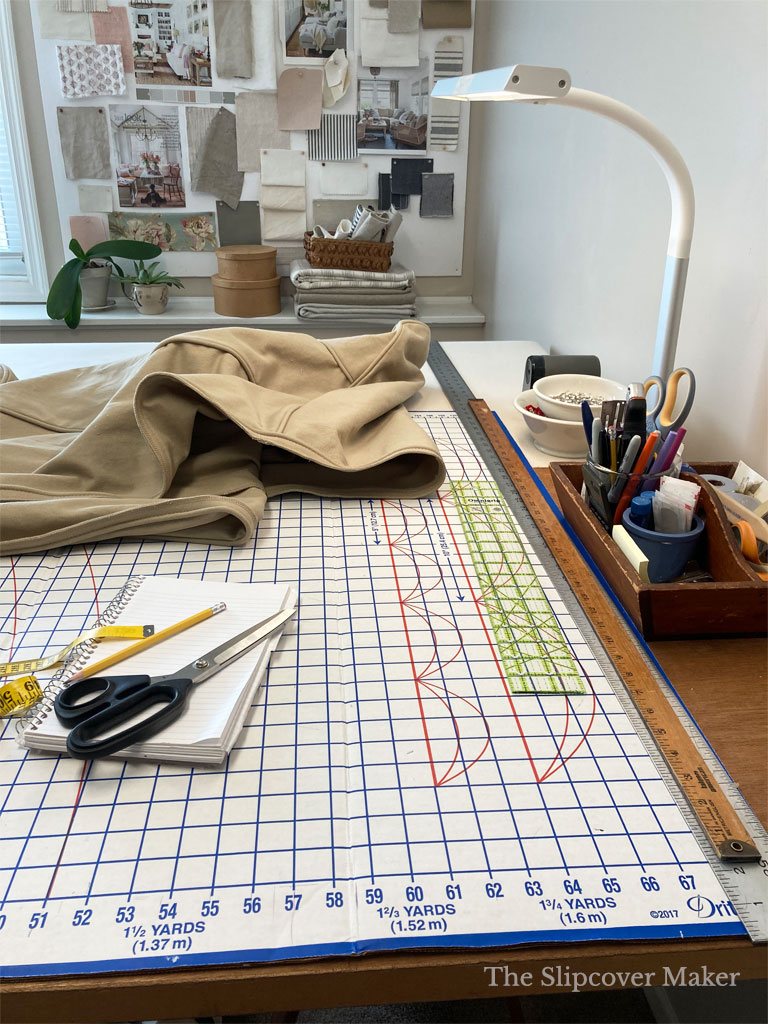
- Measure and cut fabric blocks for my pin fitting
- Measure and cut welt bias strips, skirt panels, zipper plackets and boxing
- Deconstruct old slipcovers to copy
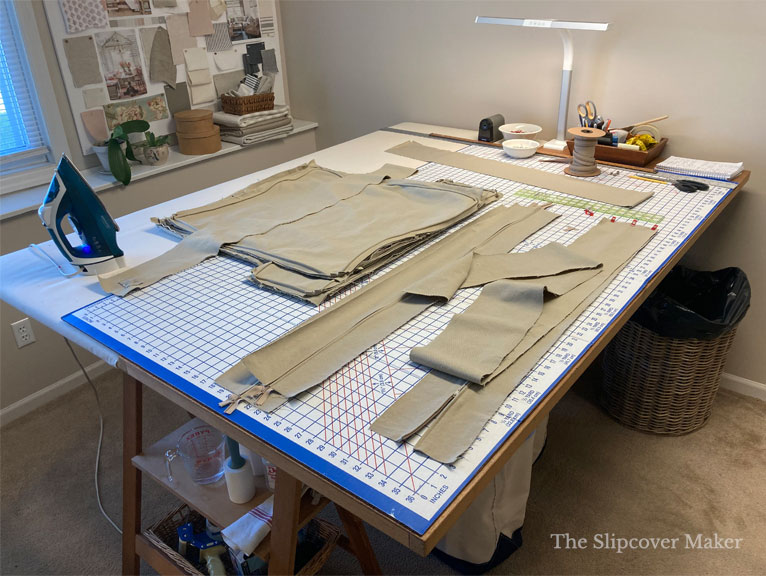
- Press slipcover sections as I assemble
- Fold/package finished slipcovers for delivery or shipping
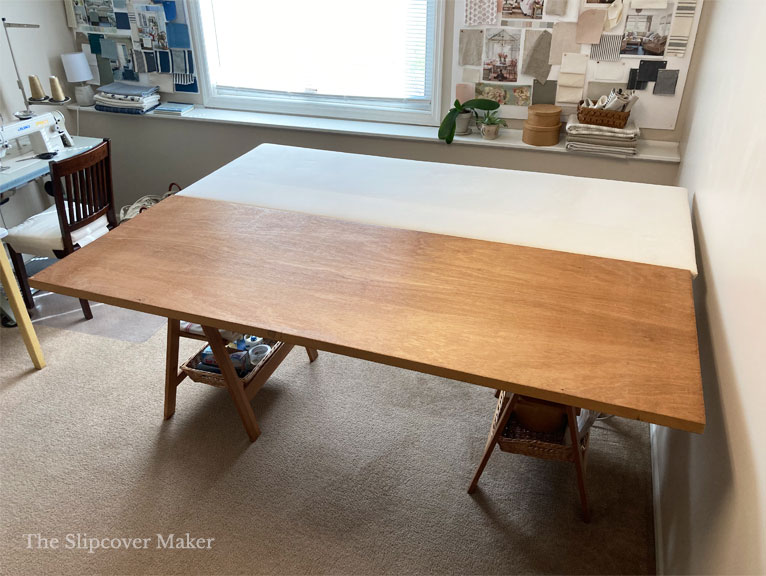
Worktable Dimensions
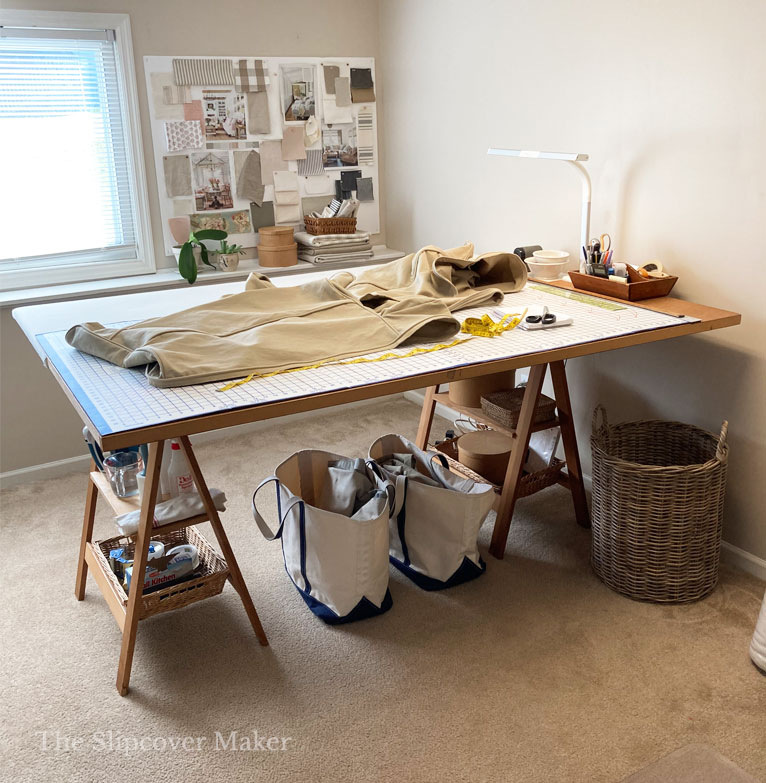
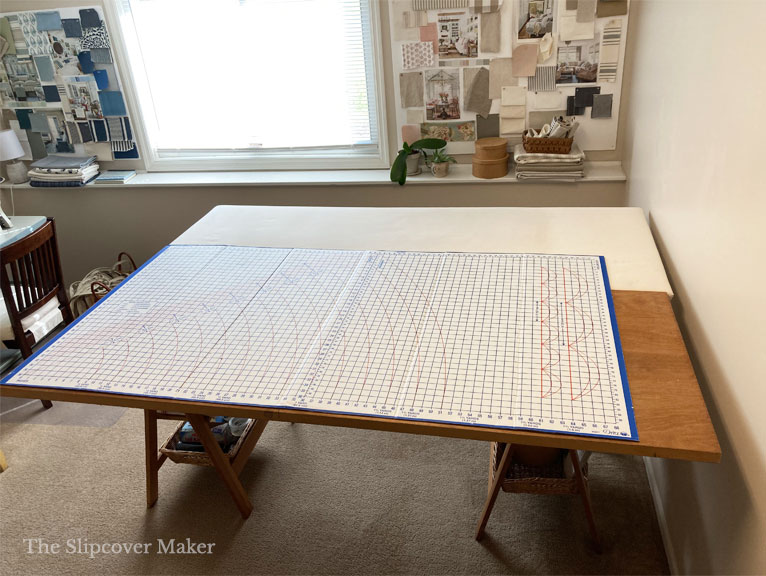
My table’s work surface measures 60″ wide x 80″ long and doubles as a cutting and pressing table. It stands 37 inch tall and fits comfortably in my 12 ft x 12 ft space along with 2 sewing machine tables.
I like the 60″ width because it accommodates most slipcover fabrics, which are 54″ to 60″ wide. I can spread fabric flat in a single or double layer without it hanging off the edge.
Modular Table Design
I created my modular table design with only 4 components:
Hollow-core door. Mine is a standard-size door, 1 1/4 x 30 x 80. I found it at the ReStore for $5.
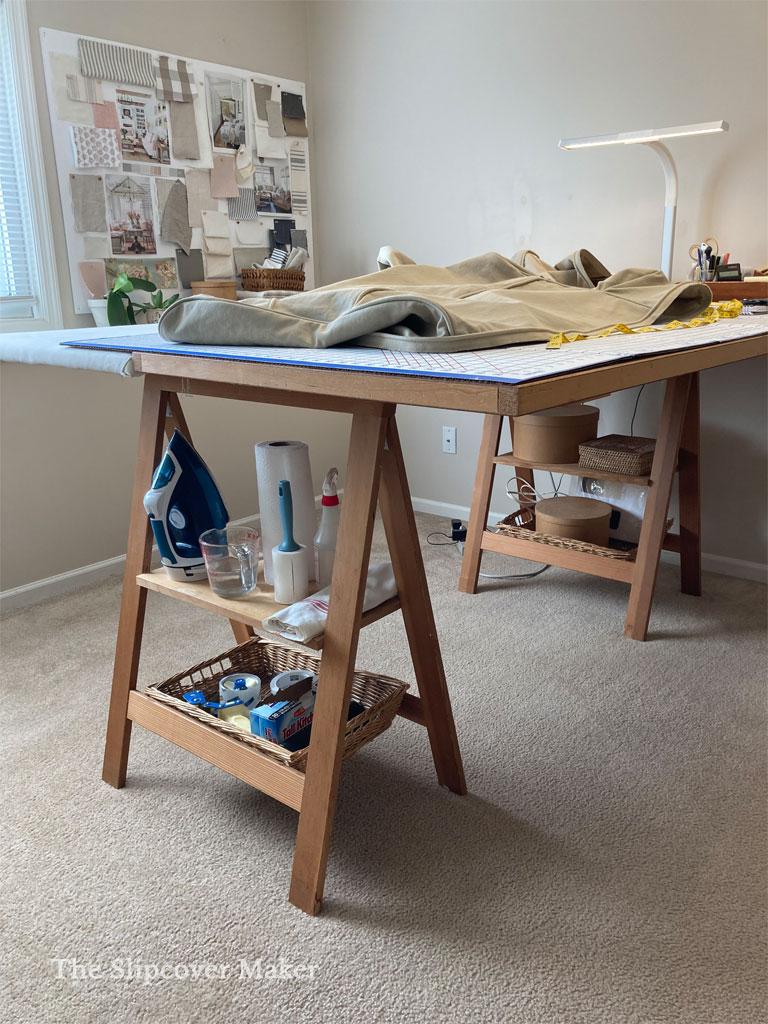
Pressing board. I had 3/4″ birch plywood cut to 30 x 80 at Home Depot. I covered it with 3 layers of cotton batting and #12 weight natural cotton duck. I used a staple gun to secure the layers to the back of the board.
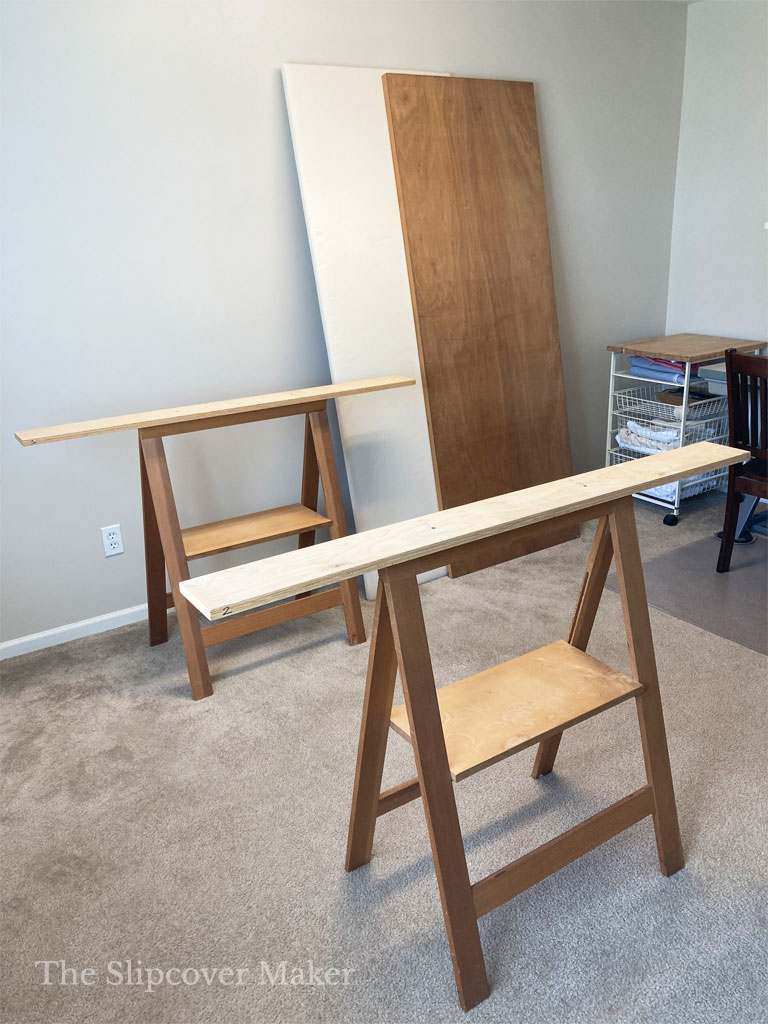
Folding sawhorses. I repurposed a pair of wooden sawhorses I had custom-made many years ago. I screwed a 3/4 x 5 x 54 board to the top of each to support my table width. I put a piece of non-slip rug pad material on the ends of each board to keep the tabletop from sliding.
Cardboard cutting mat. I like using a measurement grid on my tabletop. The Dritz Foldable Superboard approx. 40 x 72 is my favorite. I put 3 large pieces of non-slip rug pad material under my mat to keep it from sliding.
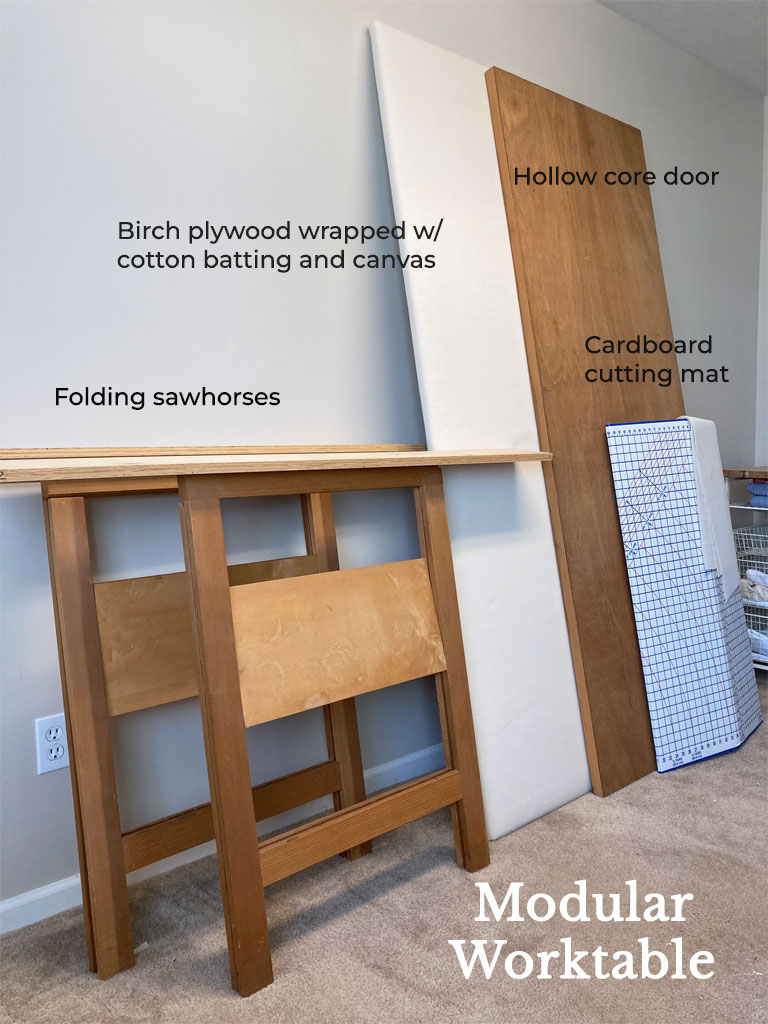
Here’s a look at my worktable components disassembled. The entire table breaks down flat. The pieces are easy to carry, and don’t take up too much room to store.
Below you can get a closeup look at the support boards mounted on the sawhorses. I can easily remove them to make the sawhorses easier to store.
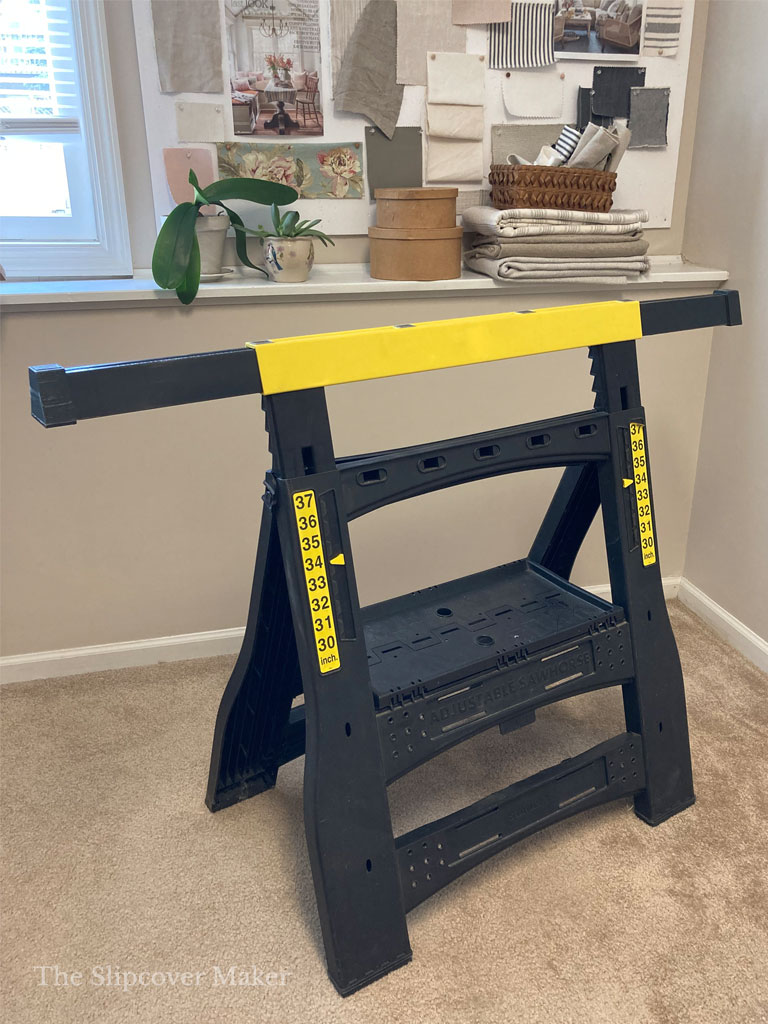
Worktable Saw Horse Base
If you can’t find ready-made wooden sawhorses in the height you need, opt for heavy-duty plastic foldable sawhorses. Look for a pair that has adjustable height and extension arms like the Stanley model below.
I don’t think the arms extend past 48 inches, so I would consider increasing the support by attaching a board on top like I did on my wooden sawhorses.
At one point, I considered using two large bookcases on castors in place of sawhorses. But they took up too much space under the table and were too difficult to move and store.
I prefer the minimal look of the “floating” tabletop on sawhorses. It doesn’t clutter the room. The wide open storage space below comes in handy.
Worktable Design Considerations
As you design your own modular table, consider these things:
- your room size
- your desired table width, length and height
- the type of tasks you will use it for
- how do you want your modular components to function
- how often you will use your table
For example, if you make slipcovers for yourself only once in a while and want to store the table after you’ve finished your project, you might do fine with a smaller work surface with fewer components than mine.
The most simple modular table is one hollow-core door on a couple of sawhorses with a customized height that is easy on your back. It sure beats measuring and cutting on the floor!
On the other hand, if you’re starting a home-based slipcover business, you will probably need the maximum size table that will fit your space.
My blog reader, Lori, wants to set up a slipcover workroom in her 11 ft x 11 ft space. Depending on the type of work she does and how often, she might not need a 60 x 80 work surface every day. She is considering designing a portion of the tabletop as a drop leaf to save on space. Great idea!
I hope this post inspires worktable ideas of your own! Happy slipcover making! — Karen
What a great work table Karen! That table is such a smart solution for someone like me who only occasionally makes slipcovers for my home. Those saw horses are gorgeous btw! Thanks for sharing! Pinned 😊
It’s perfect for you, Cindy!
Great post. Now I need to take another look at my own space. I love that combo ironing/cutting — it saves so much room and looks very convenient.
Stacy — I like the pressing/cutting combo, too. I never have to set up a free-standing ironing board!