How To Topstitch a Box Cushion Cover
Learn how to trim your box cushion slipcovers with topstitch. The look is clean and simple, making it a modern alternative to a tailored welt cord.
There is something about topstitched slipcover seams that is so aesthetically pleasing.
I love the simplicity of the straight stitched lines. No bells and whistles, just an understated detail that looks lovely on solid-color natural fiber fabrics.
I often get questions about how, when, and why to topstitch a slipcover. The answers can vary depending on the pin fit method you use, the type of topstitch you want to apply, your slipcover design, and the type of fabric you use.
So let’s start with the basics. This week I’m working on a pair of sofa slipcovers with topstitch detail. I thought I’d show you how I single-needle topstitch the box cushion covers.
This easy topstitch method can be used on many types of slipcovers and fabrics with good results.
Enjoy the tutorial!

1. Cut Cushion Pieces
Cut top and bottom cushion pieces. Then, make the zipper & boxing panel. I show you how in this tutorial.

2. Attach Zipper & Boxing
With right sides together, sew the finished zipper & boxing panel to the top cushion piece.

As you sew around each corner, make 3 small relief cuts on the zipper/boxing panel. This makes it easy to guide the panel around the corners. Smooth out any folds to avoid fabric bunching up.

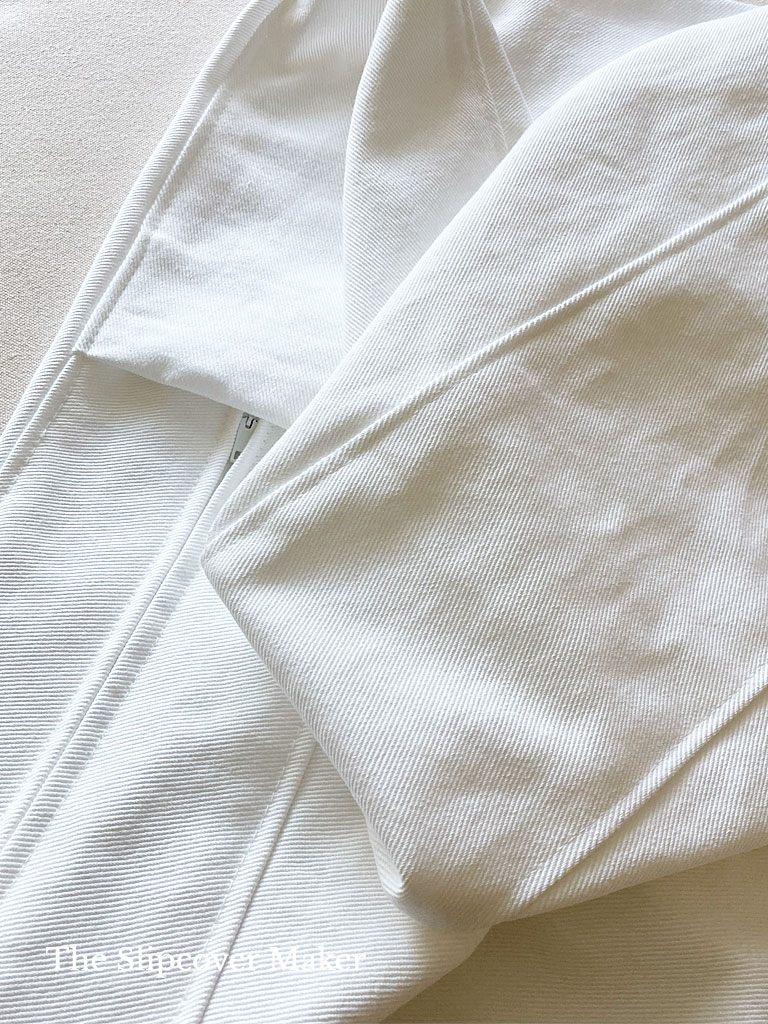
The stitch line at the corners should be a soft, curved shape, as shown above. This shape will make topstitching easy. Avoid stitching pointed corners.
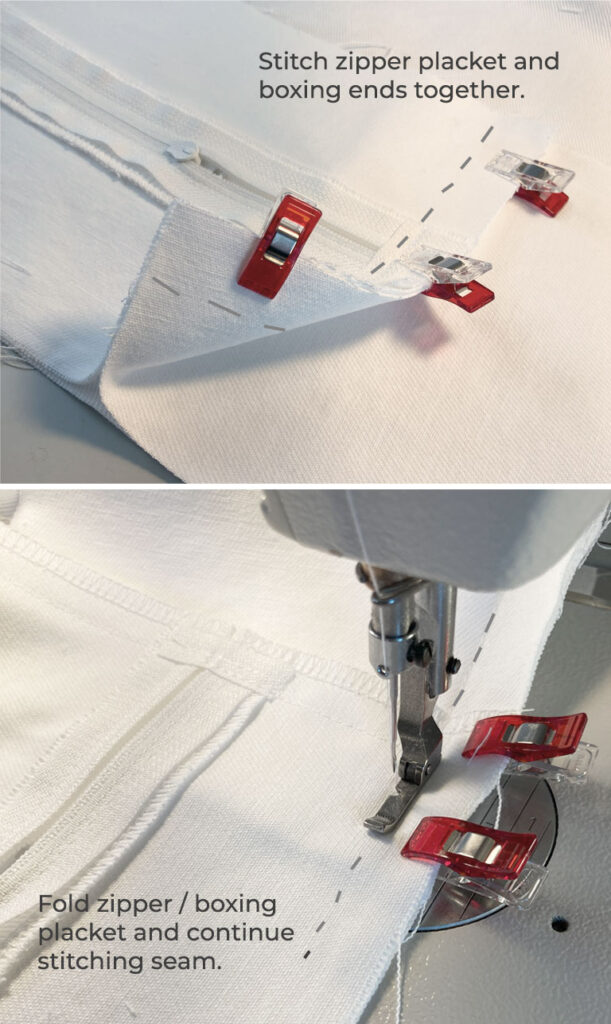
Sew zipper/boxing panel ends together and finish sewing the cushion cover seam.

Next, serge or overlock the seam allowance all the way around the cushion cover. See above.
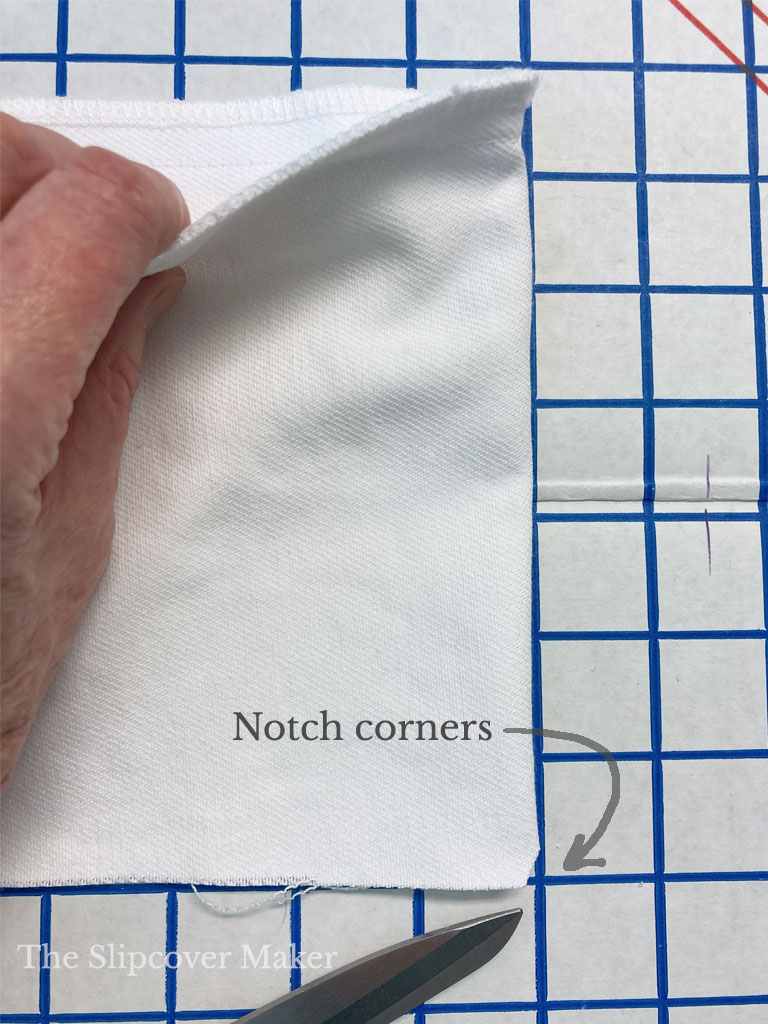
Finally, square up the zipper/boxing panel corners and cut a small notch on each. You will match up the notches to the corners of the bottom cushion piece later.
Now, it’s time to topstitch around the top cushion cover!

3. Topstitch Cushion
For this project, I created a 1/4-inch single-needle topstitch. The finished topstitch is 1/4 inch away from the seam. Below is the step-by-step:
- Turn the cushion cover right side out
- Flip the seam allowance towards the center of the zipper/boxing panel.
- Line up your presser foot’s inner edge with the seam. I used a 1/4 inch wide zipper foot and #4 stitch length.
- Topstitch around the cover, starting at the top center.
Topstitch Do’s & Don’ts
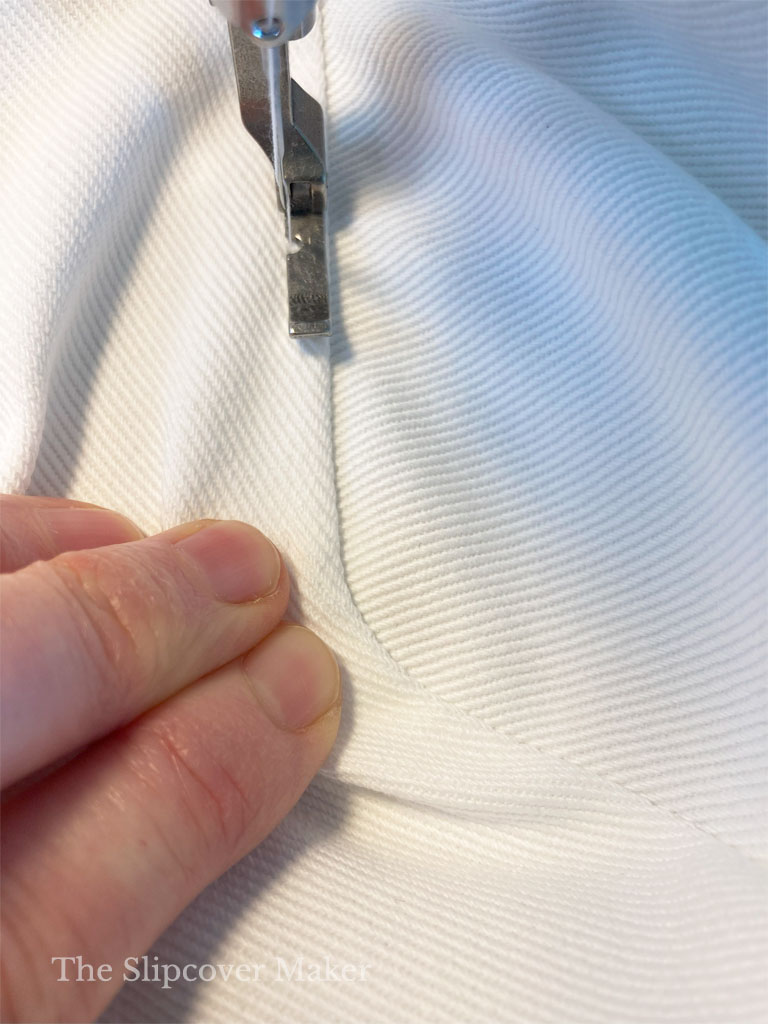
- I don’t press the seams flat before I topstitch. Instead, I use both hands to gently pull and flatten the fabric away from both sides of the seam as I stitch.
- As I topstitch around a corner, I pull back and flatten the bit of excess fabric that tends to bunch up in that area.
- I never topstitch on the cushion pieces. I topstitch only on the zipper/boxing portion of the cushion cover.
- After I finish the first row of topstitch around the cushion top, I attach the bottom cushion piece to the zipper/ boxing panel. When that’s finished, I topstitch the seam.

Give topstitching a try on your next slipcover project and let me know how you do.
Thanks so much for following! — Karen
Beautiful
Thank you, Charlotte!
So glad you posted this! My next slipcover job will now get topstitching instead of welt cord!
Oh, good! All the best with your project, Ramona.
Great tutorial. Thank you.
You’re welcome, Lynda. I’m glad you found it useful!
You make it look so damn easy!!
Thanks, Mary!
Great inspiration for my first attempt at a washable cover … (so nervous)
Cynthia — First slipcover, that’s exciting! I’m cheering you on! Take your time and have fun with it.
Great article! Thank you!
You’re welcome, Natalie!
This is so helpful! Thank you for sharing.
Kate
Wonderful! Happy topstitching, Kate!
I’ve been studying all of your helpful tutorials. In this tutorial, it looks like you serged the edges after sewing the seams so that the two pieces are serged together, as opposed to serging each piece separately before sewing them together. Do you have a rule of thumb for when and how you serge the edges (i.e., separately vs. together)?
Katherine — For most projects, I prefer serging the edges together after I sew each seam. I use an industrial serger, which can trim and overlock many fabric layers without a problem. However, if you are using a home serger and working with heavy-weight 12 to 14 oz denim or canvas I would serge around all edges of every piece before you assemble the slipcover. That way you won’t choke your serger when trying to go through 4 to 6 layers of fabric. Serging pieces individually is easy to do when you pin-fit your slipcover right side out. It’s more complicated if you pin-fit the reverse side out. Thanks for your question! This is a good topic for an upcoming blog post.
Thanks so much for the explanation, Karen. You do such beautiful work, and I’ve greatly enjoyed your website. I’m making my first slipcovers now. I’m doing two parson’s chairs, so I’m starting small, and your site with the tutorials and clear pictures has been enormously helpful. I’ve topstitched the seams based on your advice in the tutorials, and I had just done the first one before your recent blogpost. I considered whether or not to press the seams before topstitching and decided not to, which I found was the correct decision after I read your recent post. However, I did use some quilting gloves in doing the topstitching, which made it a little easier to hold the fabric apart. Thanks again!
Your work is beautiful and inspiring!! I’ve not made slipcovers in several years, but I might have to give it another try now that I have some instructions. Thank you so much for sharing!!
Thanks, Jamie! Try the right side out pin fit method. My tutorials are here: https://slipcovermaker.com/learn/how-to-make-a-slipcover/. I find it’s easier and more intuitive than pinning fabric reverse side out. Have fun with your project!