Hem Your Linen Slipcover With Stay Tape
Prevent a wavy hem on your linen slipcover with this simple trim. Learn how to sew it easily in place to control fabric stretch and give your DIY cover a professional finish.
I just finished sewing two large sofa slipcovers using heavyweight linen. The covers are very wide, each one about 100 inches. They are weighty and floppy just as they should be — beautiful!
Both slipcovers are unlined and designed with waterfall skirts, which require a turned hem.
Stitching a turned hem on a slipcover is usually no big deal. It’s the easiest hem to sew. When I turn and stitch a hem on a cotton canvas or denim cover, it turns out great every time. The look is flat and smooth. That’s because those fabrics are stable, the weave doesn’t have too much give.
Hemming heavyweight linen is different. The fabric has quite a bit of natural give. As a result, turning, pressing, and stitching the hem — even with the lightest touch — can cause it to stretch out. And that creates a wavy effect.

What’s the fix? For this project, I used Stay Tape by Dritz.
Stay Tape is a sew-on 1/2 inch wide interfacing. It’s a lightweight sheer tape that prevents the fabric from stretching without adding bulk. It’s also washable and won’t shrink.
If you’ve made shirts, knit tops, or a blazer for yourself, you might have used this trim. It does a great job of stabilizing shoulder seams and lapel roll lines.
I don’t use Stay Tape on slipcover seams. Never, ever. A washable slipcover needs to ease out a bit and retract with use and wash. The seams don’t need to be stabilized no matter the fabric.
But when it comes to controlling the stretch in a turned hem, Stay Tape is my go-to. Here’s how I apply it:

1. Serge Hem Edge
Overlock (or zigzag) the raw edge of your slipcover hem to prevent fraying.
2. Attach Stay Tape
Sew the tape to the wrong side of the hem allowance. Line up the tape edge with the hem edge. Stitch down the center of the tape.
Avoid pulling on the fabric as you sew. Keep the fabric flat and relaxed as you run the tape along the cut edge of the hem.

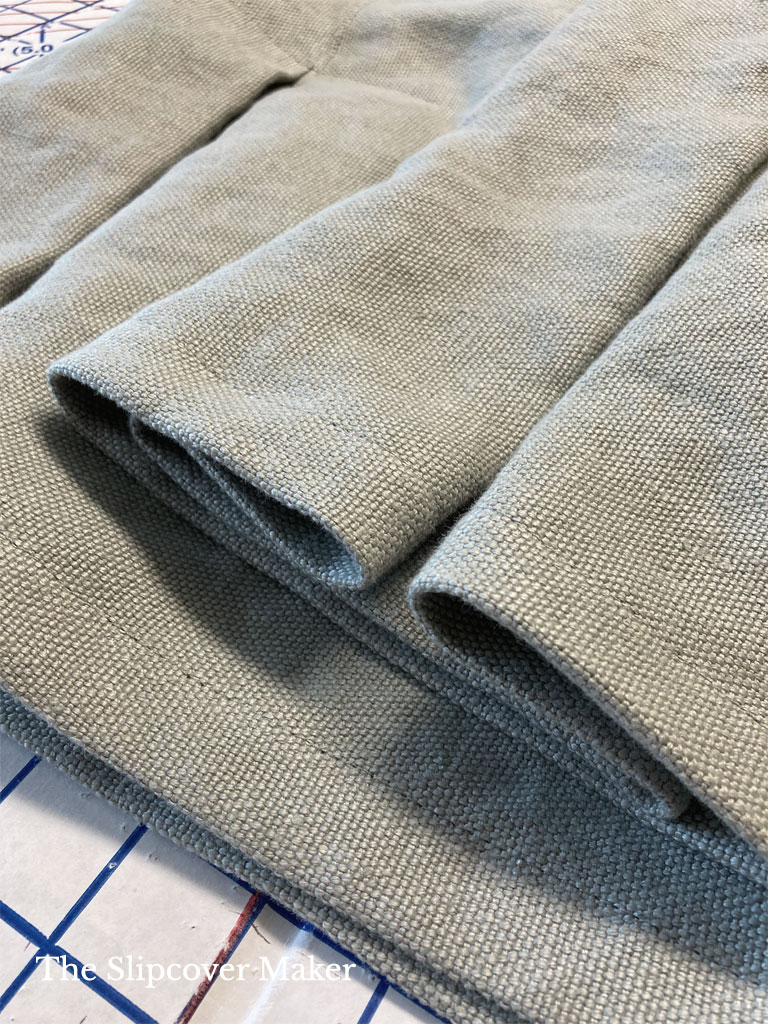
Here’s how the Stay Tape appears after stitching it to the hem edge on the wrong side of the fabric. The hem edge is now stabilized.

3. Turn & Stitch Hem
Measure, turn, and press the hem. Clip or pin to hold in place. Then, stitch the hem 1/4 inch in from the overlocked edge.
Stitching the turned hem from the inside of the slipcover (as shown above) is important because it stabilizes the fabric edge. Don’t stitch from the right side of the slipcover, the fabric will stretch and get wavy.
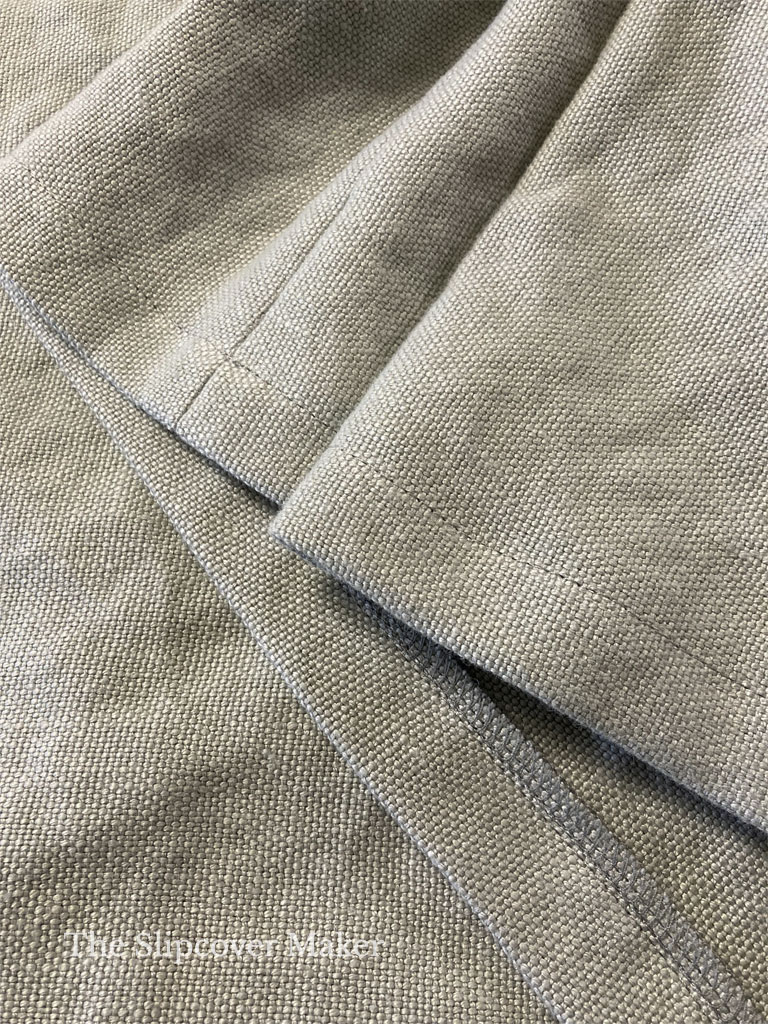
Here’s how the single-turned hem looks on my linen slipcover. It’s flat and smooth. The hem hangs nice and straight when the slipcover is on the furniture.
I also like hemming with the Stay Tape on other slipcover fabrics that are wiggly and a little stretchy, such as heavyweight hemp canvas, hemp twill, matelasse, and damask.
If you have never worked with Stay Tape, I recommend experimenting first. Mock up a turned hem using a long scrap of your slipcover fabric. Get a feel for applying the tape and see if you like the look of the finished hem.
Happy hemming! Until next time…
More Linen Slipcover Inspiration
- 4 Things to Look for When Choosing Slipcover Linen
- Easy To Make Washed Linen Slipcover
- White Hemp Canvas for Slipcovers — hemp canvas is a wonderful alternative to linen!
Definitely going to add this to my ‘tool kit’! Thank you for the great info 😉
Karen — I’m so glad today’s post was helpful. Stay Tape is a must-have, for sure!