Slipcover Design: How to Handle Outer Arm Seams
Outer arm seams with or without welt cord are common on rolled arm slipcovers. And, some slipcovers omit outer arm seams all together. Learn when, why and how to add, or not add, outer arm seams to your custom cover design.
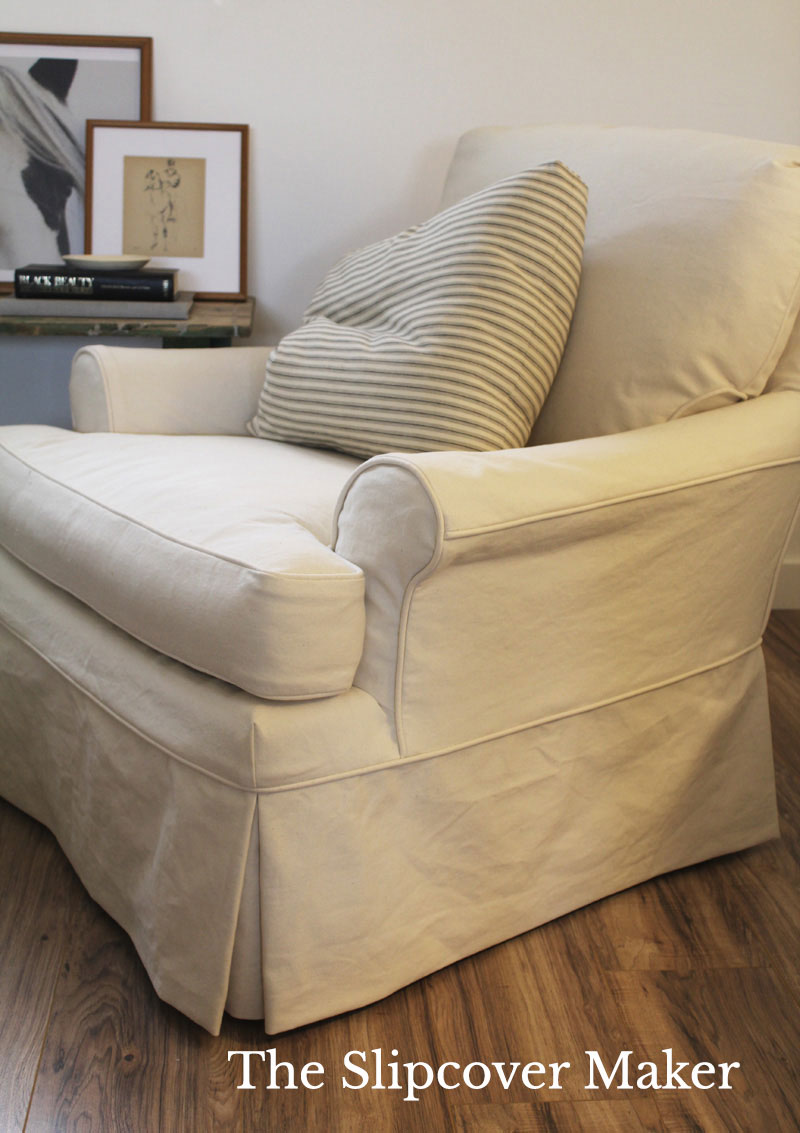
An outer arm seam sits high or low on the side of the rolled arm. It runs from the front arm to the back corner seam. Some are barely noticeable while others have welt cord or decorative topstitching.
I’m frequently asked about OA seams: Are they necessary? What is the correct placement? Why do some slipcovers have them and others don’t?
In this post I share examples of slipcovers I’ve designed with and without outer arm seams. Here’s the scoop on when, why and how I do it.
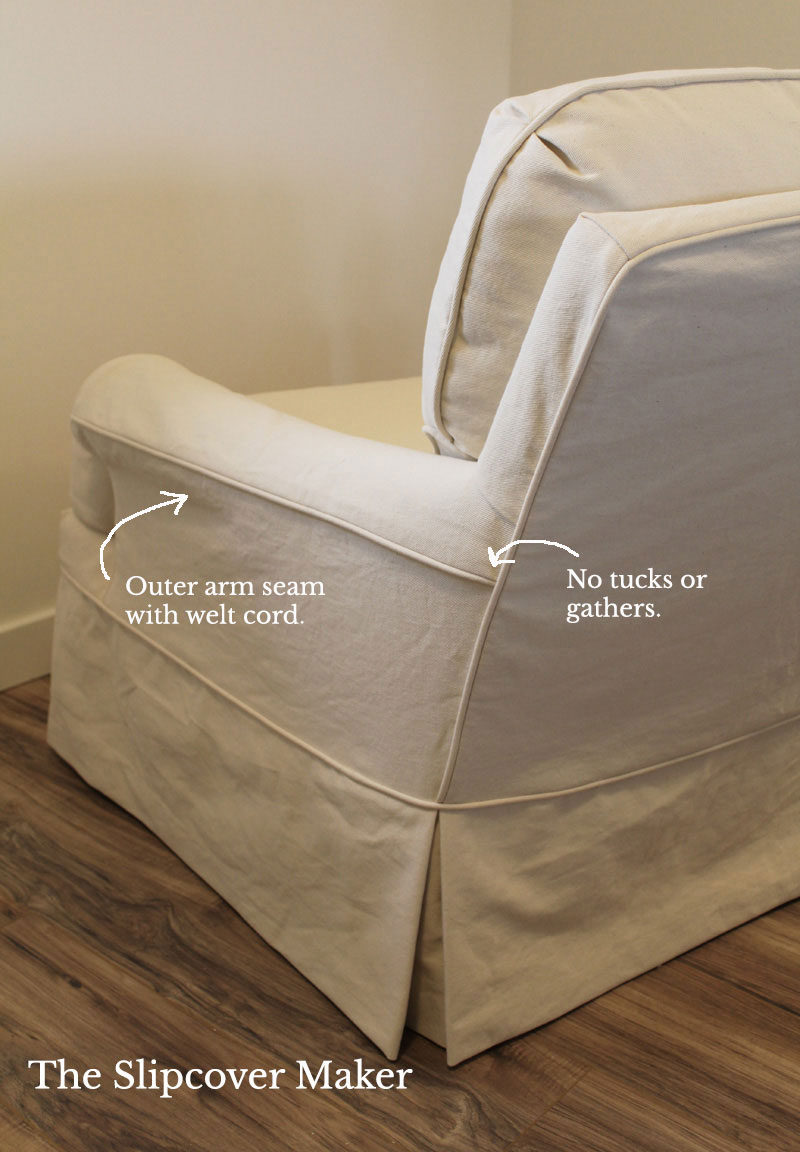
Outer arm seams with welt cord can be purely aesthetic. Or, they might be needed to control fit and add function.
For Barb’s natural denim slipcover above I decided to add welted OA seams based on these 5 considerations:
1. Upholstered chair design. This chair does not have welted arm seams. That’s a plus! It means the arm seams on my slipcover will lay smoothly without competing with bulky welt cord on the upholstery.
2. Arm shape and fullness. The fullness of the arms is somewhat shallow especially as they taper towards the back. I knew I could create a straight, flat arm seam without adding tucks to control fullness. I was going for a clean, smooth fit.
3. Fabric thickness. Even though the 12 oz. bull denim I used is considered a heavy weight it’s not extremely thick. I was able to create welted OA seams (4 layers of fabric) without them being too bulky in the seam allowance when joined to the front and back seams.
4. Amount of yardage I had to work with. My yardage estimate for this project was very conservative. I almost didn’t haven enough fabric! By pinning each arm in 2 pieces I was able to utilize smaller pieces of fabric.
5. My customer’s style. Barb likes tailored, classic slipcovers. OA seams trimmed with welt cord ties into her aesthetic. This piece coordinates with the other natural denim slipcovers in her living space.
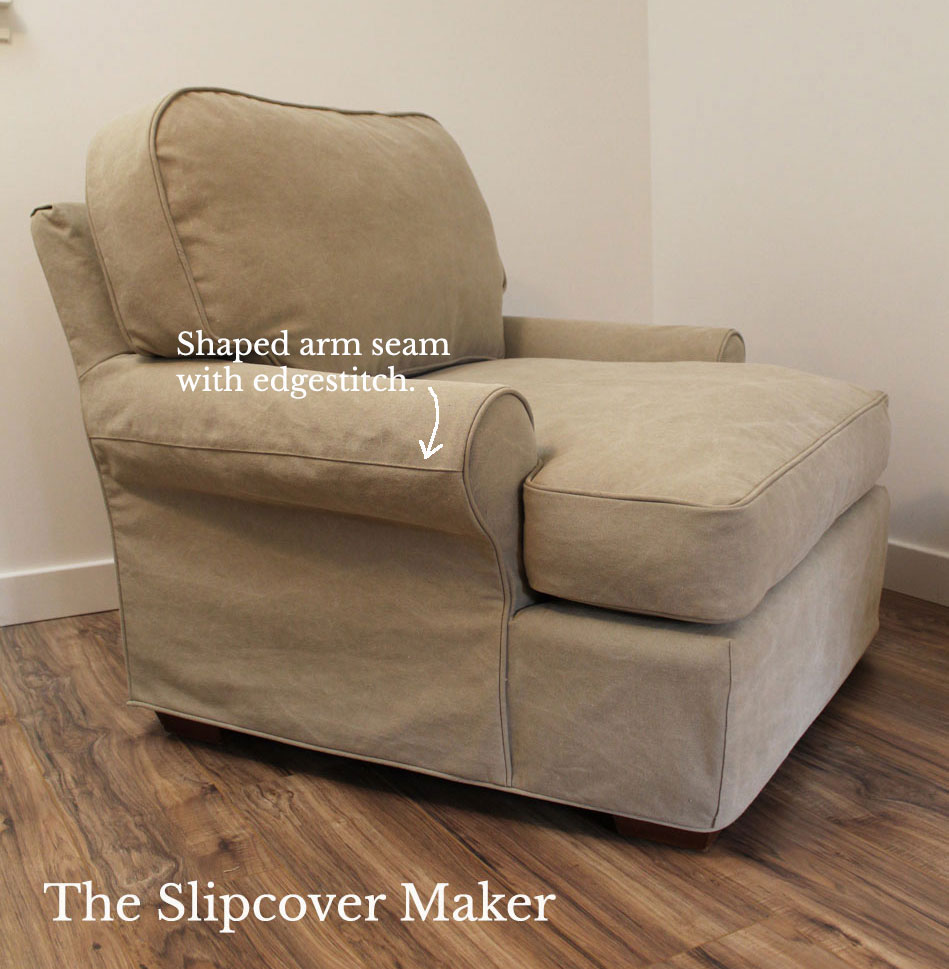
I took a different approach for Rebecca’s oversized chair slipcover (above).
The arms not only have a generous roll they also bow out at the side. When I stood over them and looked down I could see they curved outward at center and tapered slightly at front and back.
This type of arm presents some fit challenges. To create a smooth fit and control fullness I had to pin the outer arm seams to follow the curved contour. At the same time I wanted the seam to appear straight, parallel with the bottom of the chair.
I placed the seam about one half to three quarters of the way down over the roll where the outside curve bulged the most.
Tip: find the just the right spot where you can control fullness AND make the seam placement visually appealing.
Because I used Big Duck’s heavy weight stonewashed canvas — this stuff is thick and dense — I didn’t want the extra bulk of welt cord. Instead, I edge stitched the seams to add a professional finish and keep the seam allowance flat and flipped up on the inside.
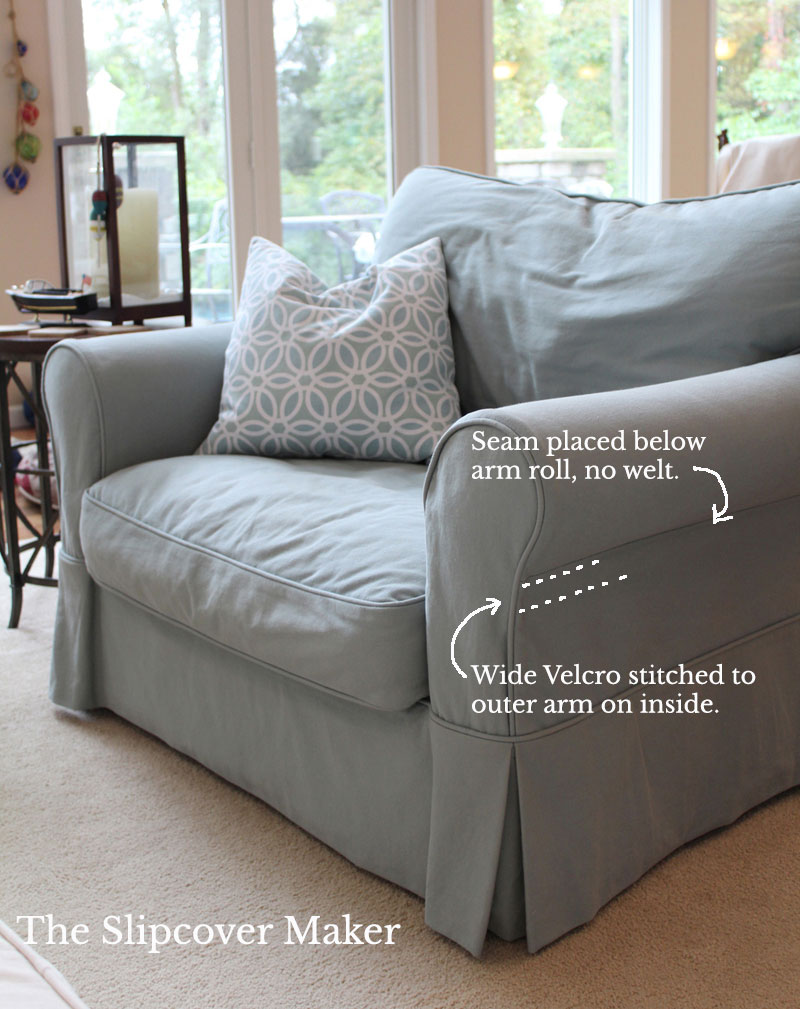
Some outer arm seams need to be placed below the roll like Kathy’s bull denim slipcover (above).
The outer arm seam runs straight across the chair from front to back. No welt cord. The lower outer arm is secured to the chair with Velcro. Hence the reason for the low, below the roll placement.
On the inside a strip of 2″ wide loop tape (the fuzzy side of Velcro) is sewn to the arm seam allowance. Then, on the outside, the tape is topsitched to the slipcover.
The low seam placement can be pinned on just about any rolled arm slipcover even if the chair doesn’t have Velcro function built in.
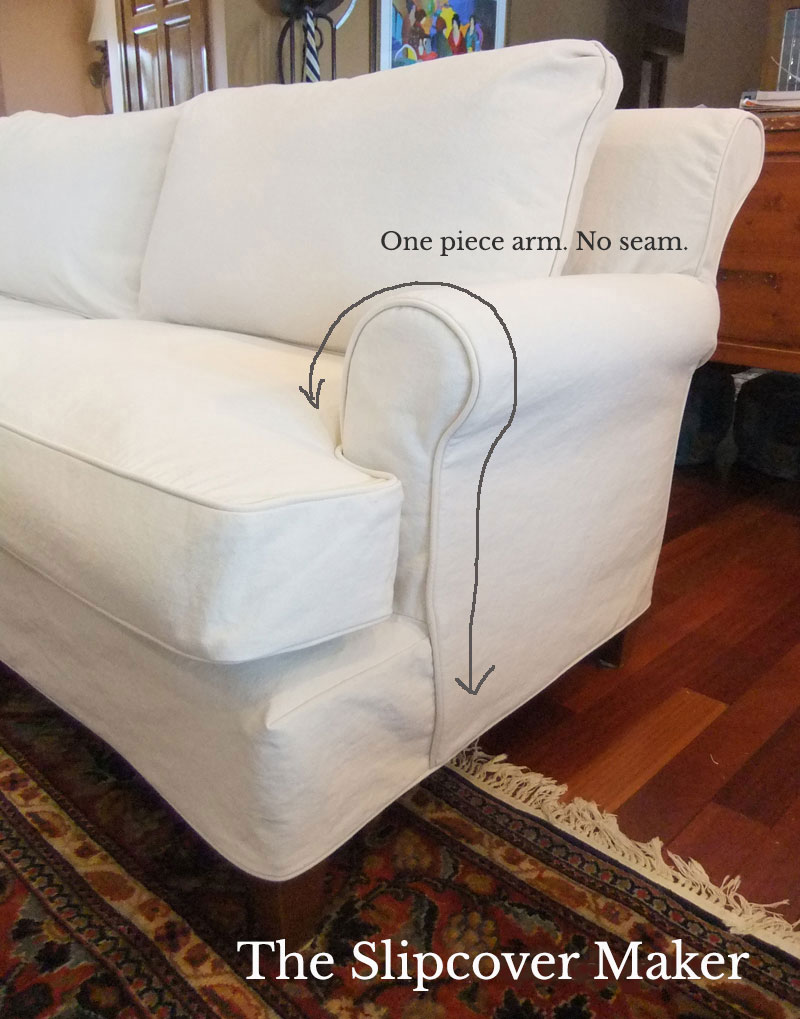
This might surprise you but not all slipcovers need to be constructed with outer arm seams.
I often forgo arm seams and cut the inner and outer arm as one piece. I do this when:
- The rolled arm shape is average in size and fullness. No extreme rolled shapes.
- I can control and minimize the fullness at back and/or front with 1 to 2 tucks.
- My customer wants a simple, relaxed slipcover design.
For Susan’s natural denim sofa, above, I was able to create a good fitting arm without a seam. I added only 1 tuck to pick up extra fullness where the arm meets the back.
The one piece arm technique worked very well with the size and shape of the arm.
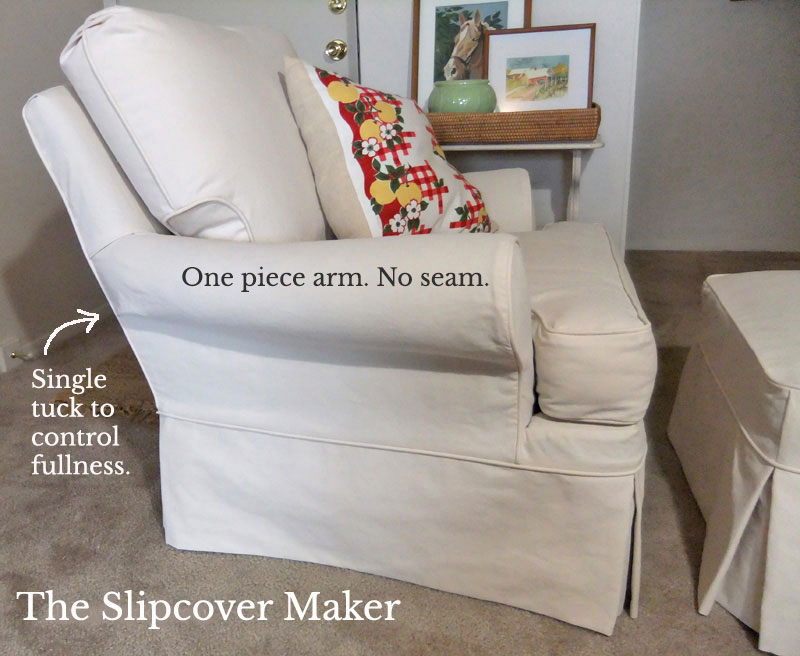
Bonnie’s project, above, is another example of an armchair slipcover without outer arm seams.
The one piece arm worked well for this chair design because the arm tapers to almost flat at the back corner seam. I used a sturdy, medium weight canvas, which was easy to pin fit around the arms.
There wan’t much fullness to control. I used only one tuck placed low to create a smooth fit in that area.
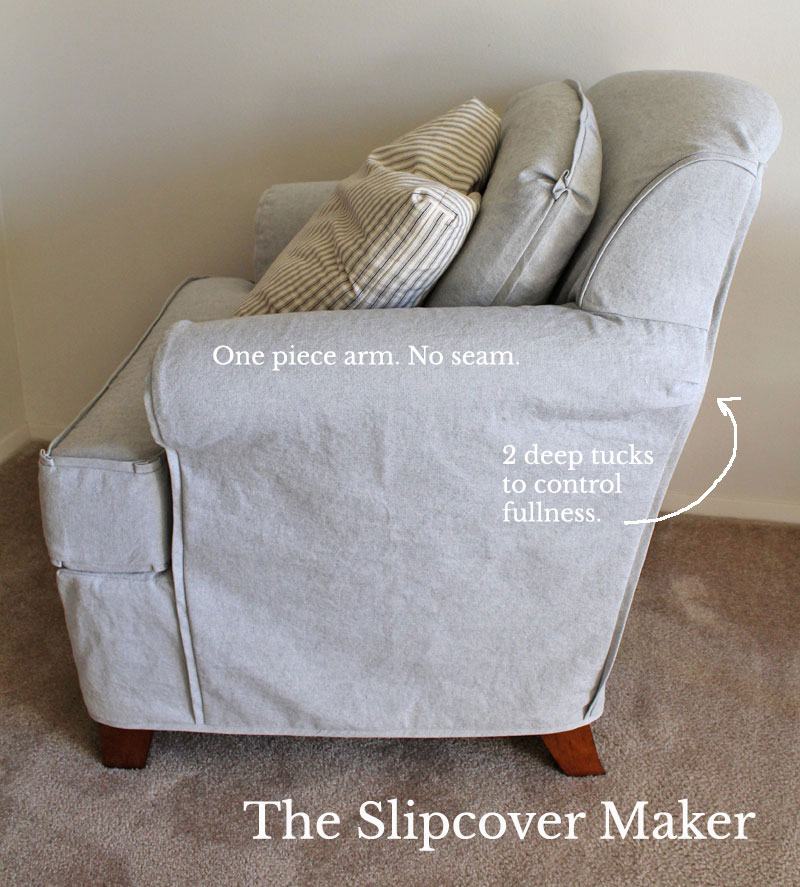
Jacky’s boxy armchair (above) has arms with a shallow roll. See the before here. This is another good design for a one piece arm. No outer arm seams needed.
Even though the rolled arms are average size they bulge somewhat at the back corner seam resulting in excess fabric. No problem. I added a couple of deep tucks to control the fullness.
Whenever I add tucks to the back end of an arm I fold and pin them where the fabric naturally wants to drape. I place them approximately 1″ apart. I never overlap tucks. The look can be messy and adds bulk to the seam.
That’s it! You are now arm seam savvy. For more slipcover tips and advice visit my LEARN page here at The Slipcover Maker.

I almost laughed out loud at my luck. I’ve been staring at my little 1940’s settee with the tapered back arm for an hour, wondering how to handle the thing when your post popped up.
Fantastic tips., thanks so much.
Maybe someday, you’ll post the dreaded 3 way meet up between the platform, rolled back and the arm…I’m scared of it.😁
Thanks again,and have a lovely Sunday.
Ester
Don’t you love when that happens! Glad the tips will be helpful for your next project. Thanks for reading, Ester.
Thank you!!! This section is where I’ve gotten stuck on my first slipcover.
Hi Tracey. Glad the information is helpful to you!