Slipcover Flange Hem Tutorial
Give your DIY slipcover a professional hem finish with this pretty flange detail. It’s easy to make and no welt cord is needed.
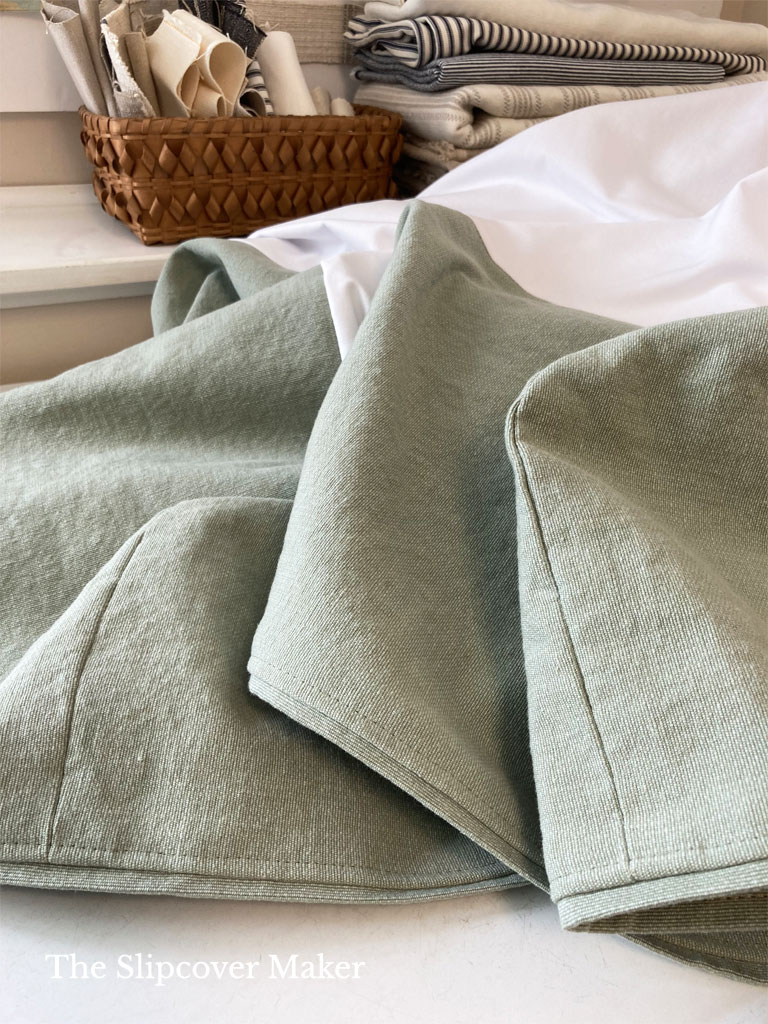
I recently copied a commercially made sofa slipcover. It was hemmed with a sweet little flange hem. I love the look — it’s a subtle tailored detail that gave the cover a pretty and polished finish.
This type of hem treatment is for a slipcover that doesn’t have a skirt. It can be used in place of a rolled hem or a welt cord hem. Use self-fabric or a contrast color or pattern.
If you are making a slipcover that is trimmed with topstitch instead of welt cord, this 1/4 inch wide flange hem will look fantastic. And, it’s very easy to make!
Here’s the step-by-step tutorial:
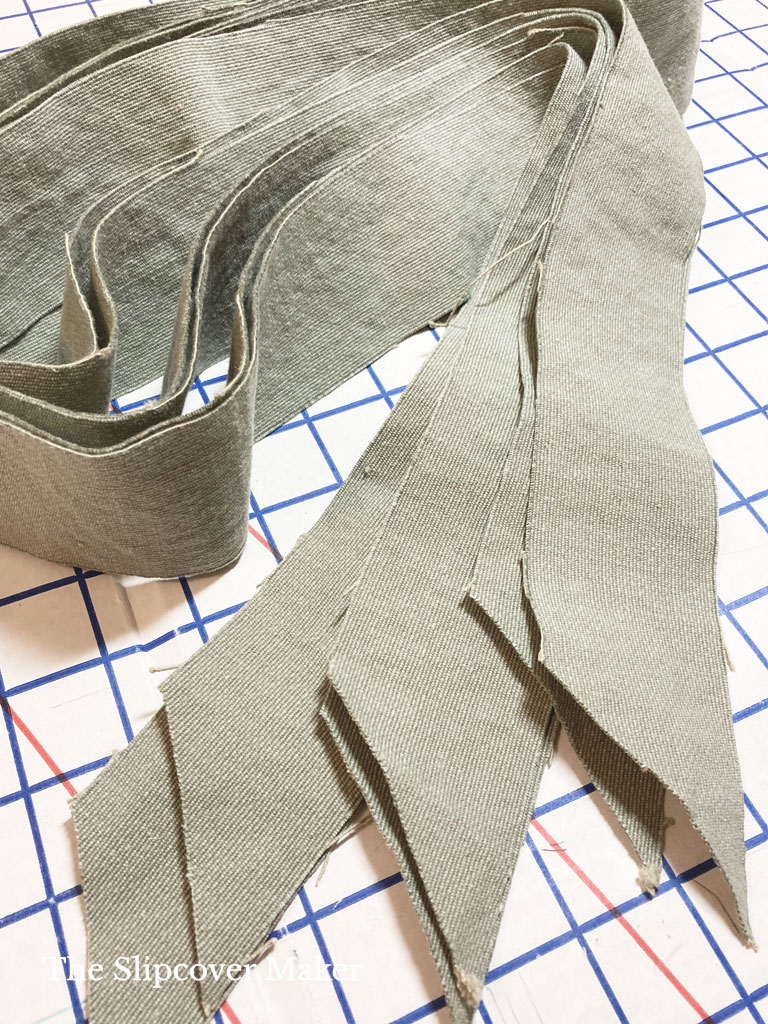
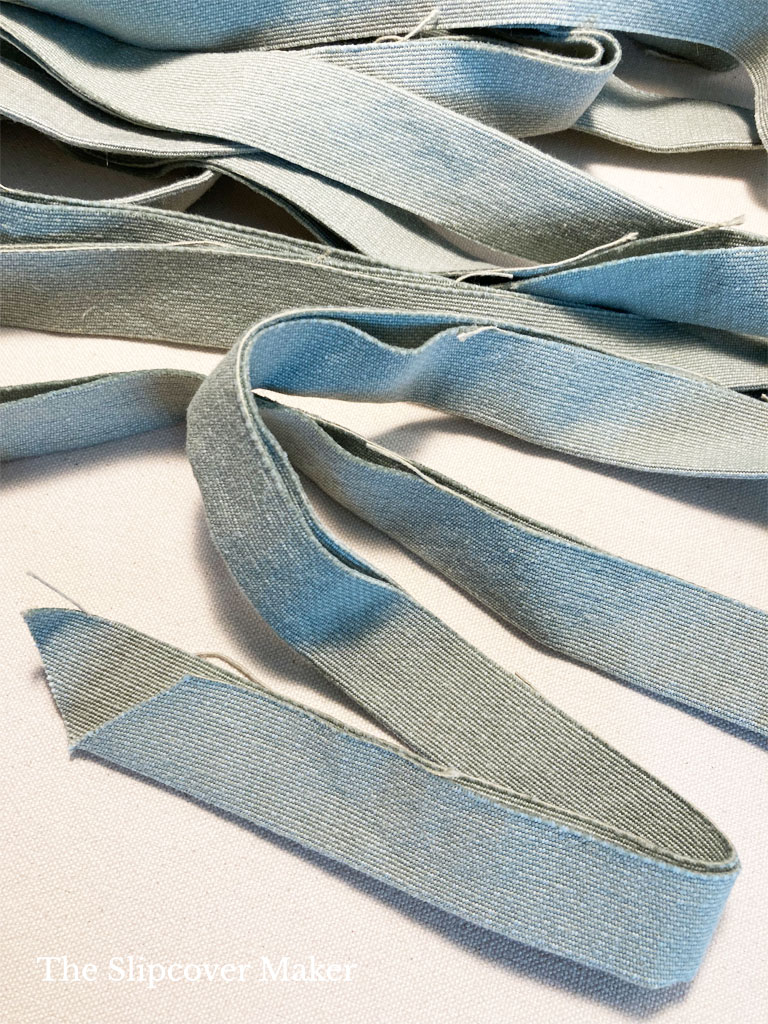
Step 1: Cut Flange Strips
Unlike bias strips for welt cord, flange strips can be cut across the fabric width (on the cross grain).
First, measure around your slipcover hem to determine the total flange length. Then, cut as many 2 inch wide strips as you need.
Snip-off ends at a 45 degree angle. This will help reduce bulk when you join the strips together.
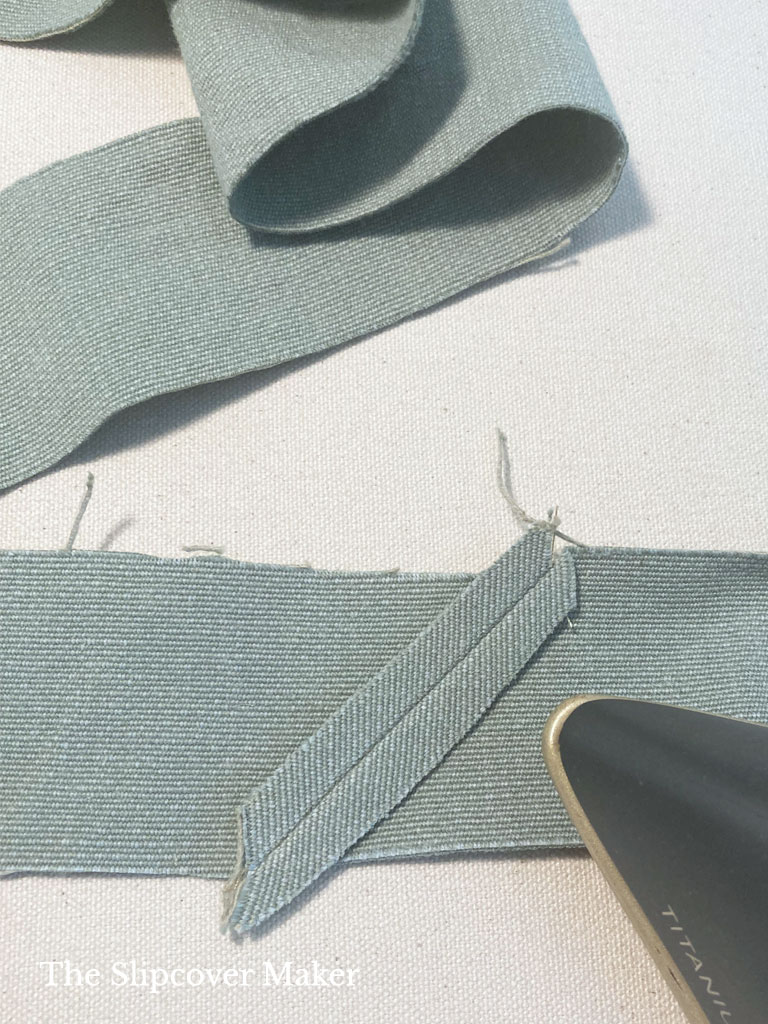
Step 2: Join Strips
Stitch strips together with a 1/4 inch seam. Press seams open.
I use the iron instead of finger pressing to make sure the seam stays flat and smooth.
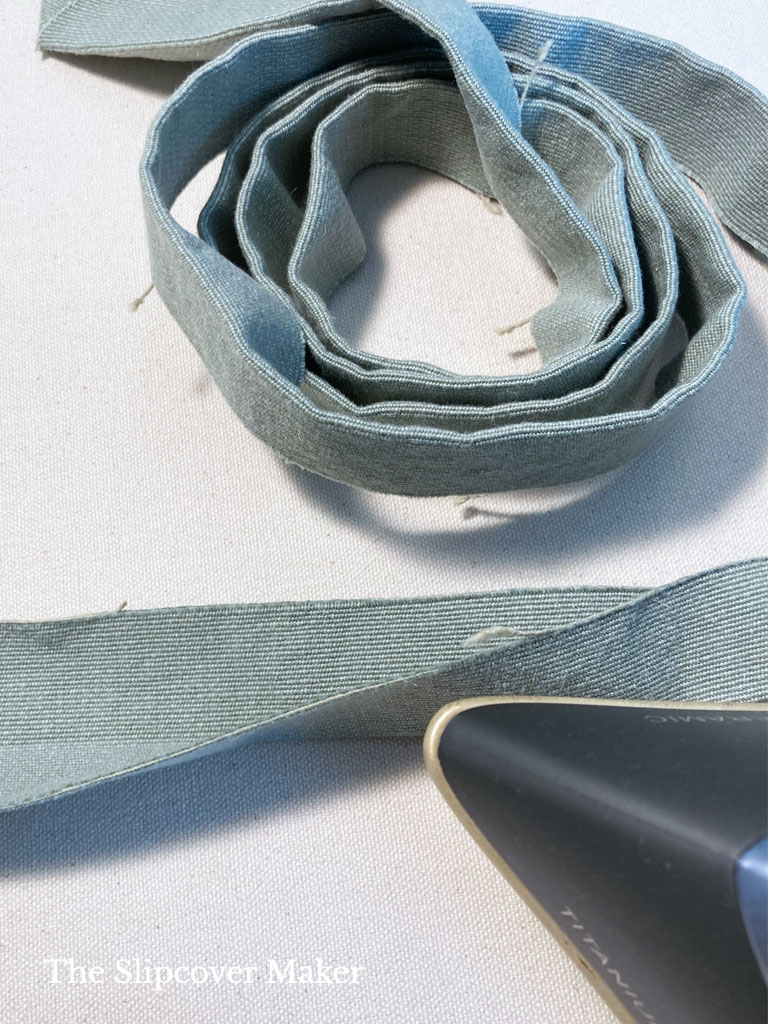
Step 3: Fold and Press
Fold the strip width exactly in half and press. Make sure raw edges meet.
This is what your continuous flange strip will look like.
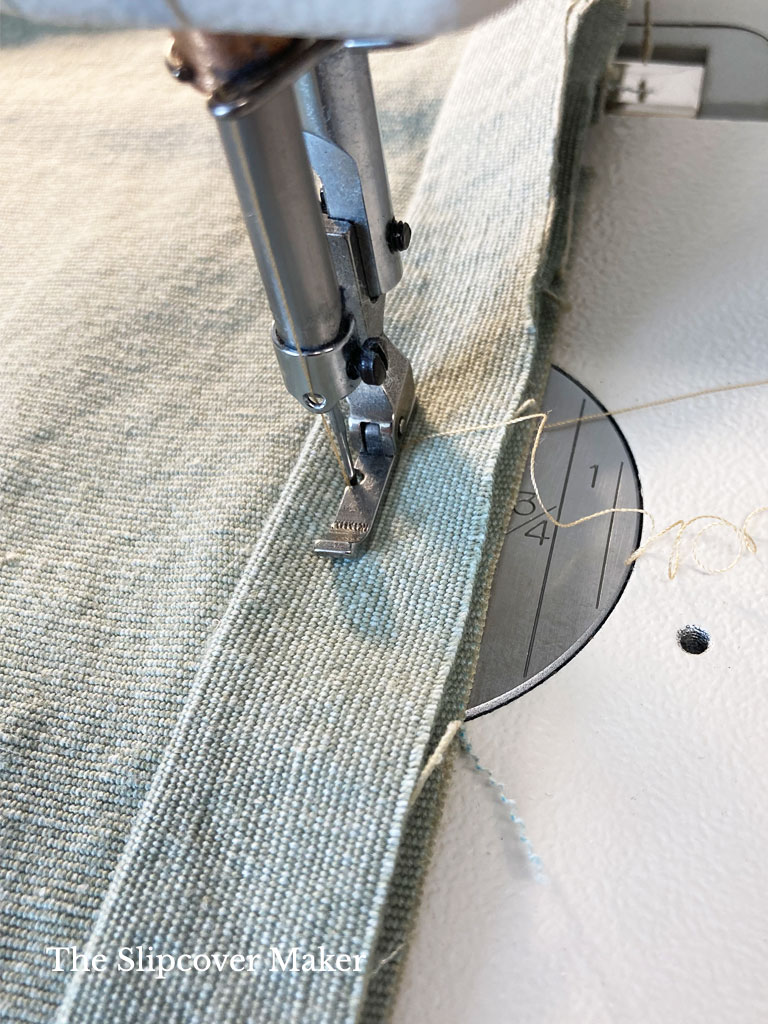
Step 4: Stitch Strip to Slipcover
Place the flange strip on the right side of your slipcover. Start at the center back. Leave about a 4 inch tail for joining with the other end.
Line up the raw edges with the slipcover hem edge. Stitch together with a 3/4 inch seam.
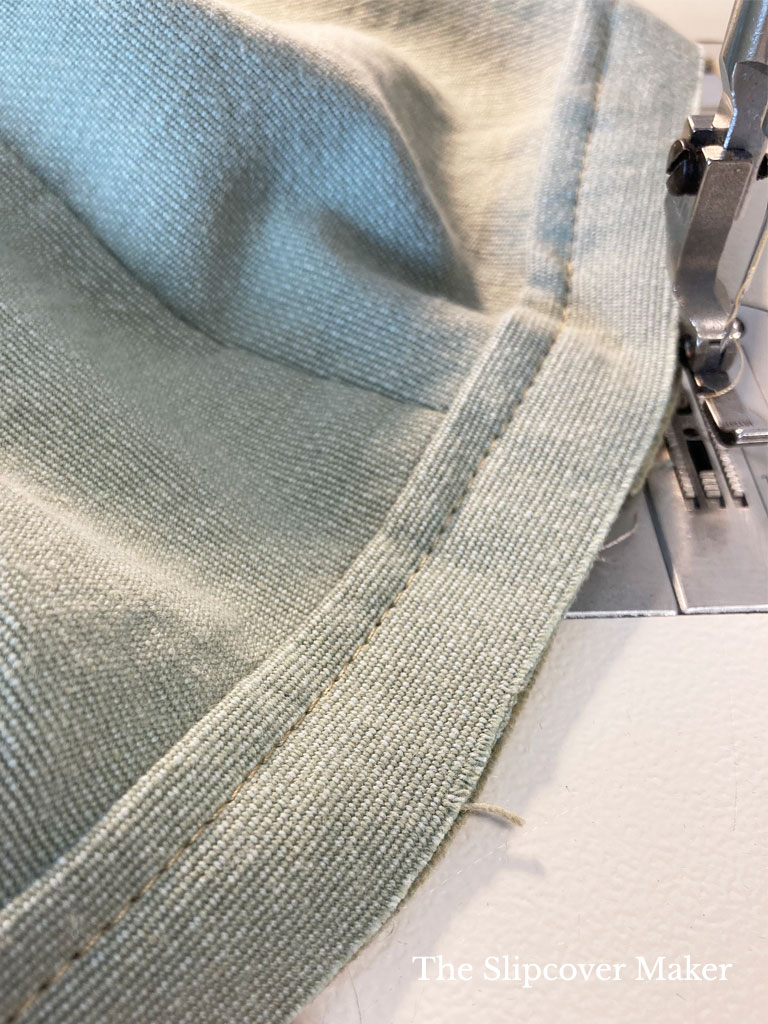
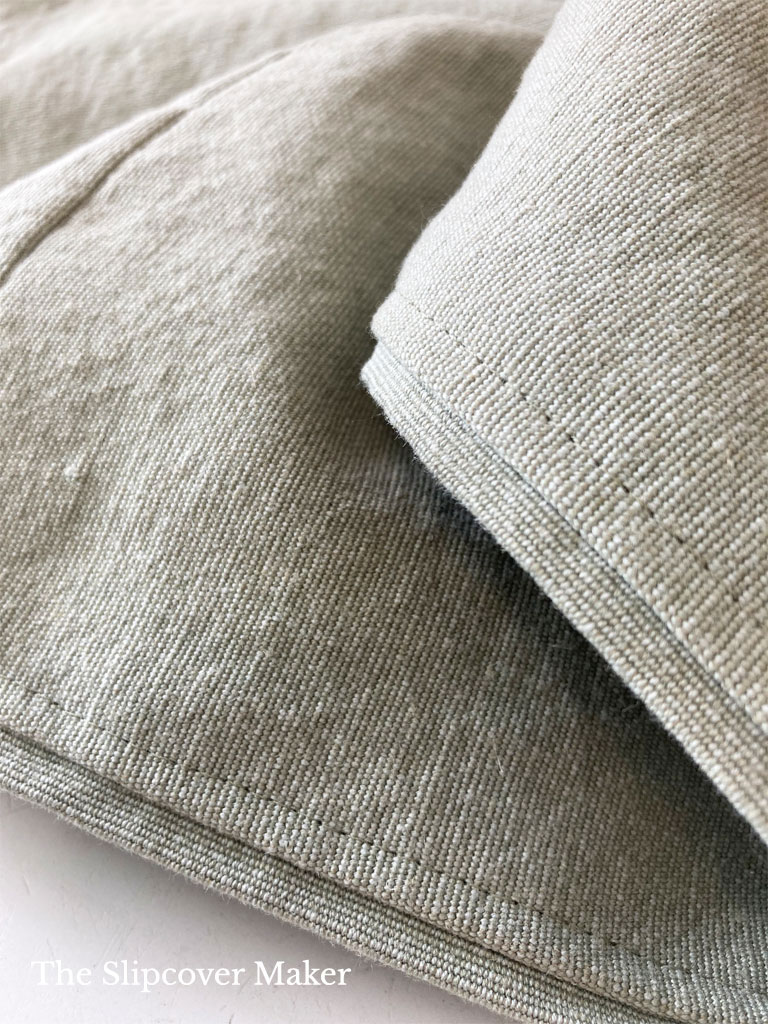
Here is what the flange strip looks like stitched to the slipcover. You can see the 1/4 inch flange section above the 3/4 inch seam allowance.
Step 5: Overlock Edge
Finish the seam raw edges with an overlock stitch or zig-zag. This will keep the edges from fraying.
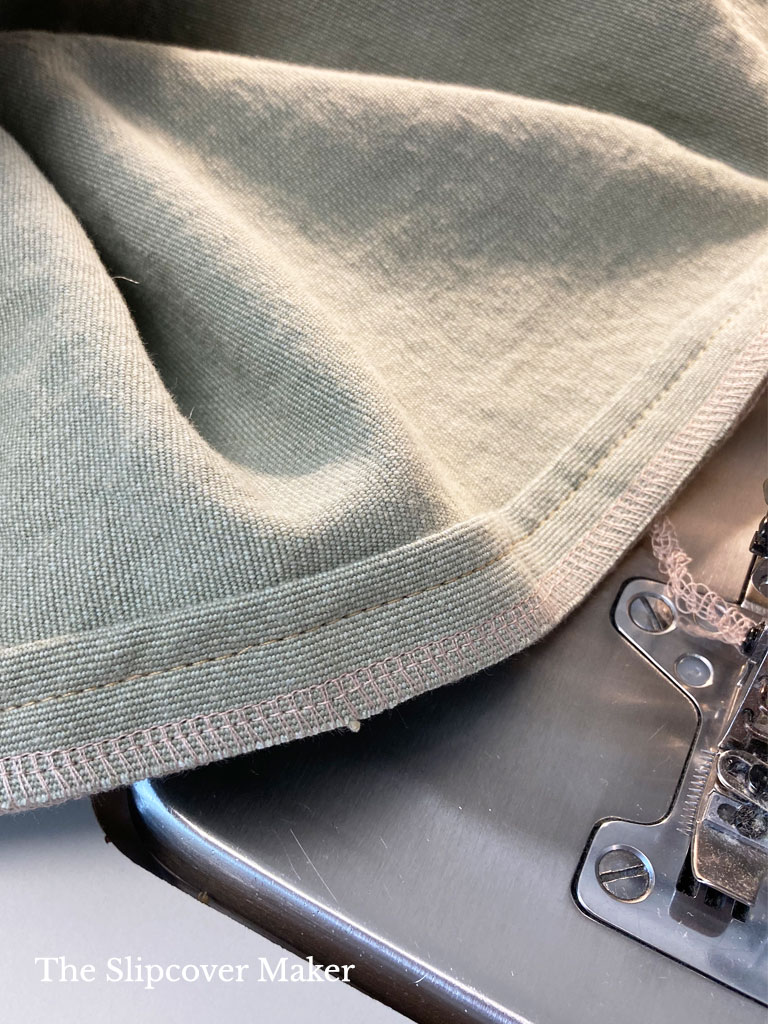
Step 6: Turn Back and Topstitch
Now, turn the seam allowance to the reverse side of the slipcover. The 1/4 inch wide flange will show on the right side just below the seam line.
Topstitch 1/4 inch through all thicknesses from the seam line. This will keep the seam allowance from popping out and drooping down.
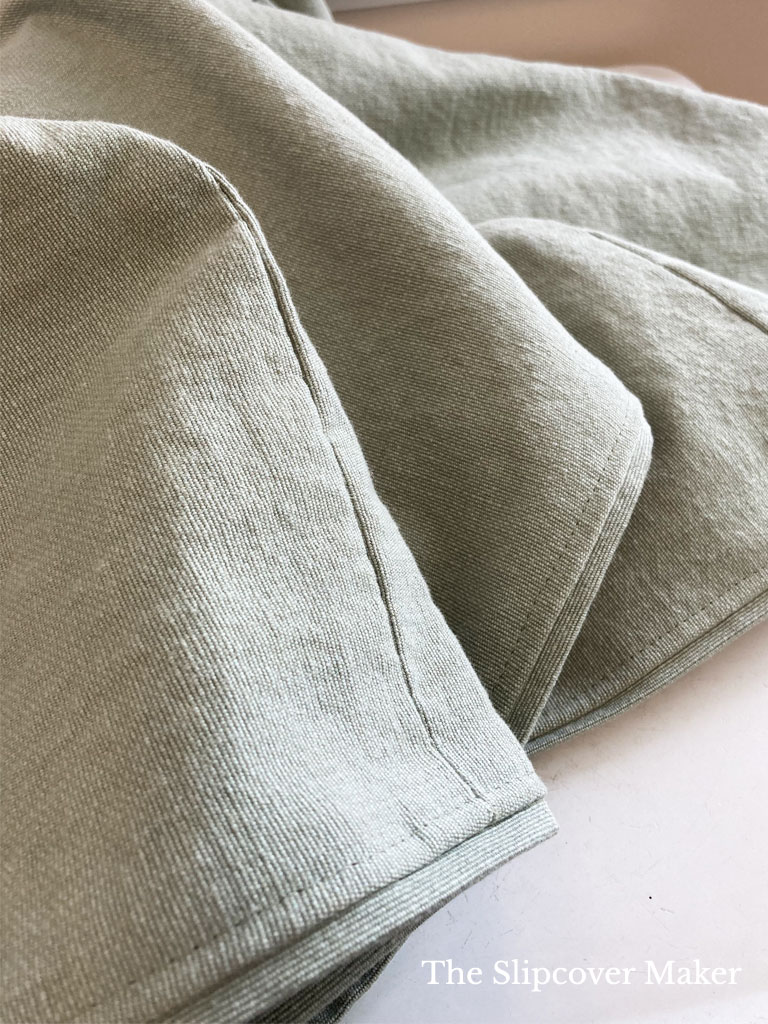
Since this was a slipcover copy, I don’t have photos of the new slipcover on the sofa. But I can tell you the flange hem has a comfortably snug fit and exposes the sofa legs. The look is clean and contemporary.
Remember, if you want to create this type of hem be sure to add 3/4 seam allowance to your desired finished hemline on your slipcover. You will need that seam allowance to attach the flange strip.
As always, thanks for reading. And, have fun making your flange hem! — Karen
Love this!! Thank you for sharing it, as always.
You’re welcome, Julie!
I used a flange to finish my slipcover on a pottery barn cameron sofa and I love it. It looks so clean and modern.
Kathy — I bet it looks terrific on that sofa model!
OMG… I just love your work. Never in a million years could I ever be that talented and do things like this. There is nothing nicer than professionally made lined drapes of all types and covering older furniture. Lucky you. I have NO patience. Please, keep me on your site because I enjoy looking at wonderful projects like this. Thank you so much. You have the patience of an angel.
Thank you for following, Debbie! So happy you enjoy my posts.
Can we buy this fabric for you for our own use? Please….
Rita, I sell the cotton-poly canvas only to my slipcover customers.
The tailored look of this flange hem is perfect! It’s fantastic that you were able to look at the commercial slipcover and recreate the look for the slipcover copy! Beautiful work Karen!
Thank you, Cindy! It’s the little extra details that make a slipcover truly custom.
Your work is like no other; the extraordinary detail work & precision is unmatched, Karen! Thank you for continued posts and tips.
Thank you so much, Pam! I’m happy you’re following my blog and enjoying the content.