DIY Armrest Covers for Your Slipcovered Furniture
Learn how to make protective arm covers for your sofa and chairs. In this tutorial, I share how to pattern and sew simple designs with a custom fit.
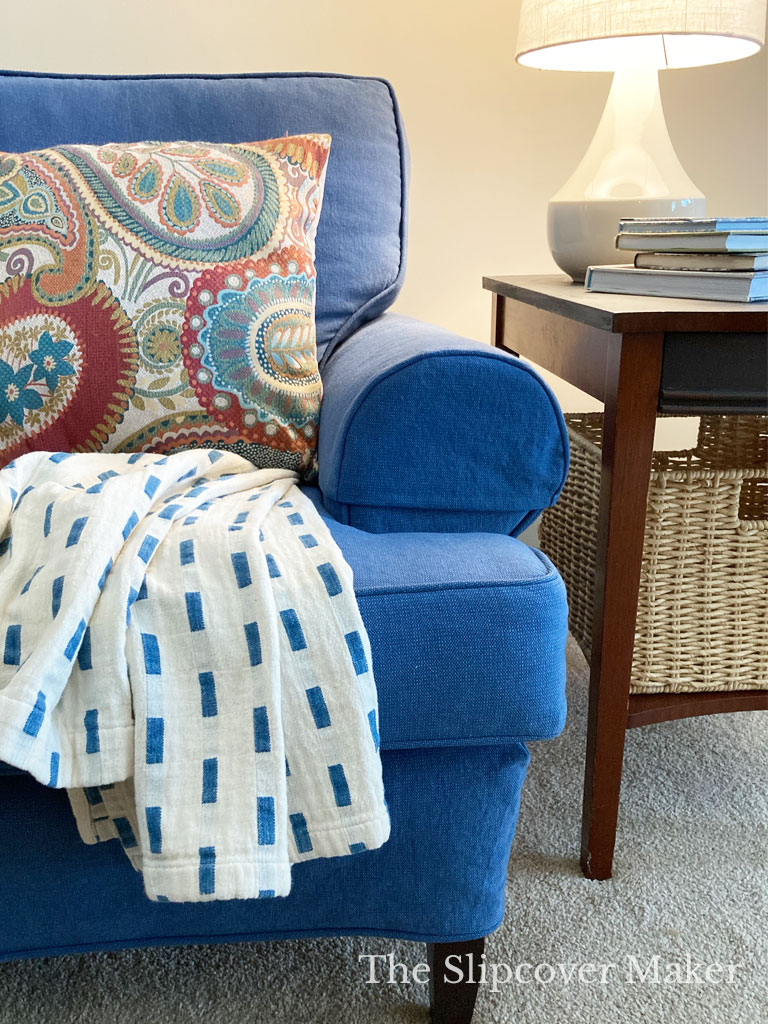
Sofa and chair armrests are a magnet for dirt and stains even on slipcovered furniture. It accumulates so fast! Especially if you have little ones with sticky fingers and sweet pets that love to lounge right on top of the arm.
You could remove your entire slipcover to wash it every time the arms show dirt. But that is so much work.
An easier solution: washable arm covers! You can make them yourself — super easy.
I’ll show you how to make a cap arm cover (for light to moderate use) and a tall arm cover (for heavy use). Both are simple, two-piece designs that can be customized to fit any type of furniture arm.
Let’s jump into the tutorial!
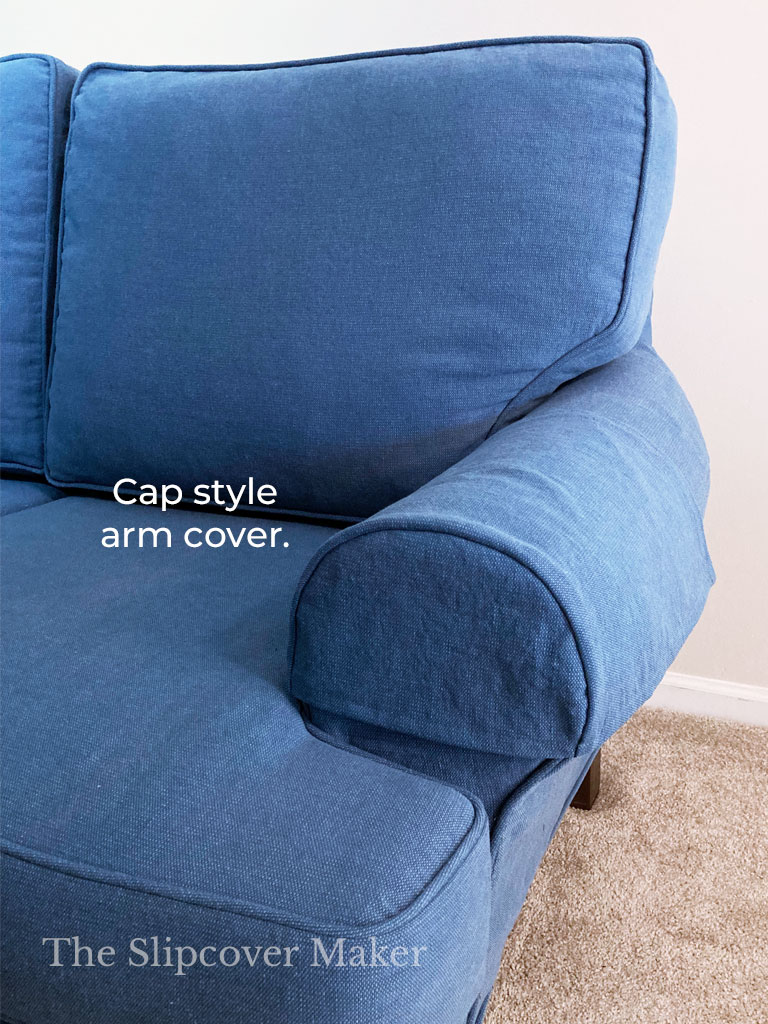
The cap arm cover is the most common design. The front piece is shaped to fit the upper contour. Even though this style only “caps” the sofa arm, it provides plenty of protective coverage.
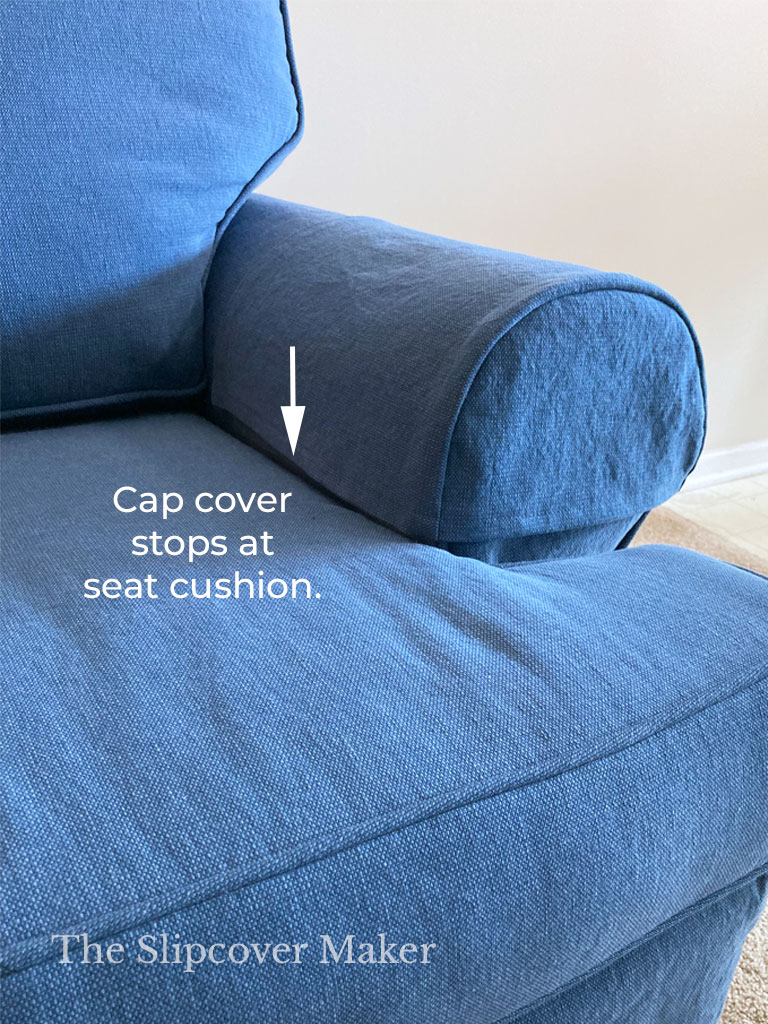
Because the cap style has somewhat of a shallow fit, the inner side hangs only to the seat. The length however can be customized. My cover measures 13 inches from front to back.
If your sofa or armchair gets light to moderate use, the cap cover is a good option and will stay put just fine.
But if your furniture gets a lot of traffic and the arm covers keep falling off, I would make the tall cover shown below. It will stay in place much better.
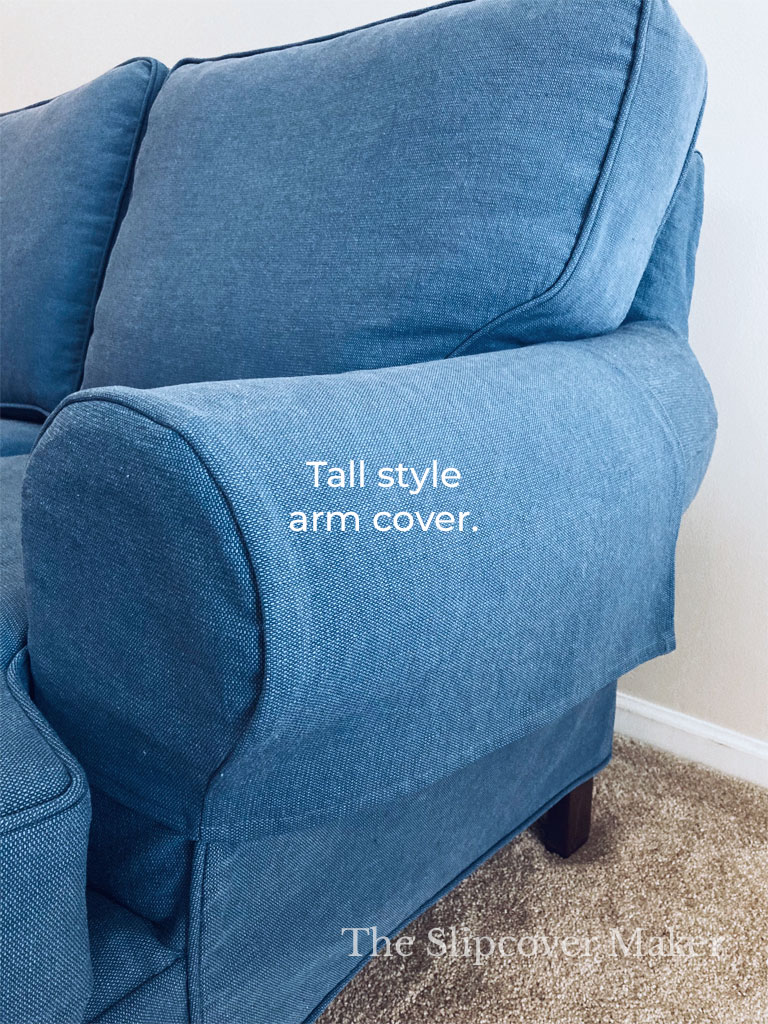
Above is the tall arm cover. It has a longer front piece than the cap style. As a result, the arm cover is wider and hangs lower on the sides. You can see the arm is fully covered.
To create maximum coverage, I extended the length of the cover to the back cushion. It measures 17″ long from front to back.
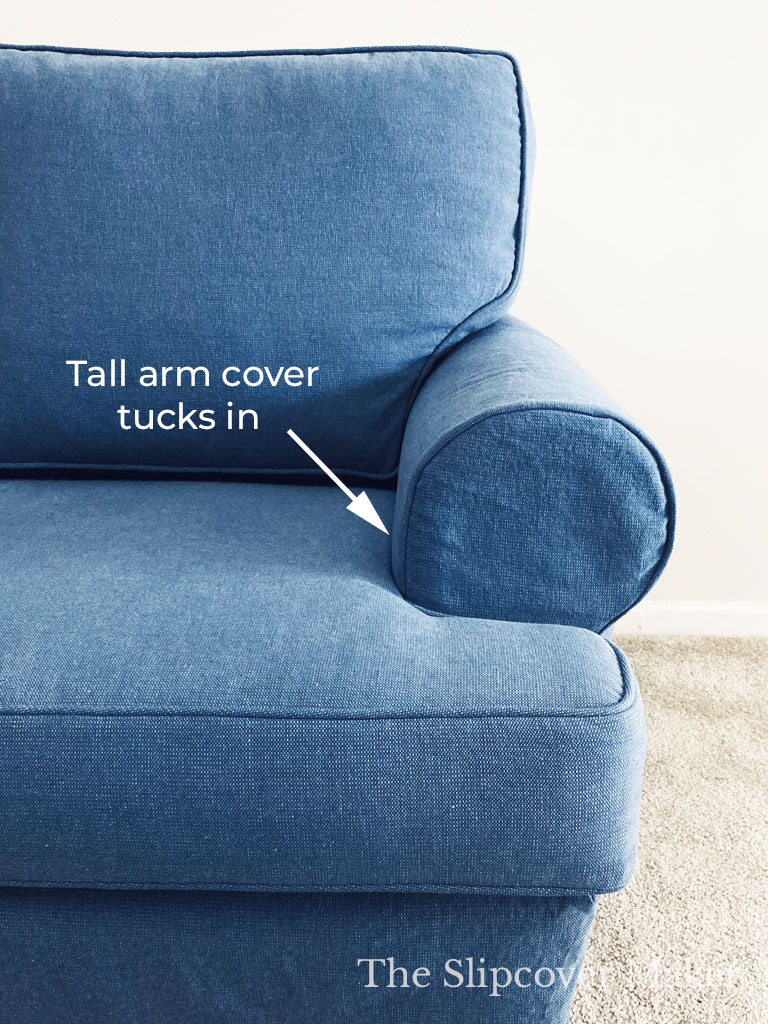
The long sides allowed me to tuck in my tall cover between the inner arm and seat cushion. The cushions fit tight on this sofa, which helps keep the arm cover in place.
No matter which arm cover style you choose, the construction is the same. Here’s how to make your own custom arm protectors.
Step 1: Trace Front Arm
Cut a piece of sturdy, light color fabric approximately two inches larger than the front arm on all sides. Pin to hold it in place.
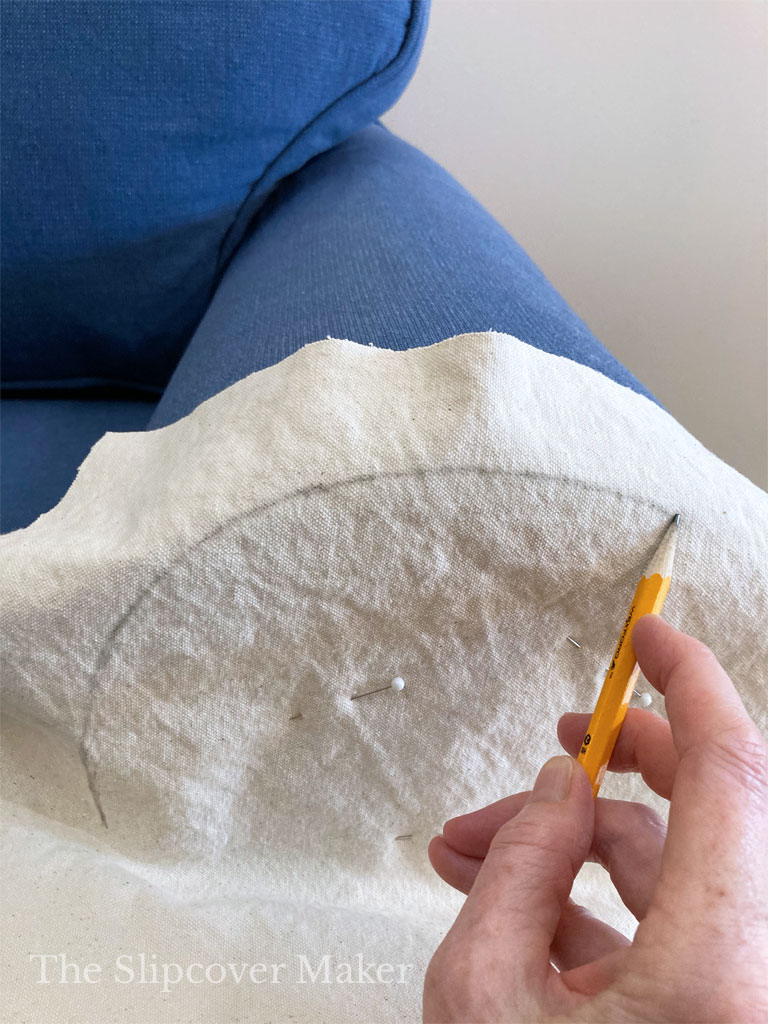
Using a pencil, trace around the front arm along the welt cord edge. In this photo, I’m tracing over my sofa’s slipcovered arm.
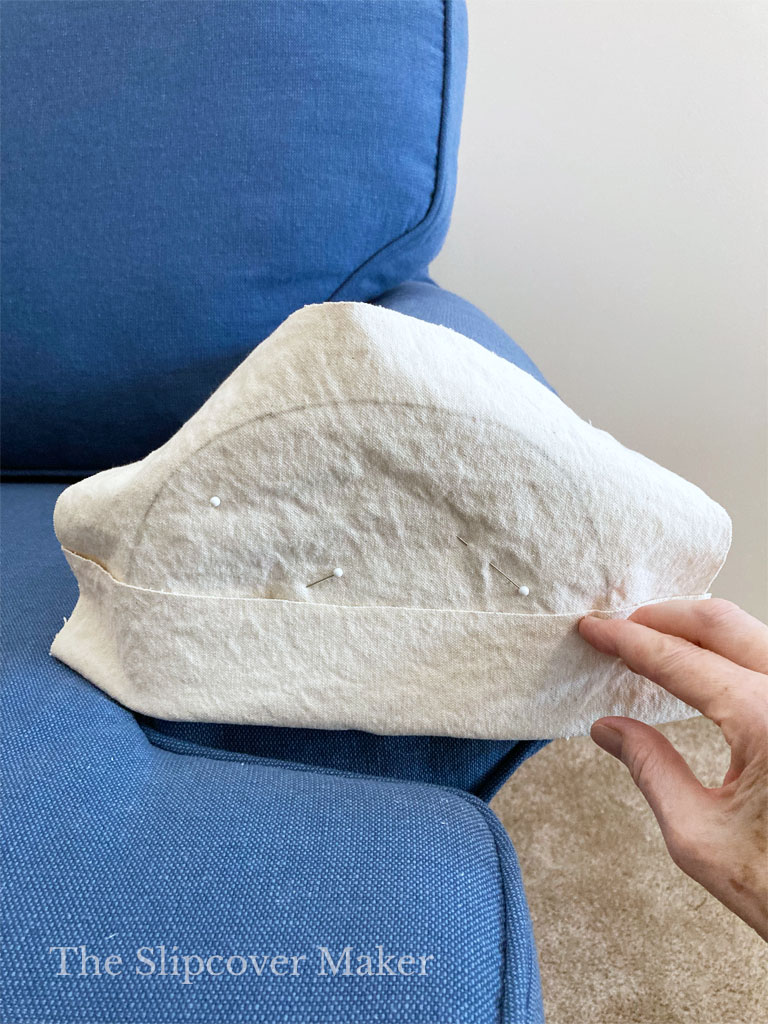
Fold up the fabric at the bottom to determine your desired hem edge. Here I’m making a cap style cover so I mark the hem to sit just above the seat cushion.
If you will be making a tall arm cover, remove the seat cushion so you can easily trace a larger portion of the front arm.
Step 2: Make Pattern & Cut
Remove your tracing and lay it on a cutting mat. Add 3/4 inch seam and hem allowances.
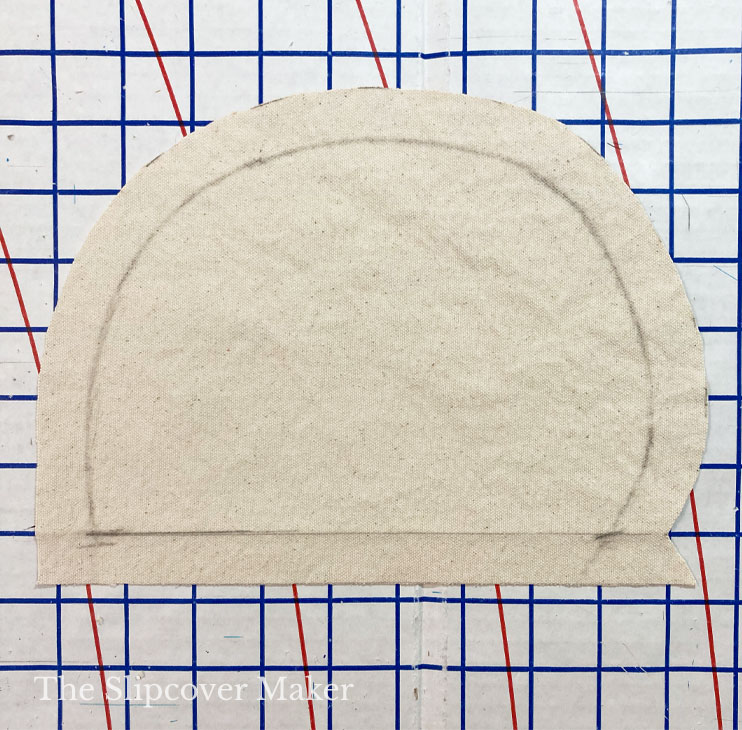
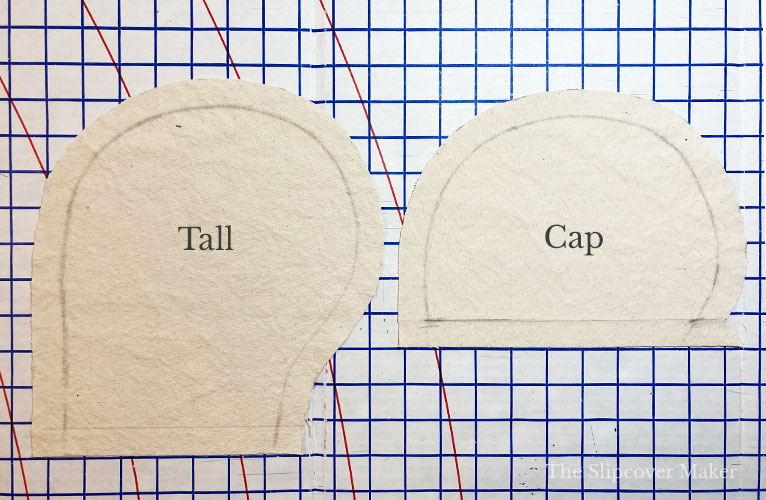
Above is my cap style pattern for the front arm.
By comparison, a tall style pattern for my sofa arm looks like this. See below.
Once you’ve created a pattern for the front arm, cut it out in your slipcover fabric.
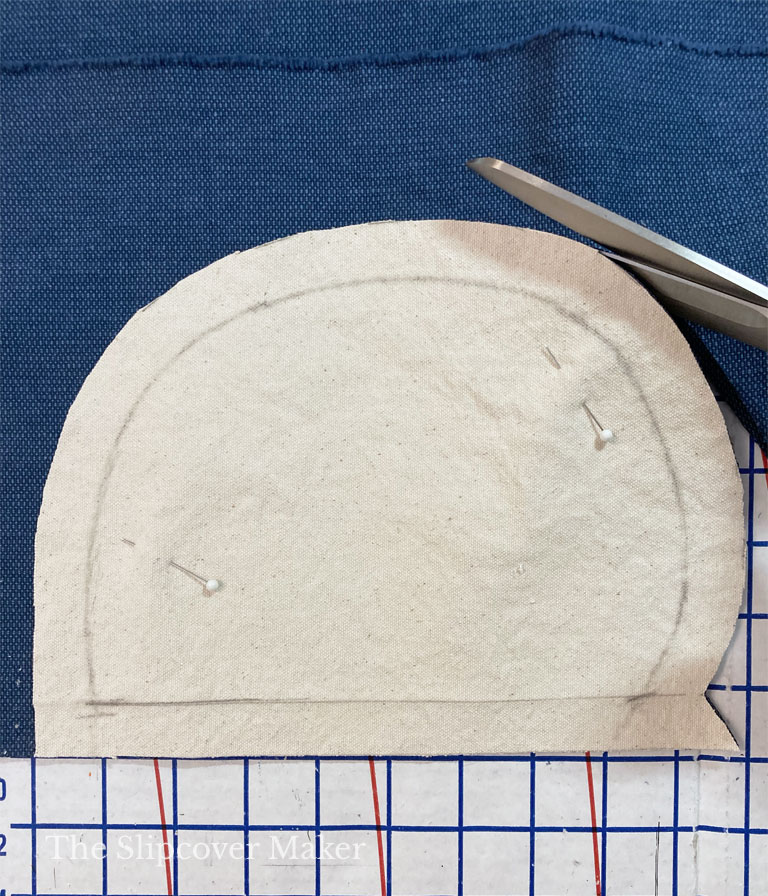
Place two pieces of fabric on your cutting table, wrong sides together. Pin and cut your pattern.
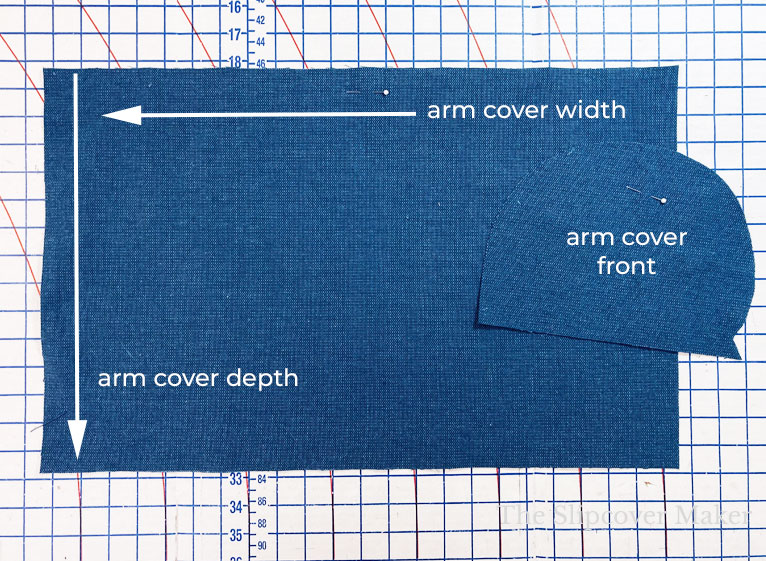
Cut the rectangle portion of each arm cover to match your desired width and length. Here’s how:
Width: measure around the curve of your front arm piece and add 2 inches.
Depth: measure along the top of your sofa or chair arm from the front edge towards the back where you want the length of the arm cover to end. Add 2 inches to that measurement.
These measurements include seam and hem allowances.
Step 3: Sew
With right sides together, stitch the front arm to the rectangle width with a 3/4 inch seam.
I like placing the arm piece on top of the rectangle. It makes it easier to guide the curved shape along the rectangle’s straight edge as I sew.
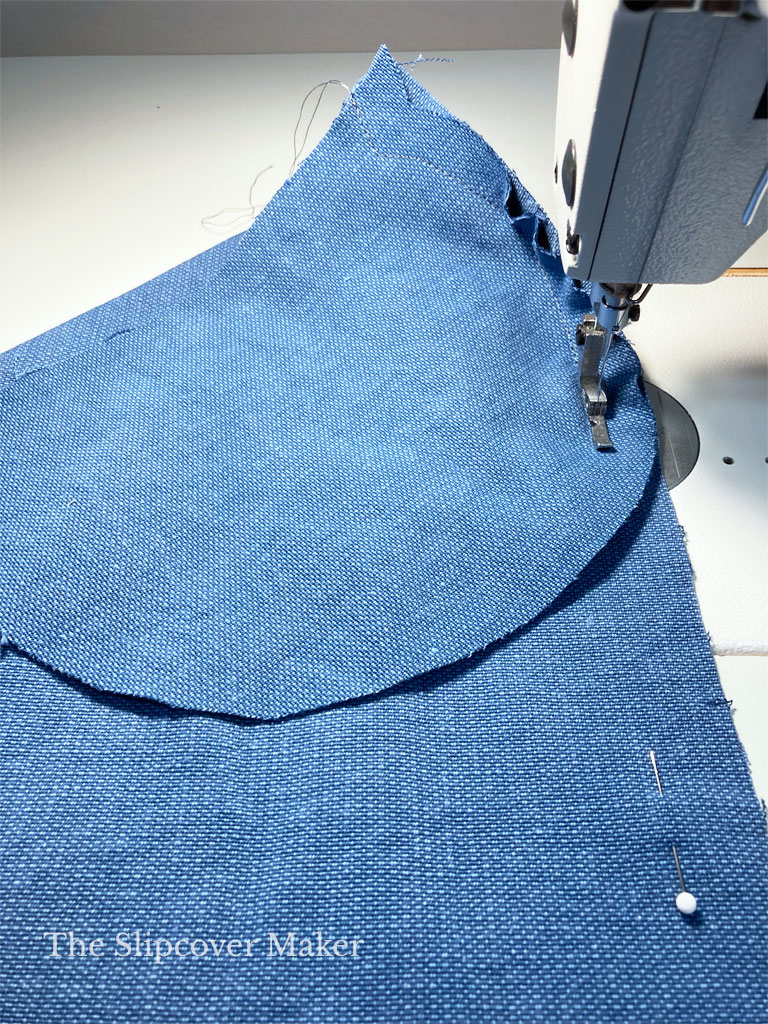
Armrest covers don’t require welt cord. I think they fit better without it. If you want to add welt trim, stitch it around the curve on the front arm pieces before you assemble your covers.
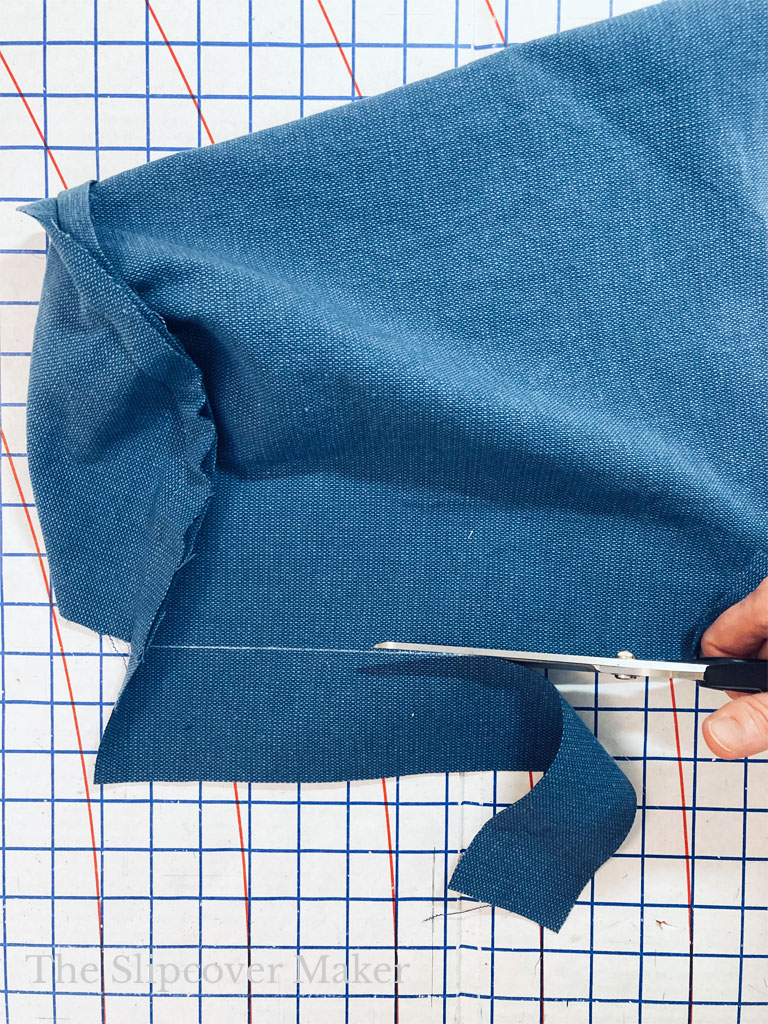
When you’ve finished attaching the front arm piece, you will notice a little bit of the rectangle fabric hangs below the front arm on one side. That’s normal. Simply mark a straight line from front to back and cut off the excess.
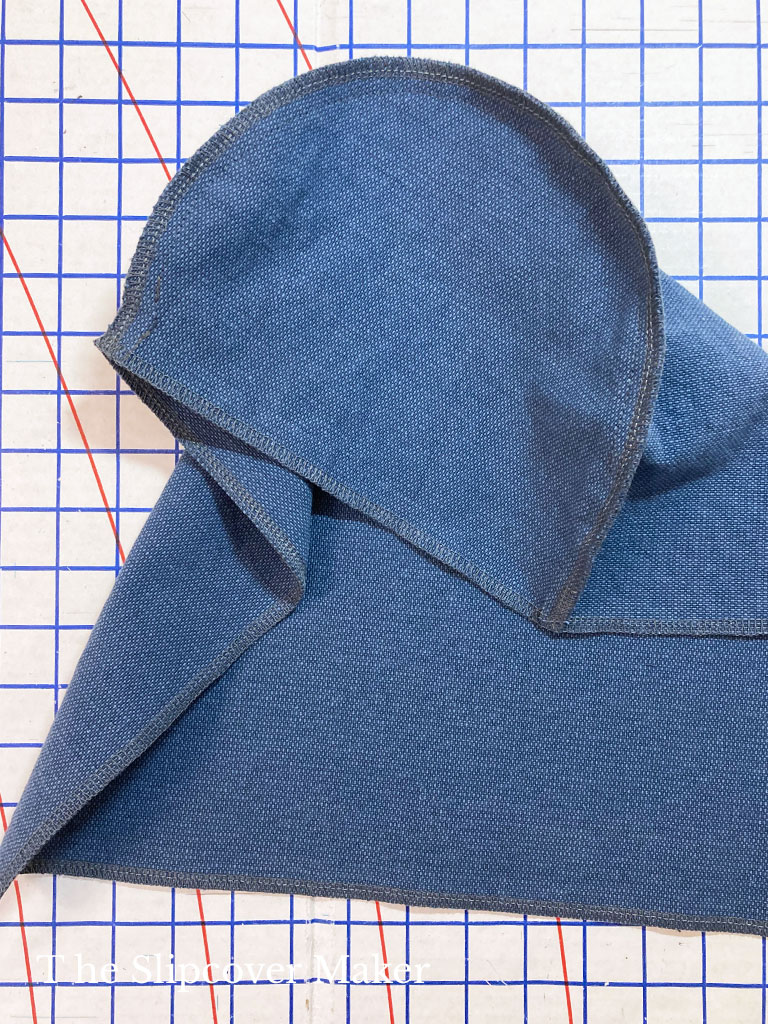
Then, overlock or zig-zag around the front arm seam allowance and do the same on all of the hem edges.
Step 4: Hem
The last step is to hem your arm covers.
Turn and press all hem edges 3/4 inch. Clip or pin in place and stitch 1/2 inch all the way around.
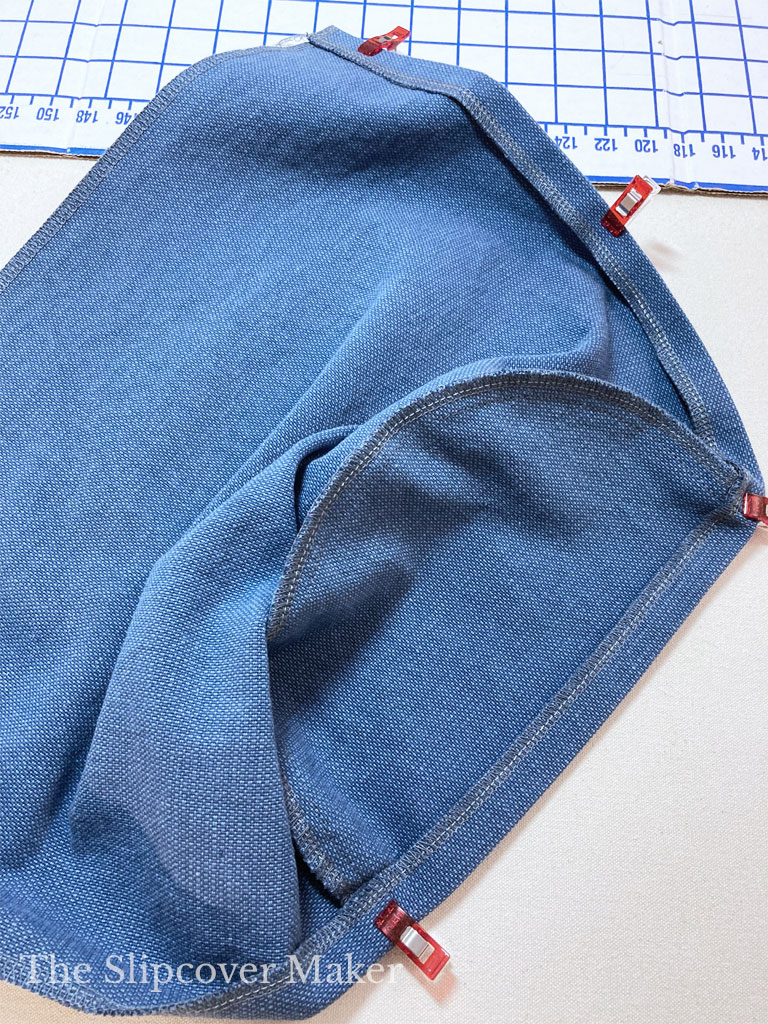
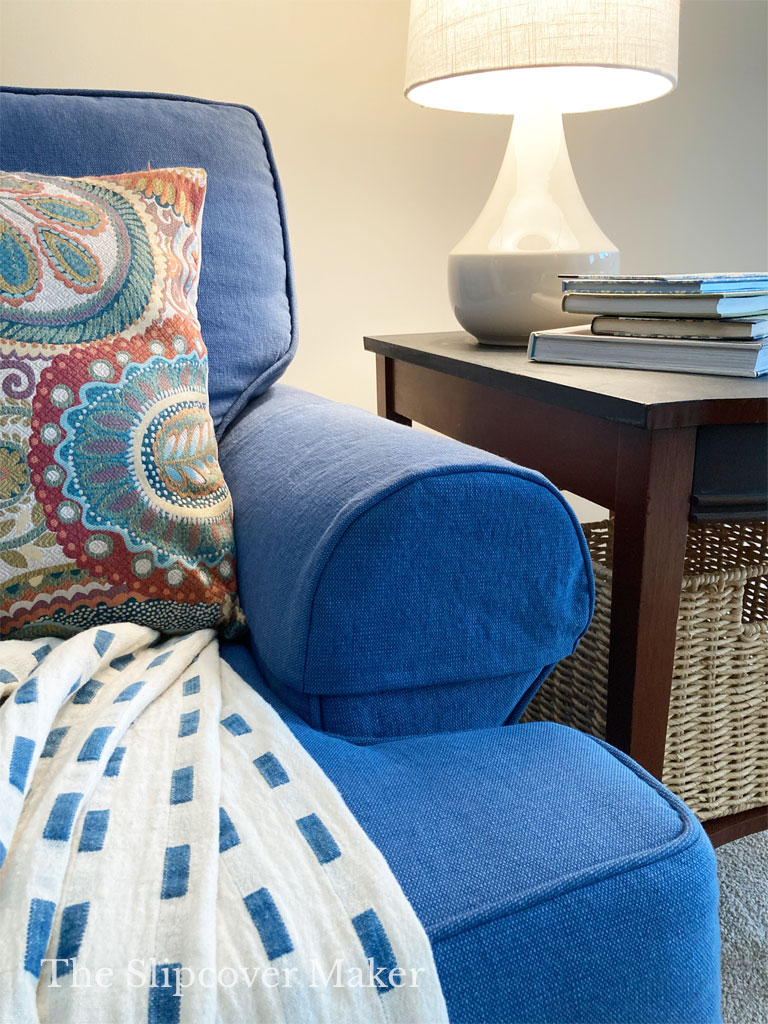
Here’s what my cap arm covers look like completed!
As you can see, I made my arm covers to fit a rolled arm sofa. But this two-piece, custom fit design works great for many types of furniture arms — rolled arms, track and tuxedo arms, shelter arms, etc.
Just trace the front arm shape of your furniture and make a pattern. Then, figure out the width and depth of the rectangle piece.
You will probably want to launder your arm covers frequently so be sure to preshrink your fabric!
Oh, and one last tip — if you’re using 7 or 8 oz. lightweight fabric for your arm covers I would line them to add weight and structure. Otherwise, they will be too flimsy and tend to fall off the arm easily with use.
Thanks so much for following! — Karen

Your tutorials are always beautifully formatted and easy to follow! Thanks so much!
Ramona, hi! I appreciate your feedback — good to know! Beautiful and easy to follow is my goal!
This is ANOTHER great post! I never thought about making a tall arm cover, it makes great sense especially for kids and pets.I always learn great tips from your posts! Thank you!
Wonderful, Natalie! So glad the tips are helpful. Yes, the tall arm cover is a gem!
Great easy to follow directions. Very helpful
How these ever fell off the trend bandwagon I’ll never know. This is the part of the sofa that most necessitates
the washing of your entire slipcover/upholstery. It’s an essential. Thanks Karen!
Ester, I agree!