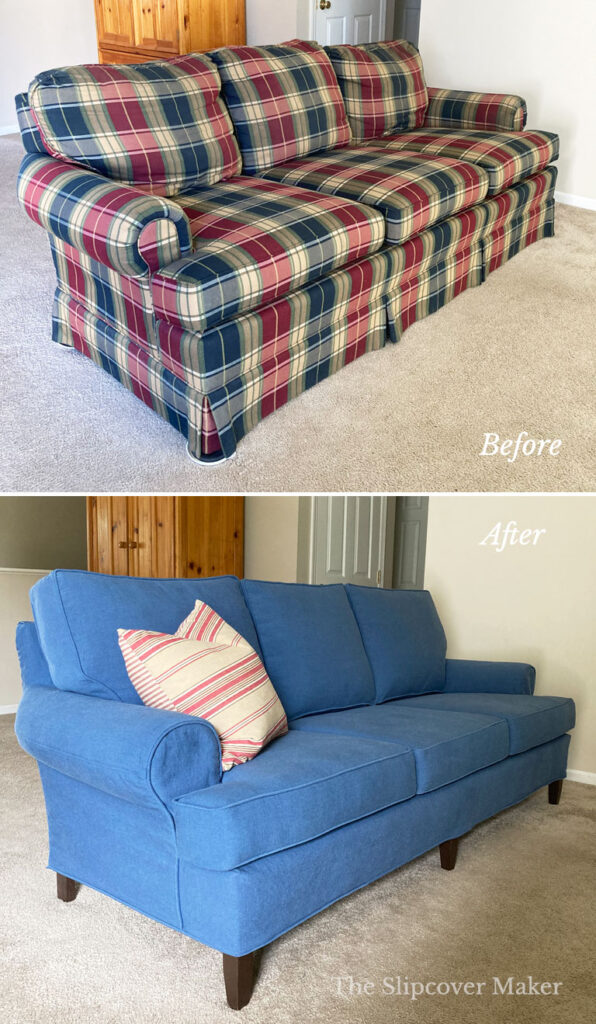
DIY Slipcover Makeover for Lazy Boy Sofa
Learn how-to transform an outdated secondhand sofa with a contemporary slipcover and new cushion inserts for under $1,000 — sofa price included! Get inspired with these money saving tips.
Have you shopped for a new sofa lately? It sure is challenging to find one that’s well made, affordable, and in stock. And fits your space!
I’ve been searching for a while with no luck. I finally bought a secondhand sofa and give it a super slipcover makeover.
In this post, I share my DIY process, tips and costs for turning my outdated sofa into a contemporary brand look-a-like.
The Sofa
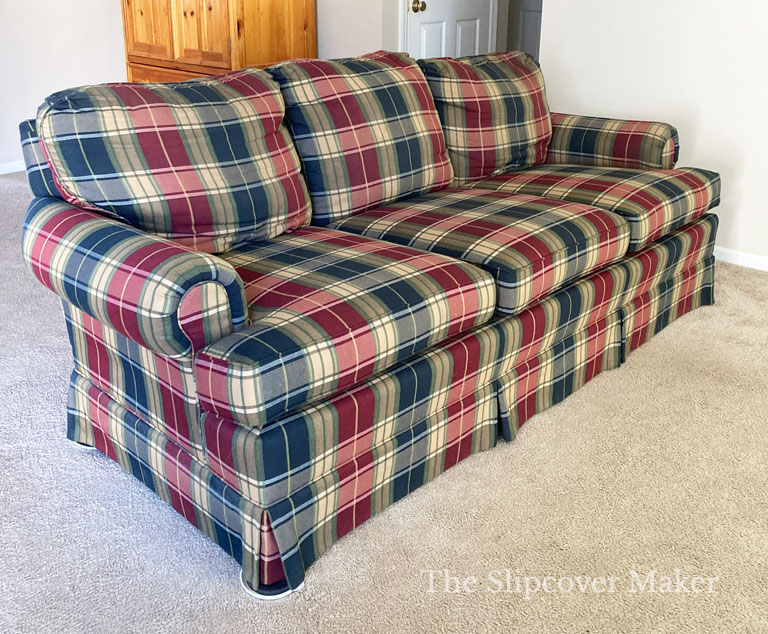
I found this 20-year-old Clayton Marcus / Lazy Boy sofa at my local Habitat ReStore.
Why in the world would I buy such a dusty, old, outdated piece? Because it’s better quality than the new sofas I looked at in my price range!
The frame is solid wood and sturdy. The springs are still tight and offer good support. It has good bones and a classic style. These are the features to look for when purchasing a secondhand sofa.
Design Plan
It’s a good idea to come up with a design plan before buying fabric, inserts, trim, etc. for your project. Here’s my design plan for this makeover:
- Remove the attached back cushions
- Remove the skirt
- Vacuum the entire sofa — maybe twice!
- Make boxed back cushions and stuff with new poly cluster fiber fill
- Order new custom foam inserts for the seat cushions
- Purchase heavy weight fabric with good coverage under $12/yard
- Create a contemporary slipcover style with upholstery-like fit
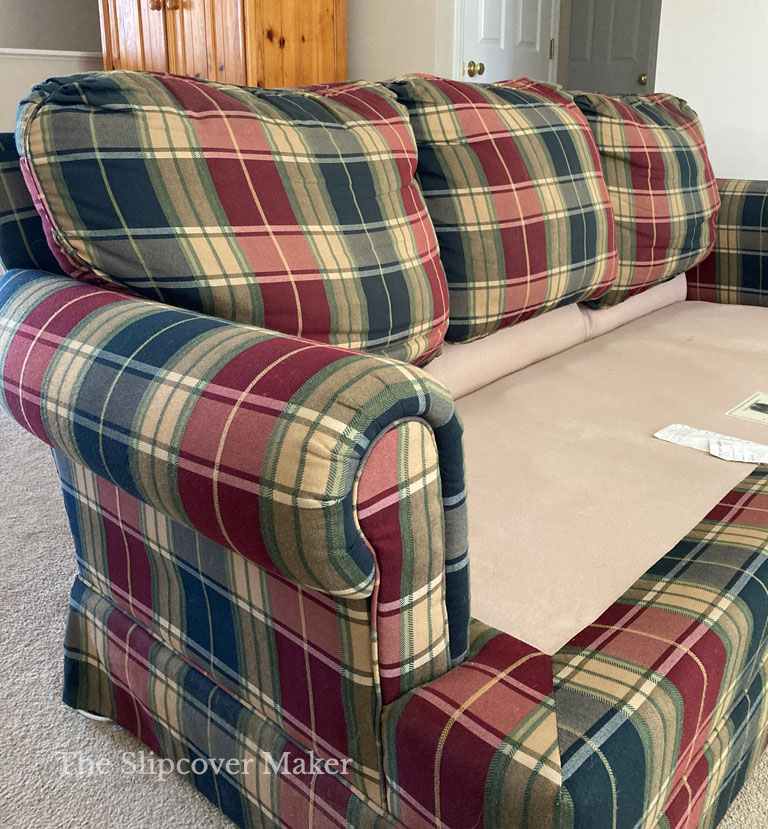
Back Cushions
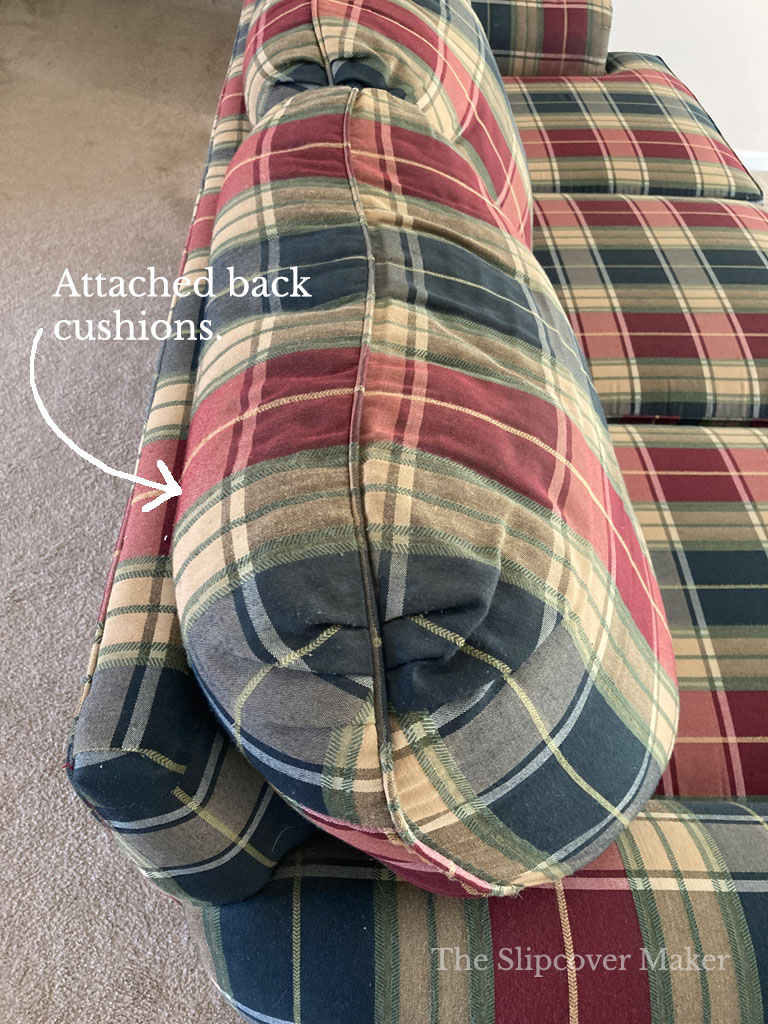
The original attached back cushions were compressed, dirty (inside and out) and sagging. They had to go!
I never slipcover over attached back cushions if they can be removed. These came off easy. Learn how to cut them off without ruining your sofa.
Removing attached back cushions means you have to replace them with loose cushions, which includes new insert casings, new fiberfill and new outer covers.
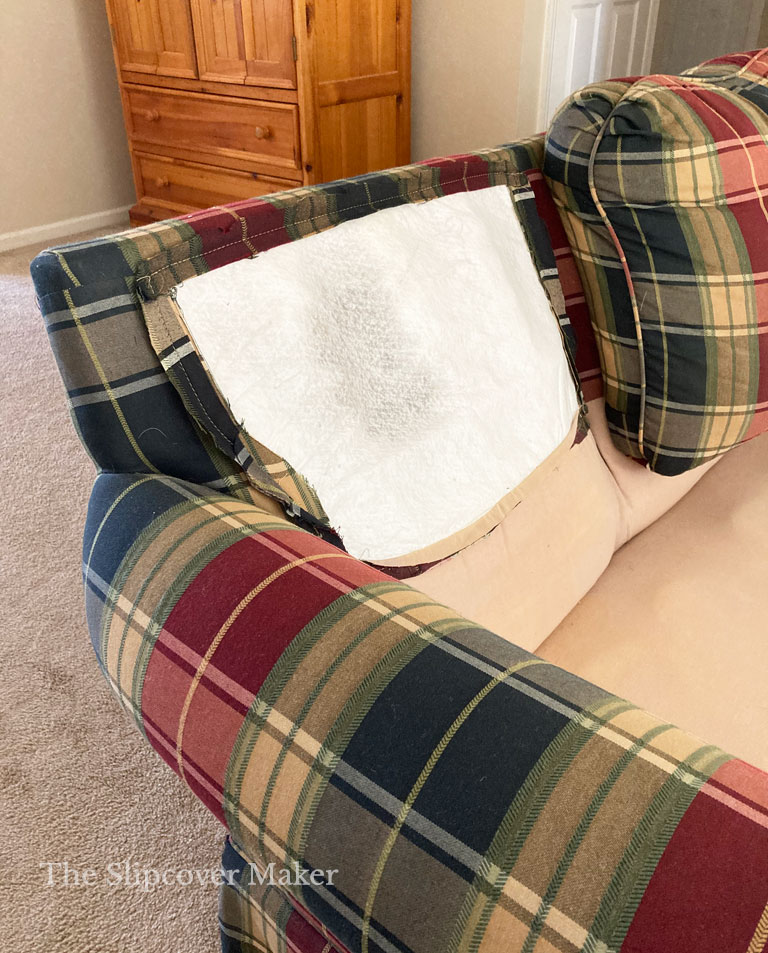
Above is what it looks like behind the back cushion after removing it. No gapping hole!
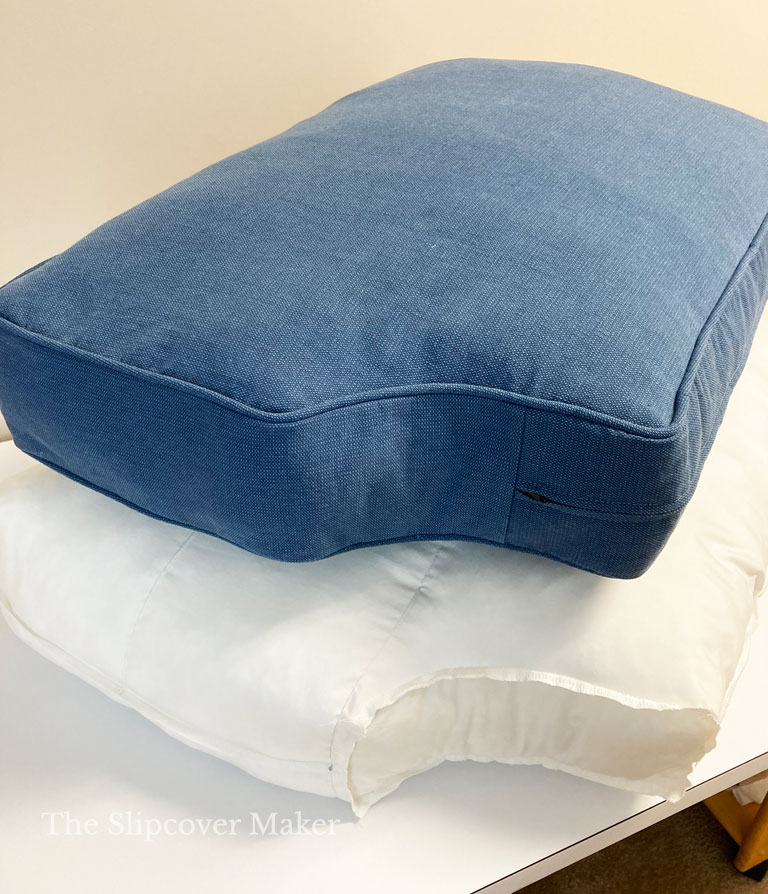
You can have back cushion inserts custom-made and filled with poly fill or a down/feather mix. No foam needed. Explore Foamorder.com or work with your local upholsterer.
Or, you can make them yourself. It’s easy and you will save $$$ money. However, it requires a little bit of extra work.
The good thing is you don’t have to start from scratch. Here’s what I did:
- Took apart original casings to use as patterns.
- Cut the casings from a cotton percale sheet I had on hand.
- Changed the Turkish pleat outer cover to a boxed style for a more updated look. I took apart the original covers and used them as pattern guides for overall shape and size.
TIP: take photos of the casing’s inside baffles just in case you need a construction reference when it’s time to assemble the new ones.
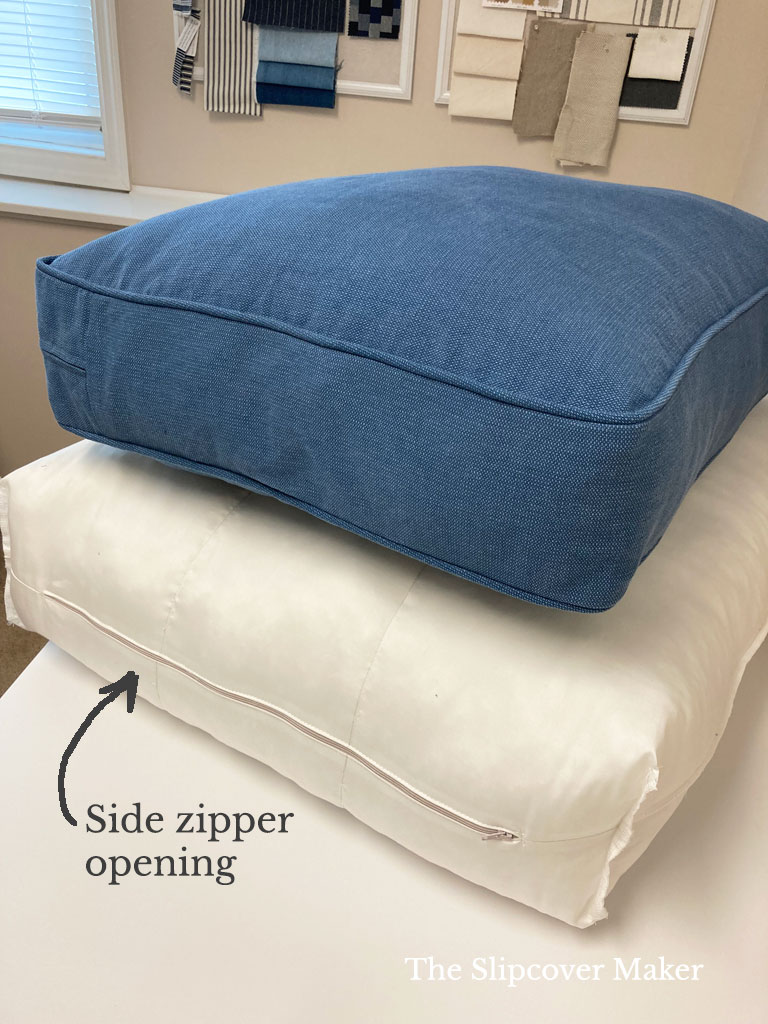
It’s important to cut insert casings larger than the cushion covers. Mine are 2 inches taller and 2 inches wider. I filled them with poly cluster fiberfill. Here’s how I fill a back cushion.
TIP: Don’t pack in the fill too tight. When you’ve added your desired amount of fill, the insert should feel fluffy, slightly dense and pliable. If your insert won’t fit back into your cushion cover, you’ve over stuffed it and will need to remove the excess.
I always put a zipper in on one side of the casing cover. That way I can easily access the fill when I want to adjust the amount without having to rip out stitches and resew the seam by hand each time.
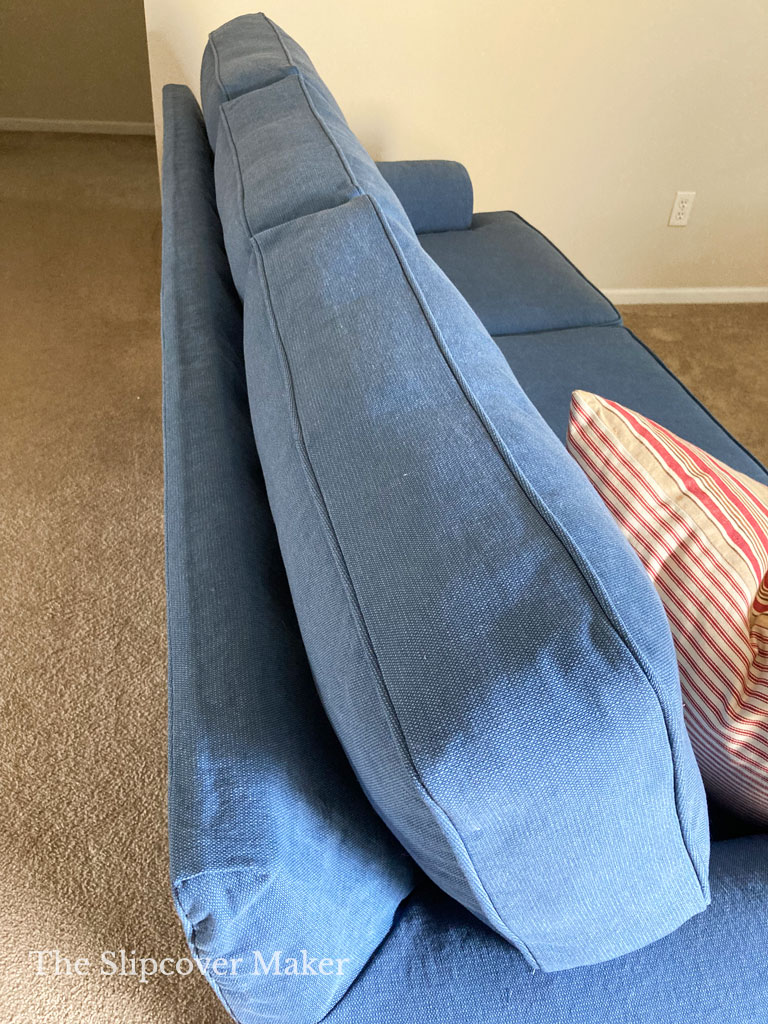
The boxing on my new back cushion covers is 5 inches wide. That’s an average width for most sofas and in this case, it matches the seat boxing.
I used approximately 6 pounds of poly cluster fill in each cushion, which created a plump look and supportive feel. Your cushions might require more or less, depending on the size of the cushion cover and the level of support you want.
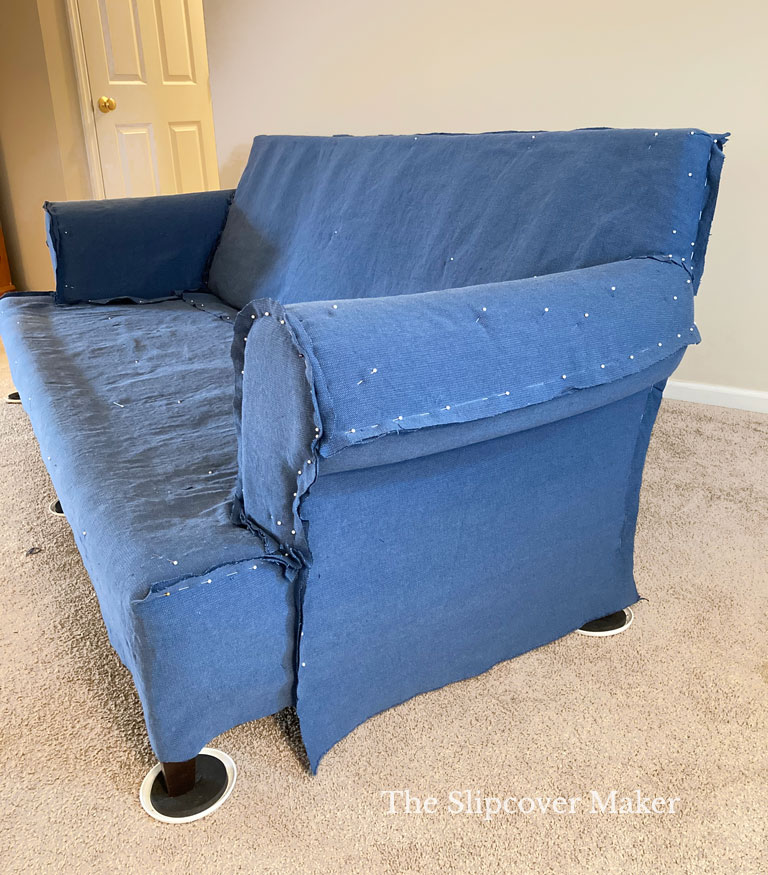
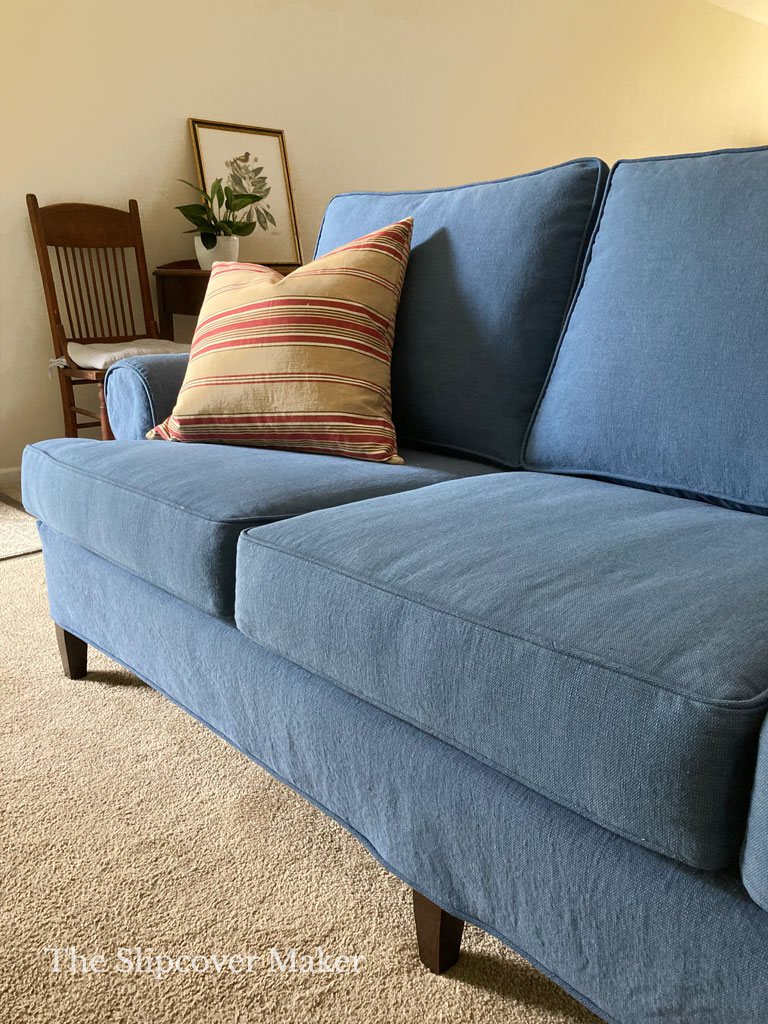
The Slipcover
After removing the back cushions and skirt, I pin fit the sofa using the right side out method I teach here.
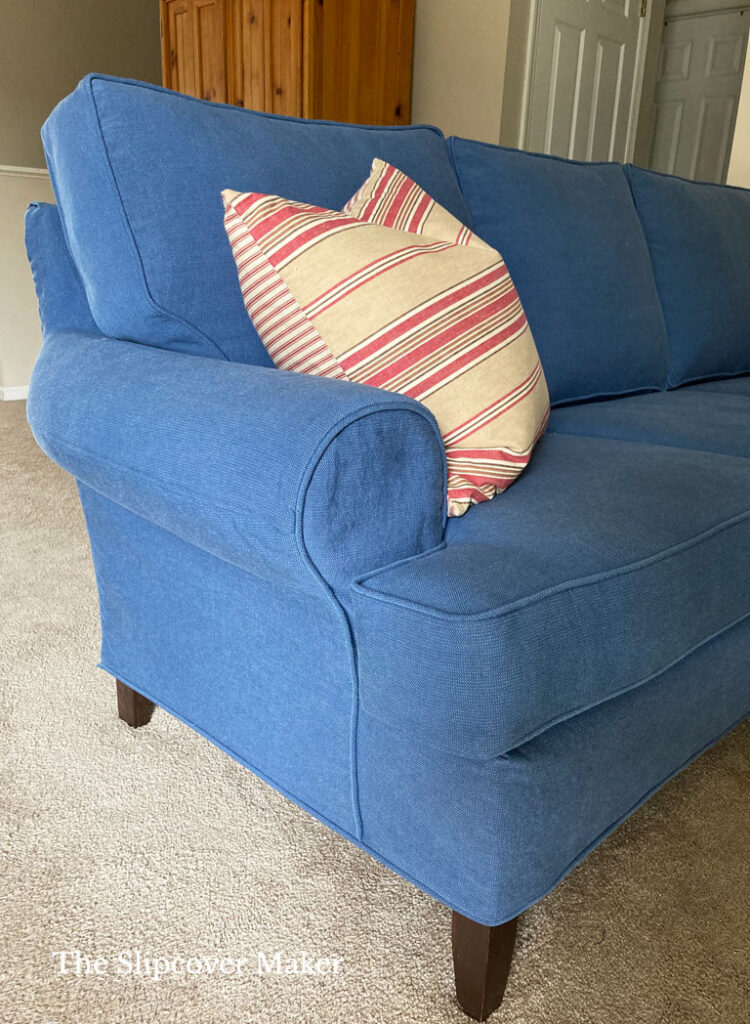
I created an upholstery-like fit. The outer arm seams needed shaping (curved) to control the fullness at the back and eliminate tucks. I was going for a smooth, clean look.
Fabric: heavyweight 12 oz cotton canvas found at my local fabric store on clearance.
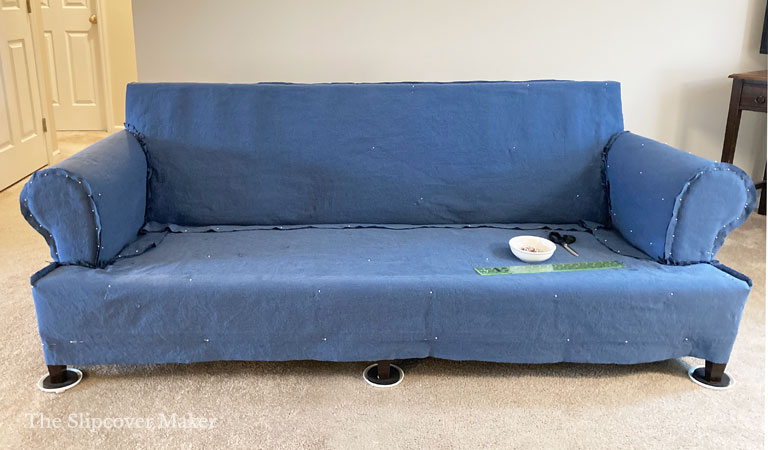
If you look at the front arm on the original upholstery, you will see a step down design. Instead of replicating it, I created a flat panel front arm. It’s easier to pin and looks more modern.
I trimmed the seams and hem with welt cord. The hem stays put with Velcro. Here’s how.

Seat Cushions
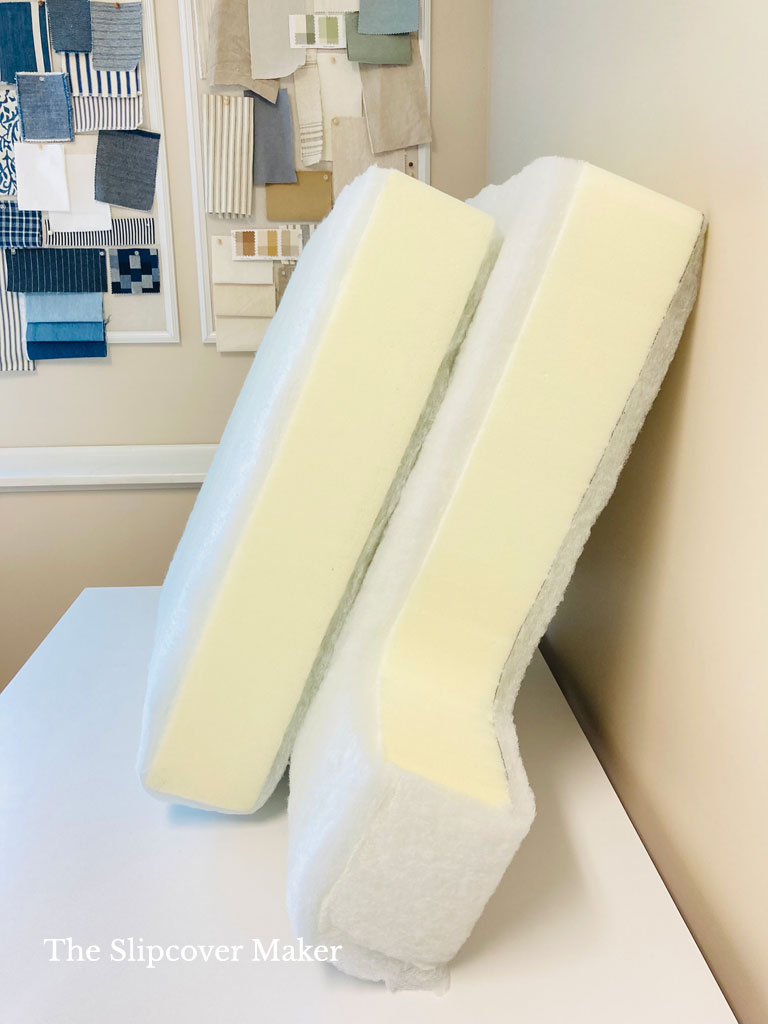
It was no surprise the original foam inserts in the seat cushions had lost their support.
At first glance, they didn’t look compressed at all. But when I sat down, the cushions flattened easily. The springs under the cushions were still in good shape. I made sure of that before I bought the sofa. It was only the old foam that was super squishy.
I replaced all three inserts with Everflex foam V44 Firm from FoamOrder.com. They cut my inserts to size and wrapped them with poly batting. I added a second layer of batting myself for a little extra crown.
Cost
So, how much did I spend on my DIY makeover?
- $65 sofa
- $125 sofa delivery fee
- $385 for 3 foam inserts for seat cushions
- $40 extra poly batting wrap and spray adhesive for foam inserts
- $90 poly cluster fill for 3 back cushions
- $0 casing fabric for back inserts
- $275 fabric 20 yards, zippers, welt cord, and Velcro
- $0 slipcover labor
TOTAL $980
The biggest savings in a project like this will come from making the slipcover yourself and choosing a fabric priced under $12/yard. You’ll save even more money if you start with a sofa you already have.
What ever you do, don’t skimp on the cushion foam inserts. Buy the best quality — it’s worth it!
This is beautiful! As always, a quality job! Thanks for always referencing your sources. It’s super helpful and makes it much less intimidating when looking for the right materials to use. Keep up the good work!
You’re welcome, Ramona! Thanks for following.
I would have never guessed it was the same sofa! Wonderful job and vision!!!
Thanks, Jody!
Wow! Talk about an upgrade. Most people wouldn’t look twice at the original, and it’s hard to believe it’s the same piece once you finished.
I just finished a slipcover for a chair I bought on FB marketplace for $75 using your instructions. It was in in great shape it just had hideous fabric. So I didn’t need to replace the foam. I really appreciate your generosity in sharing your methods!
You’re welcome, Susie! Good going on your FB chair makeover!
Karen!! You are a genius! This is truly inspiring. I am currently working on reupholstering an antique sofa that was stuffed with horse hair. (So gross). I love this post because you 1. show that older furniture is often better quality 2. show us how to buy fabric and recover it for a very reasonable price. Thank you for putting this post together.
I appreciate your comments, Anna! So glad the post inspired. Your horse hair stuffed sofa sounds like a challenging project. Can’t wait to see the results!
Thank you for links – they are useful.
Also your work is impeccable.
Thank you, Anna!
It’s amazing what someone with talent like you can do. I’d have walked right past this sofa thinking it couldn’t be made modern but you did it. Another great tutorial and possibly my favorite since I want to sew a white cotton slipcover to brighten my sofa for summer. Mine has shelter arms so should I do them the way you did these roll arms or is there a better way? I searched shelter arms on your website but came up with no results.
Thanks, Chris! Some shelter arms have a flat panel front arm like the rolled arm I did. And, others are designed with the inner arm wrapping around the front with a pleat at the top. I would follow your sofa’s upholstery seams as a placement guide for your slipcover seams.
Karen, I am so grateful for your gracious nature, readily sharing your talents with others. Thanks to your slipcover blog instructions I have “re-habbed” 3 sofas and 4 chairs, with 3 more chairs waiting for their facelift. I saved a great deal on foam inserts by cutting, and wrapping them myself. They are firm and like new, but you are right, there is much work to shaping the foam yourself BUT it is accessible if one has patience. I am not a sewer, in fact, I didn’t even own a sewing machine, so your step-by-step instructions, hints and tips distributed throughout your blog became my ‘sewing bible’. I haven’t attempted welt cord yet but fortunately today’s style is simple, so my slipcovers are on par with trend! I now have a keen appreciation of a well-fitted cushion! Thank you, Thank you!
You’re welcome, Julie. I’m thrilled you’ve been able to apply my instructions and tips to your many slipcover projects! Cheers to simple design and well-fitted cushions!
I had and sofa just like the one you slipcovered. You did such a beautiful job–it makes me wish I still had that old sofa. You inspire me. Thank you!!!!!
Happy to inspire, Terry! Some of the older sofa models are so well made. Keep an eye out!
Omgoodness Karen, your skills amaze me! I saw the image with the pin fitting and said out loud, “I wish I could pin fit like Karen!” My dog agreed! Haha. Seriously, this makeover is gorgeous – I’m loving the denim-looking fabric so much. I’ve been thinking that’s what I should do with our existing sofa. Thanks for the inspiration! Pinned 🙂
Thanks, Cindy! A blue denim look would look fab with the two natural chair slipcovers you made!
As always, your work is so inspiring!!
Thank you, Claire!