Slipcover Fit Tips for Tight Seat Armchairs
Are you making a slipcover for your tight seat armchair but not sure how to fit the built-in cushion? Here are my best tips for fitting fabric smoothly over the seat and keep it tucked in.
A tight seat is basically a built-in inner spring cushion. It can be much more challenging to slipcover and keep tucked in than a chair with a flat deck under a loose seat cushion. But it can be done with success when you understand the function of these three features:
- Seat shape
- Tuck-in space
- Arm style
Read on to learn how a tight seat influences slipcover design and what you can do to create a smooth fit with good tuck-in support.

1. Seat Shape
The two most common seat shapes on a tight seat armchair are T-shape and standard shape.
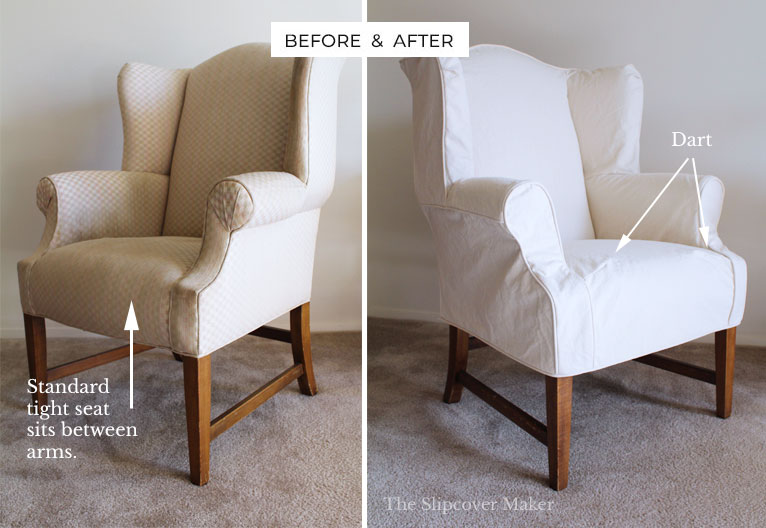
A T-shape tight seat extends to the outer arms. The T part sits snugly against the arm front. By comparison, a standard tight seat is a rectangle shape and sits between the arms.
Both of these seat shapes have a rounded top that slopes to the front, sides and back. It’s designed with a (tuck-in) space that separates the sides and back from the inner chair, which frees up the seat to easily move up and down. The seat compresses when you sit on it and springs back into place when you stand up.
Regardless if your tight seat is T-shape or standard shape, it’s the rounded, sloped design that makes it tricky to pin fit. The steeper the slope the harder it is to pin fabric smoothly.
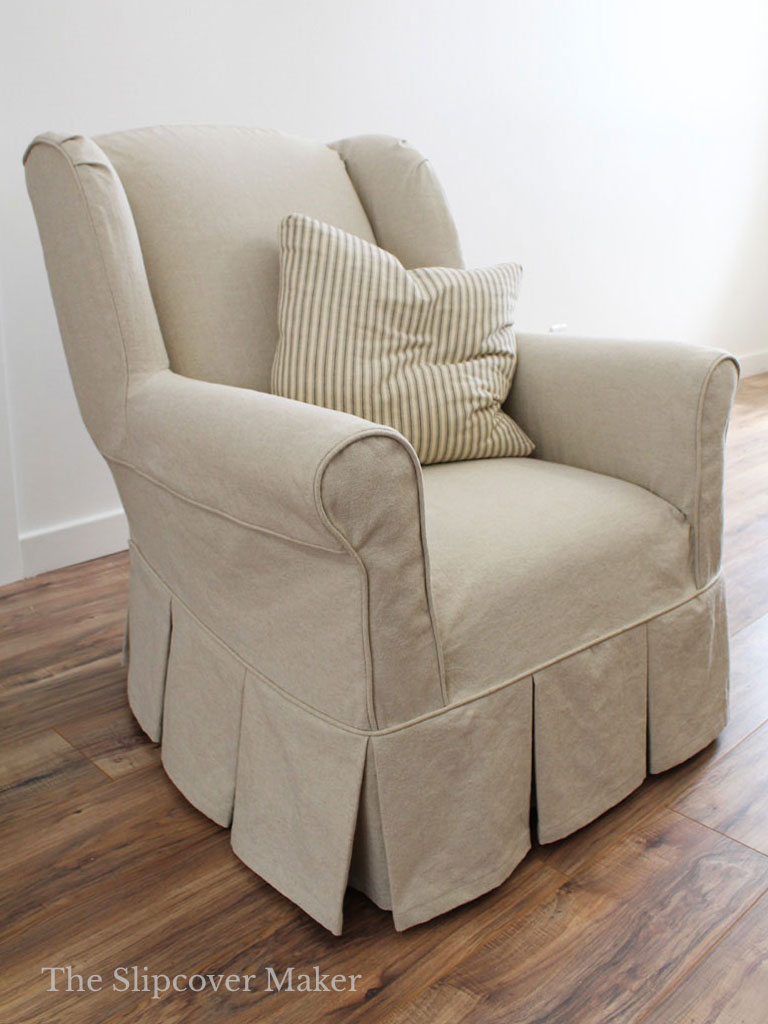
For example, the T-shape cushion on the rolled armchair had a subtle rounded top. It was easy to pin fit the stripe fabric flat and smooth.
But on the wingback chair, the seat slope was steep towards the arm. It caused excess fabric to bunch up. I had to control the fabric fullness with a dart on each side of the front seat. See photo above.
Tip 1: Strategically place a tuck or dart to control fabric fullness over the seat as you pin fit, if needed.

2. Tuck-in Space
A slipcover for a tight seat chair is created with tuck-ins. A tuck-in is an extension of the seat fabric that tucks into the space around the seat.
The tuck-ins help hold the slipcover in place. They are sewn to the inner arms and inner back tuck-ins. Learn how to pin fit tuck-ins here.
How well your slipcover will fit and function over a tight seat will depend on the type of tuck-in spaces that are built into your chair.
Example: I created the tuck-ins on the striped slipcover (above) to fit the deep tuck-in space at front arms and all the way around the seat. It allowed the cushion to move freely (up and down) without pulling and tearing the slipcover at that stress point.
The tight, deep tuck-in space worked great. It gripped the slipcover tuck-in flaps and kept the seat fabric smooth and in place.
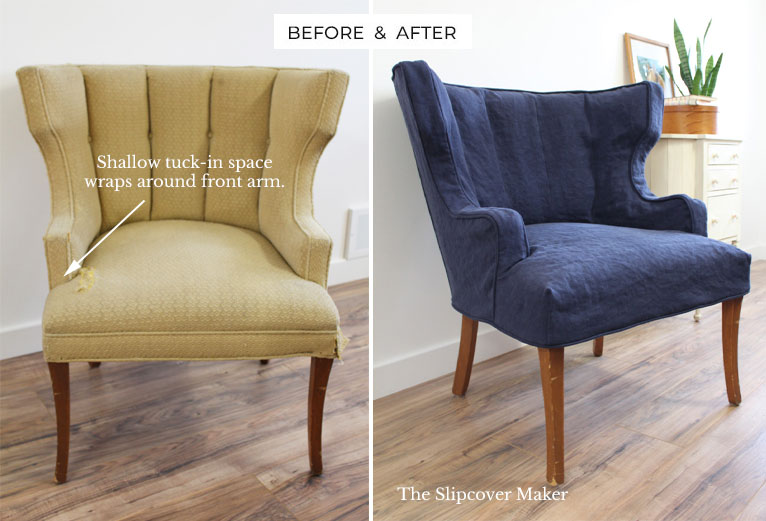
Above is another example of a T-shape tight seat. But I discovered after completing the project this chair was not a good candidate for a slipcover. Why?
The tuck-in depth was barely a half inch at the front arms and only one inch around the seat. The slipcover ended up tearing at the inner front arms. On a tight seat slipcover that inner front arm area is a stress point.
The tuck-in spaces were just too shallow. The depth didn’t match the springiness of the seat. The slipcover couldn’t move with the cushion.
TIP 2: Make sure your tuck-in spaces are reasonably deep and tight to ensure the slipcover can move with the seat and stay tucked in.

3. Arm Style
Tight seat armchairs are designed with many different arm styles. Rolled arms, English rolled arms, track arms, pleated arms and shelter arms are just a few examples.
Why does arm style matter? Because it dictates the tuck-in starting point. It will also influence how you construct the slipcover tuck-in at the front arm area.
On a slipcover, the tuck-in starting point is made up of an intersection of seams that have to shape to the chair and lay smoothly. It’s the number one stress point on a tight seat slipcover so it needs to be sewn correctly, and reinforced, in order to function without tearing.
If you are new to making slipcovers, this area can be a challenge to pin fit!
TIP 3: Identify where the front of the tight seat meets the front arm seam. Then, look at where the inner arm section meets the front arm at the seat. You will then see, and feel, where the tuck-in starts and get an idea of how to join the sections when you pin fit.
That’s if for this week! If you found this post helpful please let me know in the comments. Thanks very much for following! –Karen
Great instructions , Karen !
Thank you so much. I never would have thought to cut the arms all the way down in the front of the chair. I understand what to do now. I am due to have a knee replacement end of August. Hopefully, I will be able to tackle this project once I am able. When I finish I will send you a picture.
You make it looks so easy Karen! I had some trouble with my slipcovered chairs and the tuck-in areas but fortunately, they were not the tight seat style. The separate seat cushion helped me out!