Slipcover Seam Placement Made Easy
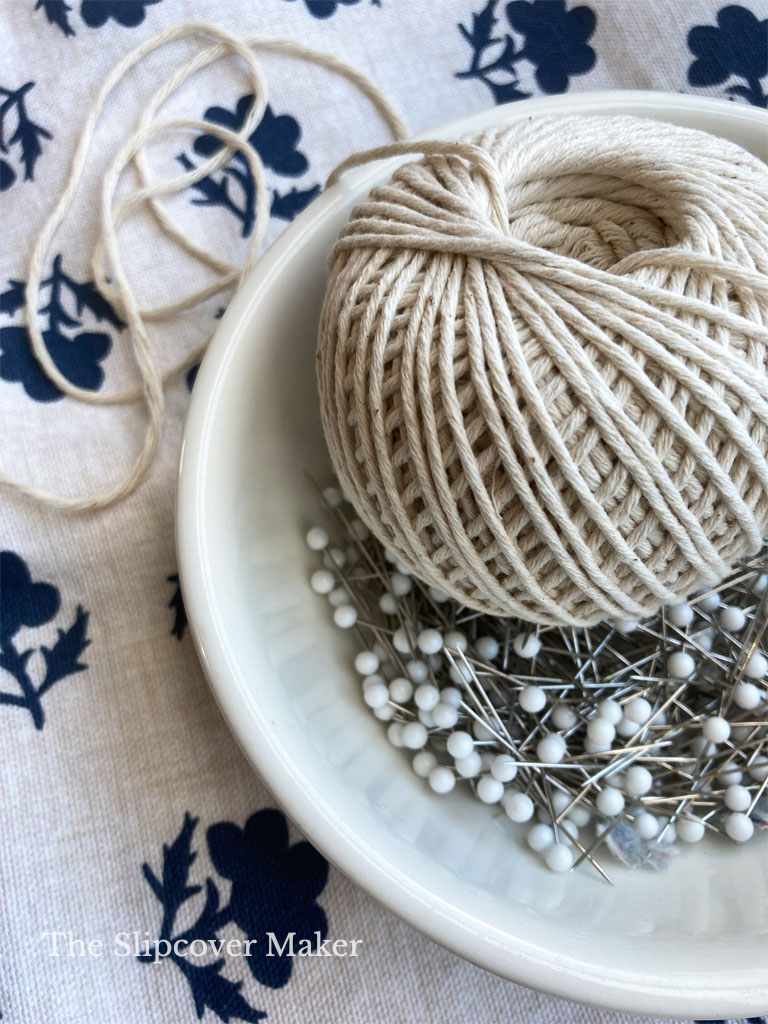
Learn how to modify seam placements as you pin fit your slipcover. My method uses cotton household string and makes pinning straight and curved seam lines easy.
One of my most popular blog posts was this one from January 2022. It’s about my 3-step process for designing a simple slipcover.
I touched on how to create a no-fuss fit by modifying seam placements. Instead of following all the upholstery seams as a guide for your slipcover seams, you can reposition certain ones for better design and function.
Today, I want to dive deeper. I’m sharing my go-to method for marking new seam placements on your furniture using cotton string. Here’s how it works, when I use it, and why.
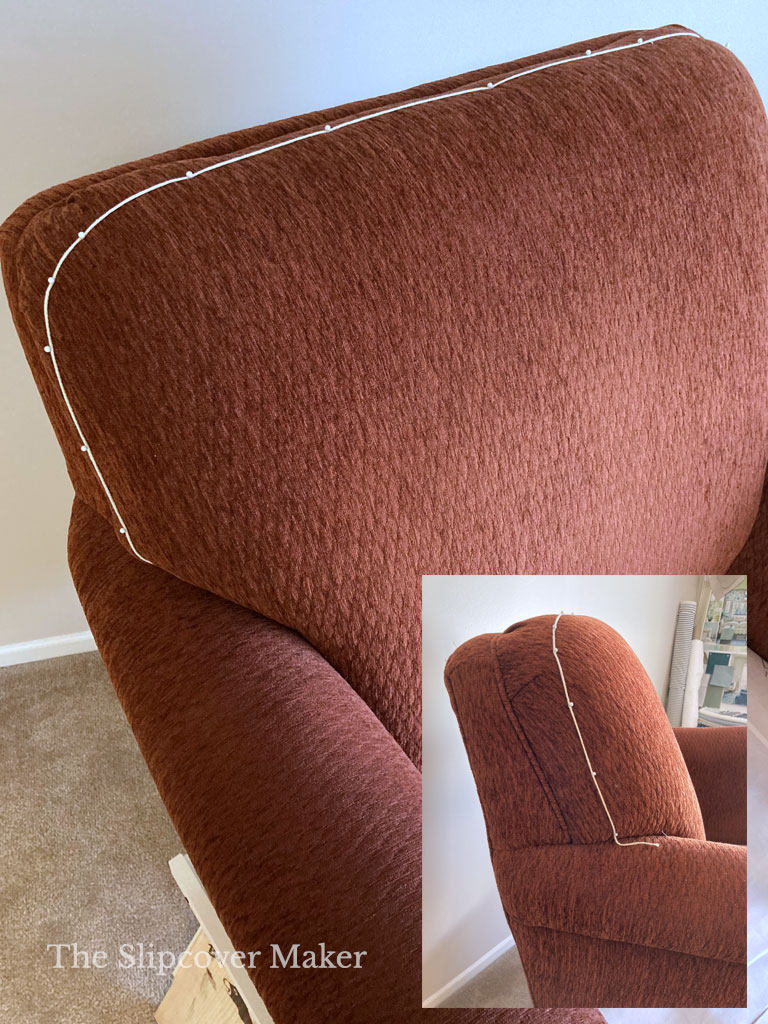
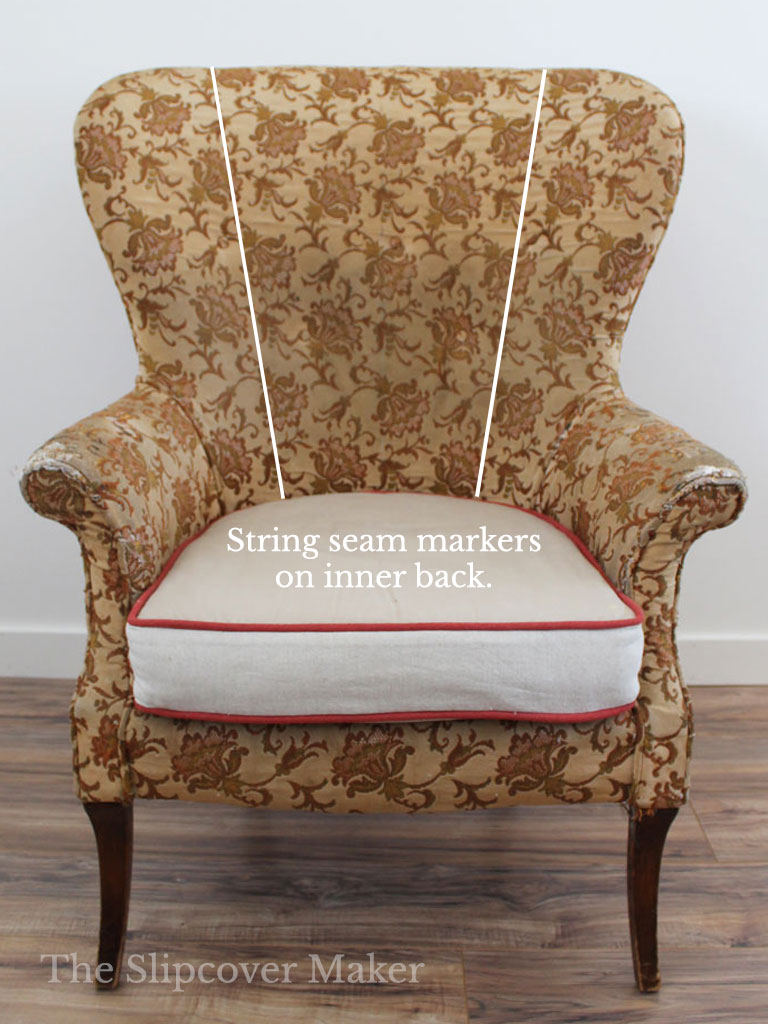
If you read last week’s post, you might have spotted a string seam marker on my upholstered armchair.
Before I started pin fitting my chair with the cotton linen canvas, I wanted to change the seam placement on the attached back. I knew if I followed the upholstery seam, my slipcover would end up with poofy pleated corners. Not a good look.
So, I used string to mark my new seam. I pinned it on the inner back along the sides and top close to the front edge where the cushion begins to roll forward and down.
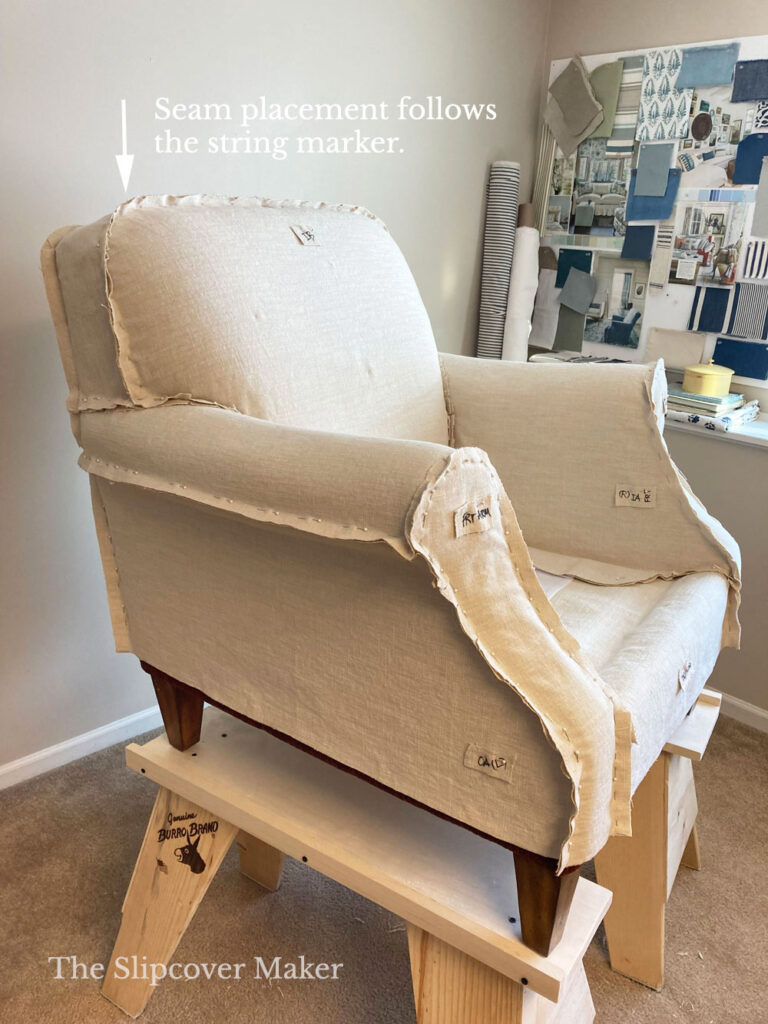
The new seam line bypassed the bulky areas of the cushion, especially the corners.
That allowed me to pin the fabric flat and smooth on the inner back. No excess fabric to pleat or gather around the corners.
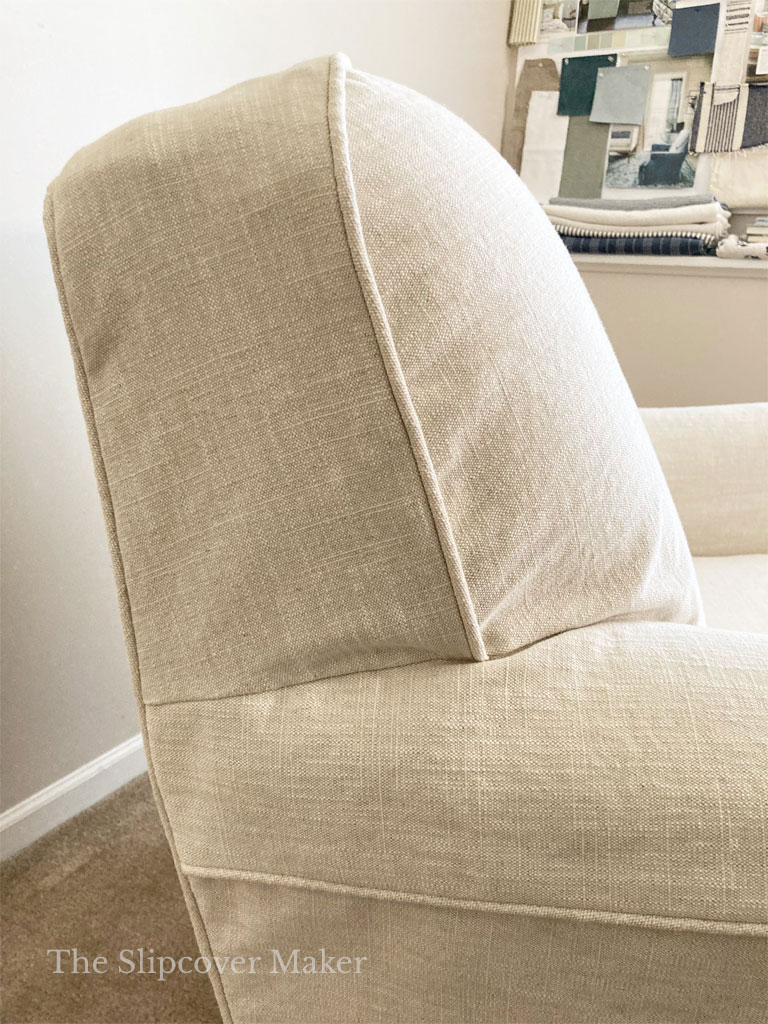
Above is the new seam on the attached inner back, sewn with welt cord.
Another slipcover project that needed new seam placements was this wingback chair. I used string to mark shaping seams on the concave inner back.
I spaced two slightly curved string markers evenly from the center and angled them, wider at the top and narrower towards the bottom.
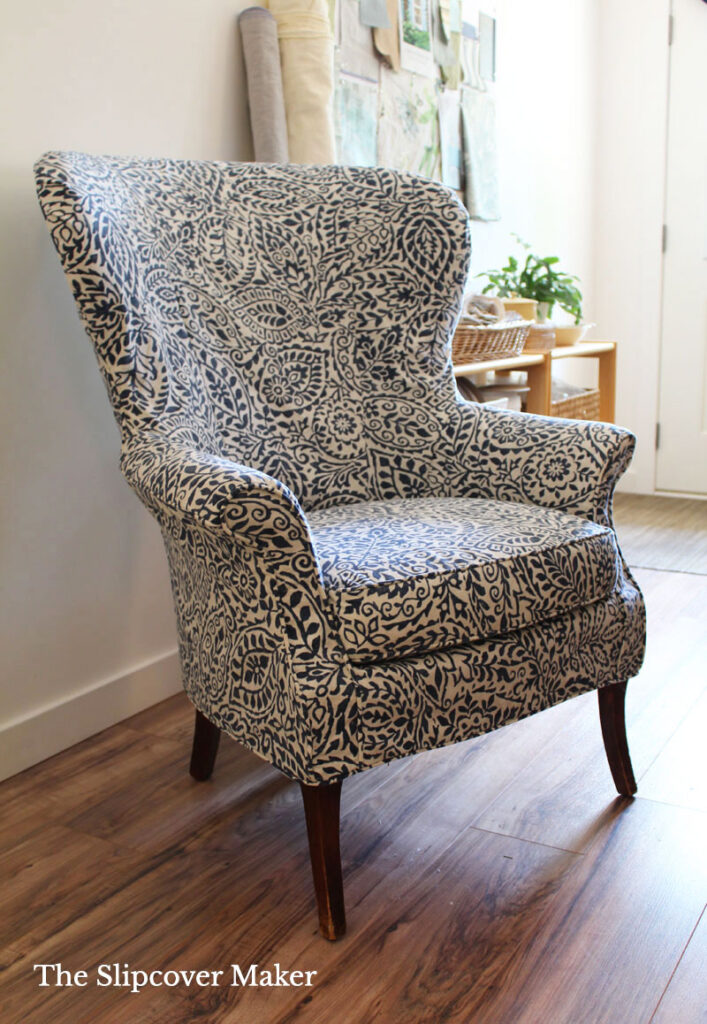
The new seam placement allowed me to shape the fabric smoothly over the inward curve. As I pinned, I made small relief cuts on seam allowances, which relaxed and flattened the fabric.
It’s hard to make out the new shaping seams in the photo above. The fabric print hides them! But you can see how nicely the slipcover fits the inner back.
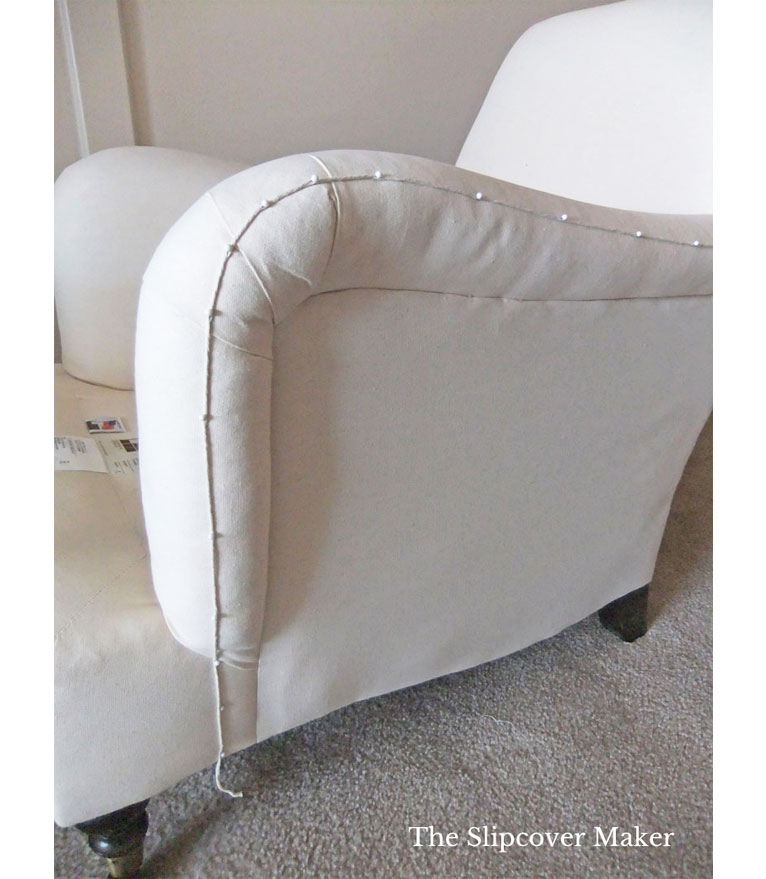
Are you planning to make a slipcover for an English rolled armchair or sofa? Use a string to mark the seam placement in just the right spot on the outer arms.
I like placing the seam high on top of the outer arm, well above the upholstery seam. This helps flatten the scoop on top of the arm and makes it easy to pin the inner arm fabric flat and smooth.
It also helps the fabric hang straight on the side of the chair.
Attach the string maker to your chair along the top arm first and then over the pleated front arm and down the side.
The goal is to create a seam placement that not only flows naturally with the curve of the arm but also is positioned towards the top and front of the arm to avoid the outer bulge.

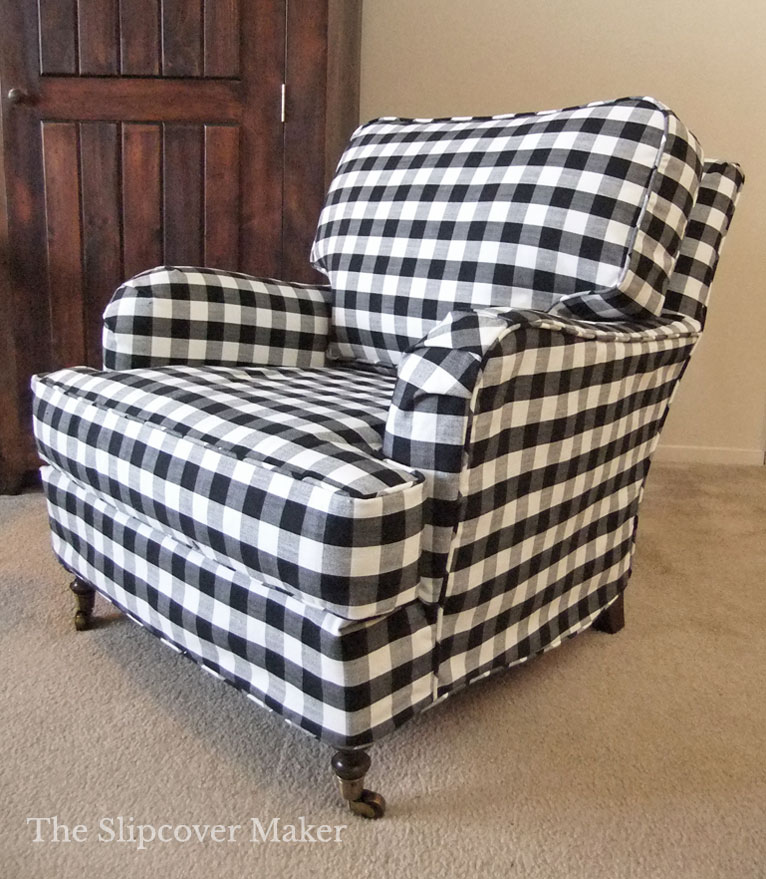
A string marker also comes in handy when figuring out the best seam placement for a skirt.
On the chair shown above, I followed the chair’s contour for creating the hem. But if my customer had wanted a skirt, I would have determined the skirt placement by using a string marker to ensure a straight seamline.
When you do this, keep two things in mind: 1. The string represents the skirt seamline, not the cut line. You have to add seam allowance before you cut. 2. Make sure the string marker is parallel with the floor. Don’t angle it.
That’s it for this post. Thanks so much for following! — Karen
Oh heck this is awesome.! 👏👏
Yippee! Glad you think so, Ester!
I could have used this technique when making my chair slipcovers. I’ll definitely use it for the matching sofa.
Excellent article, thanks! Appreciate you bringing in a variety of real life examples, especially the difficult ones like the rolled arm.
You’re welcome, R.
What a great slipcover tutorial post! I’m more hopeful than ever now. I will attempt to make a sample slipcover soon. Thank You!
Great, Becky! Good luck with your slipcover project.
What an incredibly smart and easy idea, you’re brilliant! I want to make a slip cover for an old upholstered rocker (my favorite chair to sit in while watching tv, but it’s powder blue velvet, lol), and this will help tremendously!
Patty, yes! The string seam marker is super simple and a time saver. Have fun transforming your blue velvet rocker!
Thank you so much for this ! Beautiful work .
You’re welcome, Karen!
Great tip Karen! I should have done this with pair of side chairs I made a slipcover for last year. The seam across the back was troublesome. I’ll be sure to use this the next time I make a slipcover. Hopefully, that will be my sofa! Have a great day and thanks for sharing! pinning!
Cindy, yes! Be sure to use it on your sofa if you decide to add or improve on a seam placement. You will love how easy it is.