Slipcover Pin Fit Tutorial Part 3: Sewing the Body
Congrats! You’ve completed pin fitting your chair or sofa and prepped it for sewing. Now, it’s time to stitch the pieces together. Learn how to sew the slipcover body in this easy step-by-step tutorial.
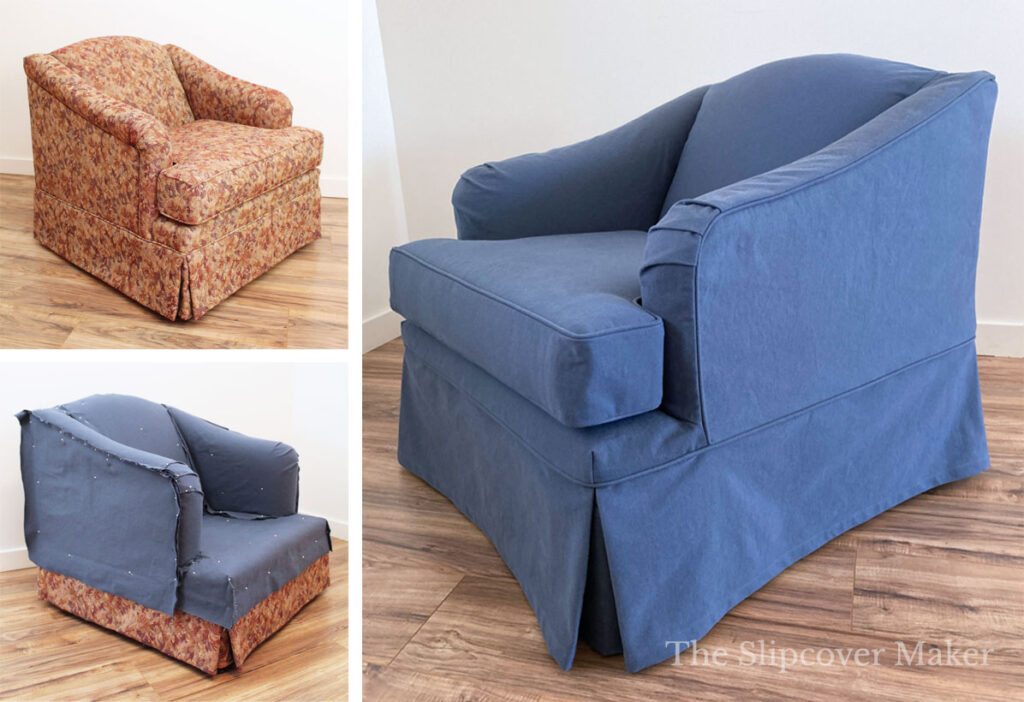
Welcome to Part 3 of my slipcover pin fit tutorial series! It’s all about sewing your pin fit pieces together to create the slipcover body.
If you are new to this series, join in! Start with these modules:
- Part 1 How To Pin Fit a Slipcover Right Side Out
- Part 2 Sewing Prep
- Extra Tips: 5 Ways to Make Sewing Your Slipcover Hassle-Free
OK, now you’re ready to make your slipcover come to life. Let’s dive in!
First thing to know — there is a specific order to sewing the pieces that make up the slipcover body. It goes like this:
- Assemble and attach the arms to the inner back.
- Attach the deck.
- Attach the back.
For correct assembly and easy sewing, just follow the sequence of steps I show below. It works like a charm!
Get Ready to Sew!
Here are the must-do’s for stitching your slipcover pieces together:
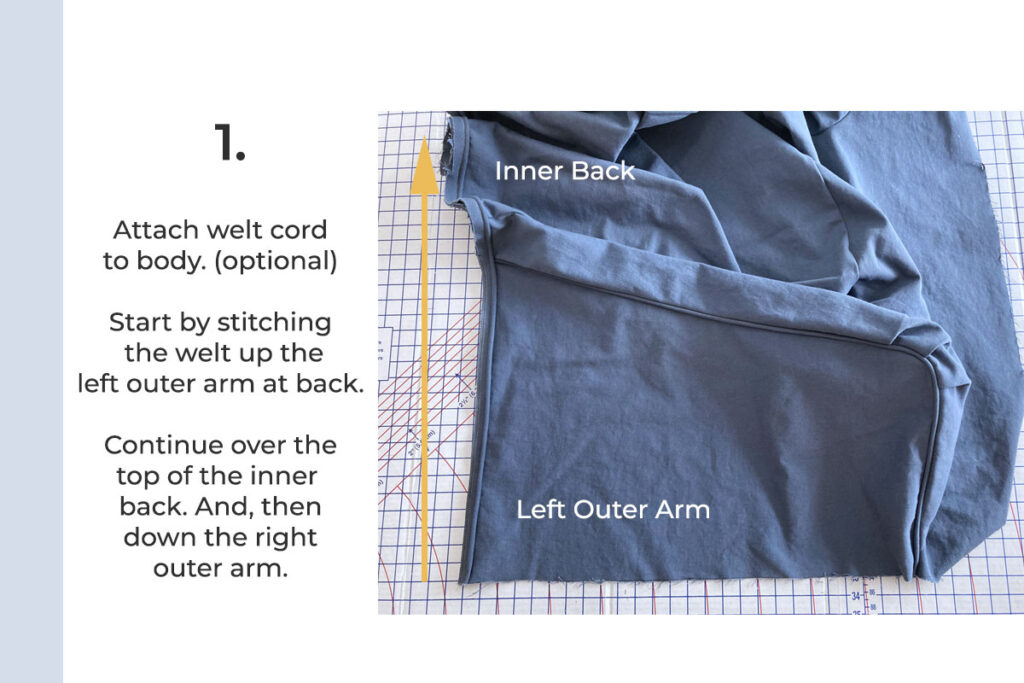
- Make welt cord – optional. If you want to add welt cord, and your machine can handle the extra layers, go ahead make it now. Here how I make welt cord.
- Sew with a zipper foot. If you add welt cord, sew the entire slipcover with a zipper foot. If no welt cord, use your straight stitch foot on seams.
- Stitch seam allowances 3/4 inch. During your pin fitting you trimmed your seams to 3/4 inch. That’s the allowance you must follow when you sew.
- Overlock or zig zag edges. Before assembling your slipcover pieces, finish all edges with an overlock/serge stitch or zig zag if you want to prevent seams from raveling during wash.
Note: I sewed the slipcover shown in this tutorial with 12 ounce heavy weight denim and welt cord. My industrial machine sewed through the multiple layers easily. Most home sewing machines can’t. Please follow my hassle-free sewing tips for your project if you’re using a home machine.
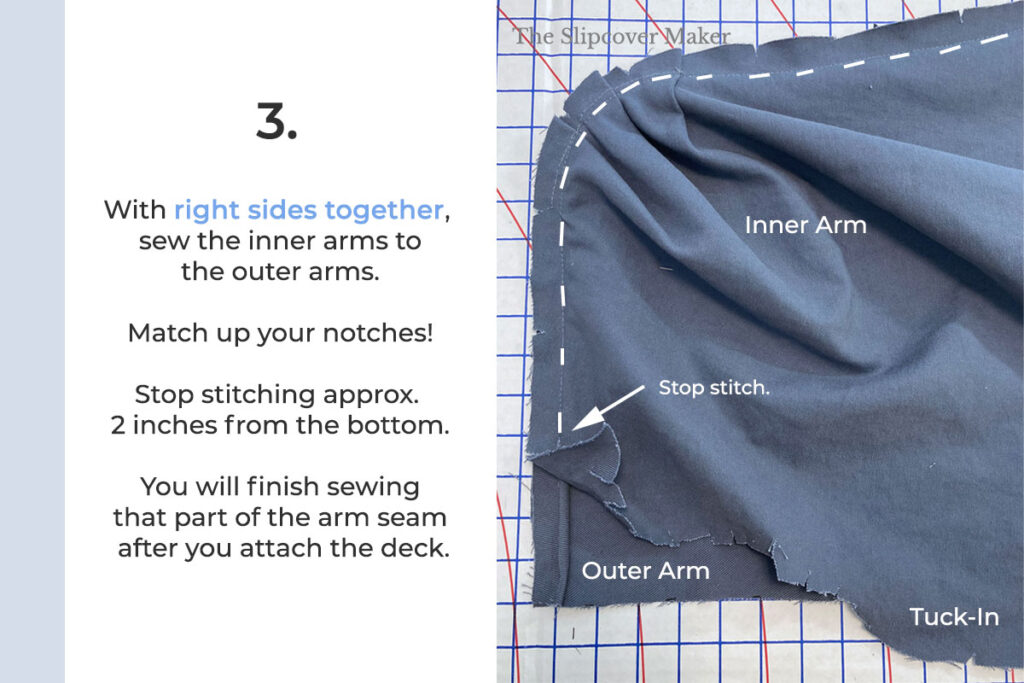
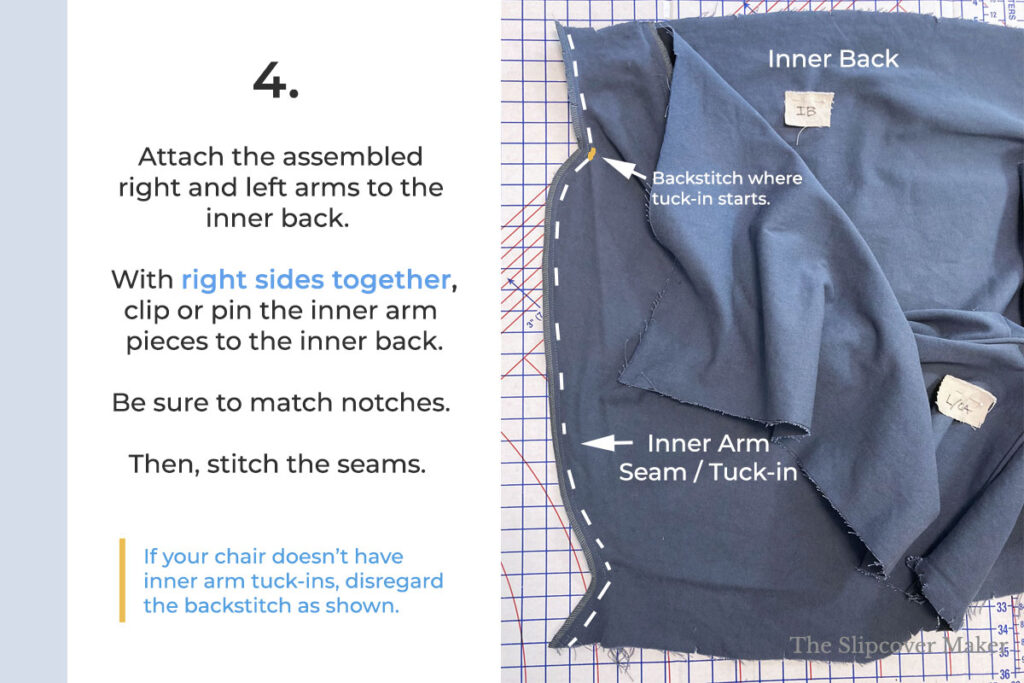
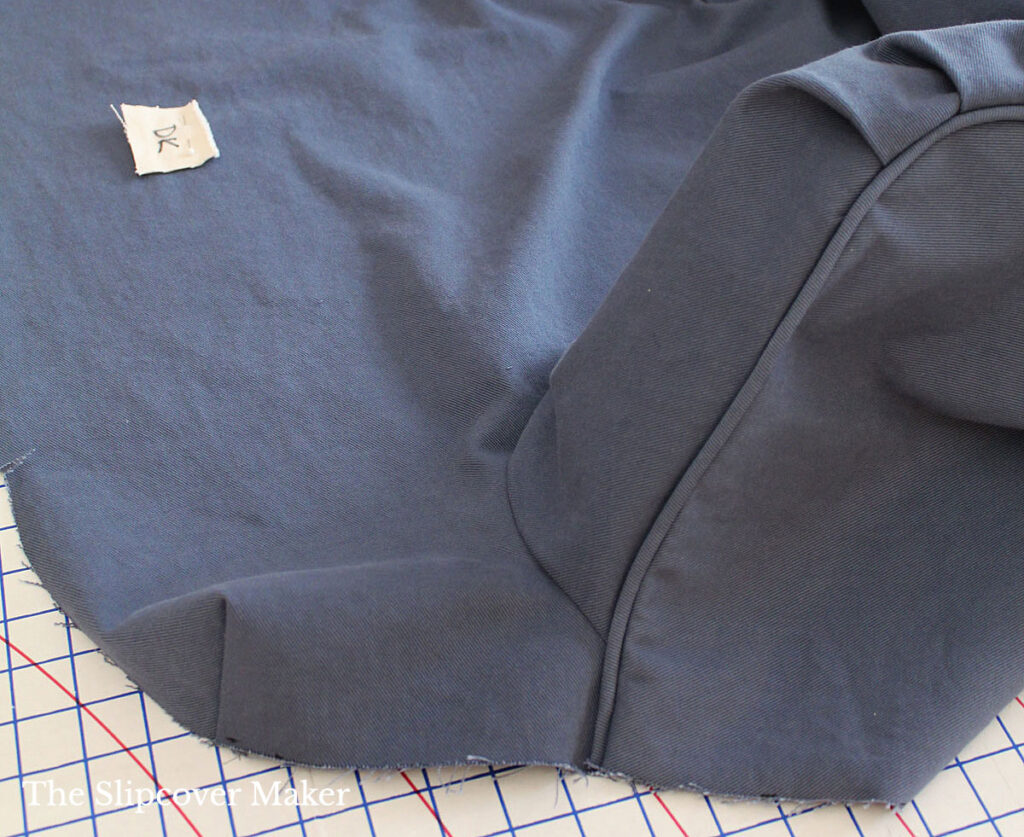
Step 1: Attach the Arms
I always start sewing my slipcover by stitching the arm pieces together.
No matter if the style is an English rolled arm as shown in this tutorial, or a regular rolled arm, or a track arm, I assemble the arms first.
Then, I attach them to the inner back.
Follow the steps below to learn how to sew the arms and stitch them to the inner back piece.
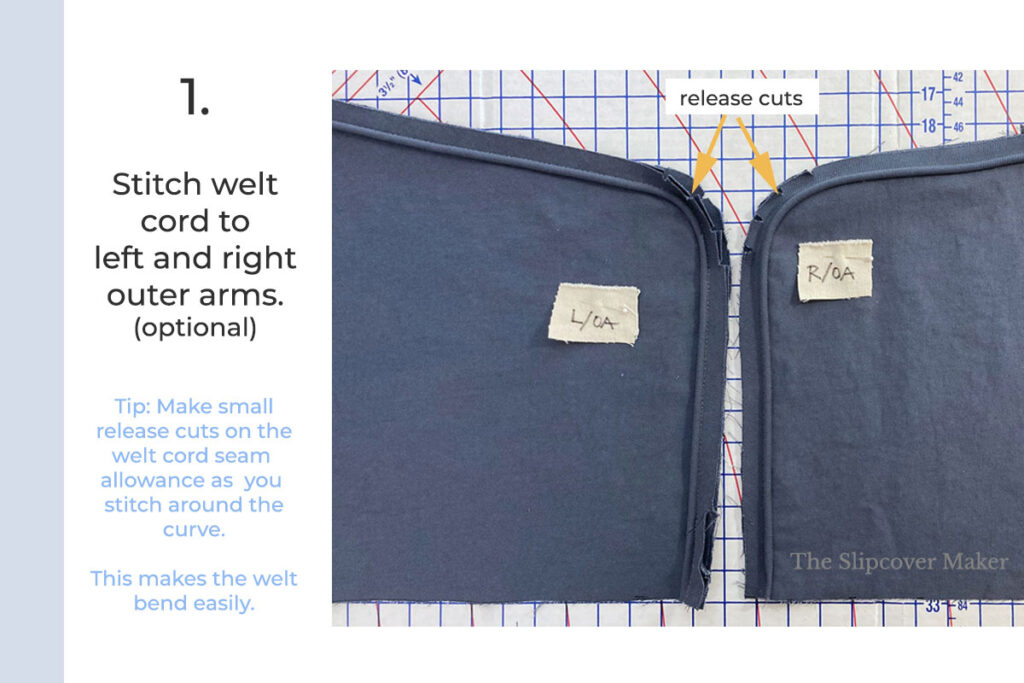

If welt cord isn’t your thing, or your machine can’t handle it, it’s OK to leave it off your slipcover. Welt cord is more decorative than functional.
TIP: Instead of using welt cord, try topstitching the seams. The look is clean and simple. This way you can make your slipcover with 12 ounce denim or canvas (if you want) without your machine choking from the extra welt cord layers. Read more about topstitching here.
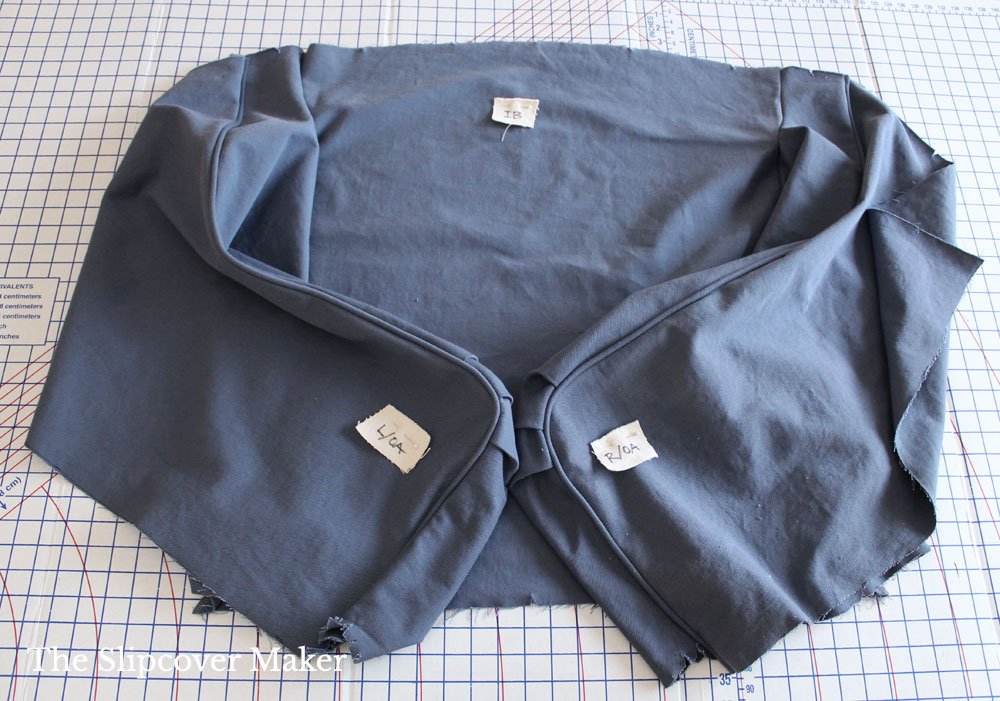
Arms complete! This is what the arms look like after they are assembled and attached to the inner back.
Step 2: Attach the Deck
After I join the arms to the inner back, I attach the deck.
Here’s how to stitch the deck to the front arms, inner arms and inner back:
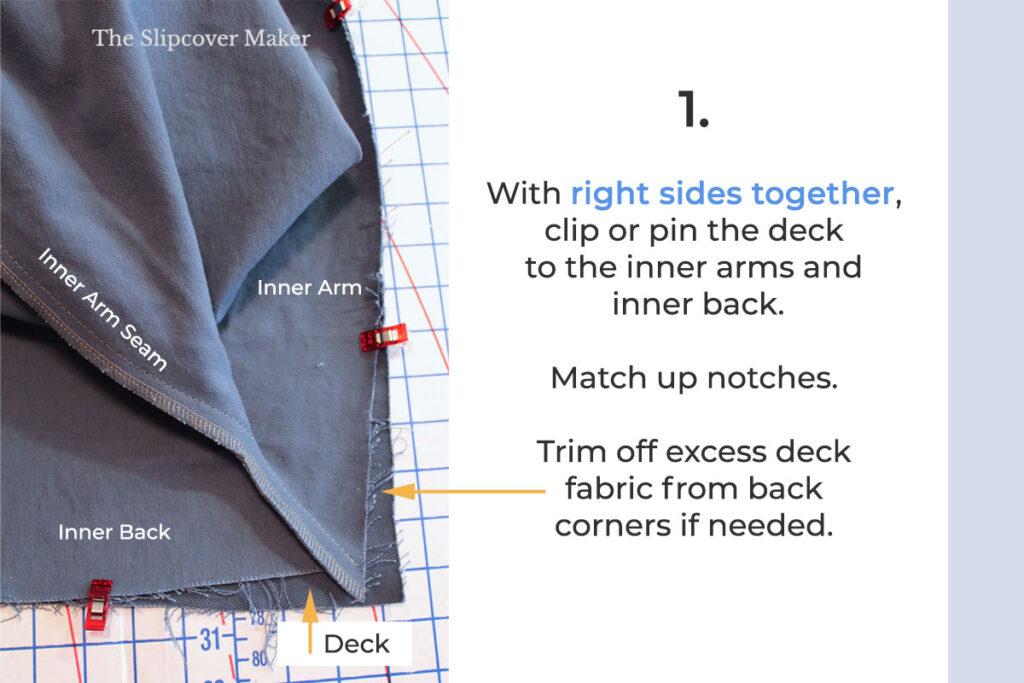

Deck and Tuck-Ins: When you attach the deck, the back corners might not line up perfectly with the inner arm/inner back corners.
That happens more often than not and it’s OK. Deck back corners on furniture are rarely squared, which makes it tricky to cut and match the tuck-ins exactly at the corner point.
If there is a little excess fabric on the deck back corners, just trim it off. Or, if the inner arm/inner back corners have excess fabric, fold it in a tuck at the seam.
Keep in mind, the fabric around the outer deck and back corners are your tuck-ins. They will not be visible once you stuff them down into the tuck-in space on your chair or sofa.
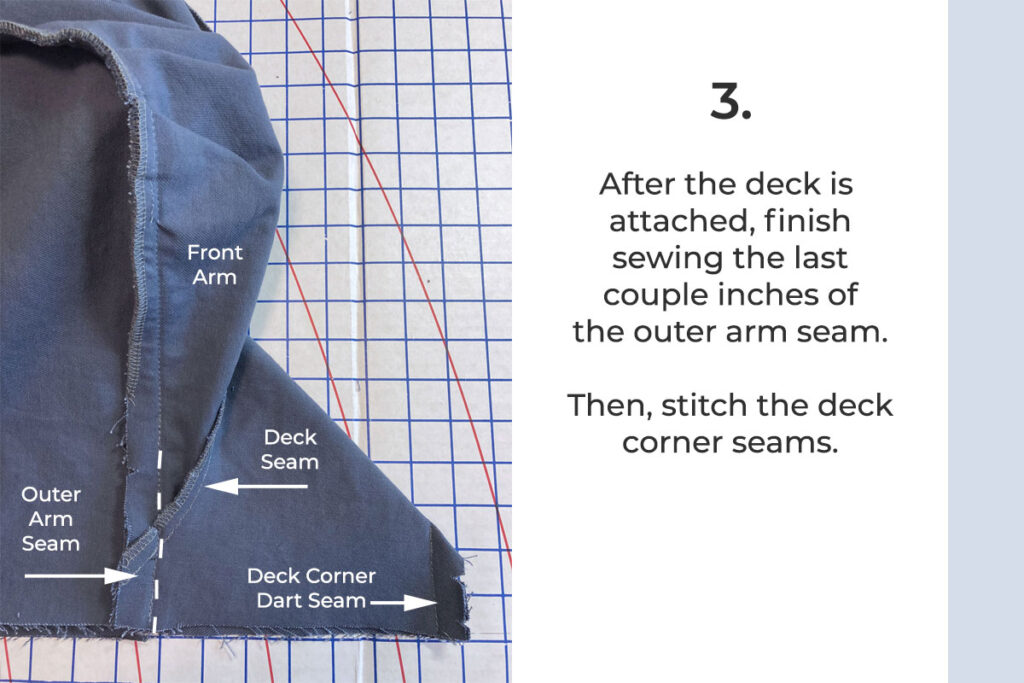
Deck completed! This is what the deck looks like after it’s attached to the inner arms, inner back and front arms.
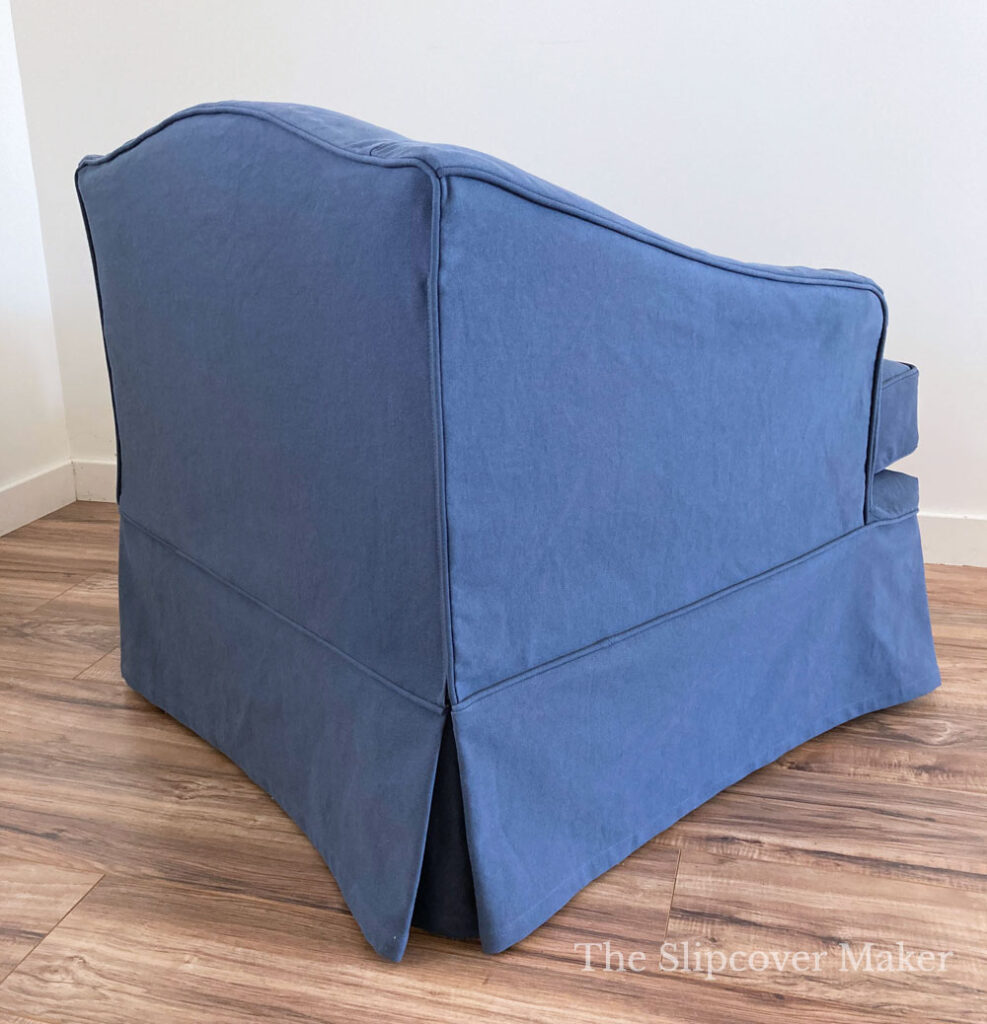
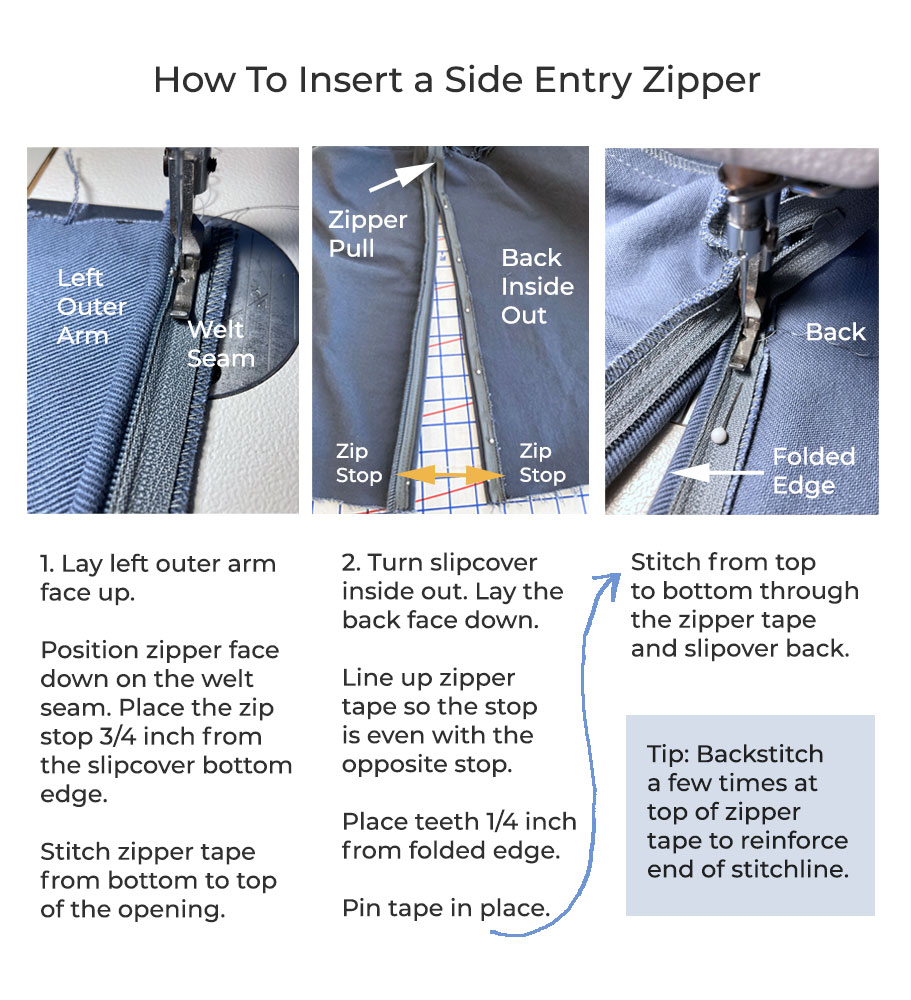
Step 3: Attach the Back
Attaching the back is the last step in sewing the slipcover body!
This is when I join the back to the inner back and outer arms. And, it’s when I add a side entry zipper if needed.
Follow the steps below to attach the back. Note: adding welt cord is optional.

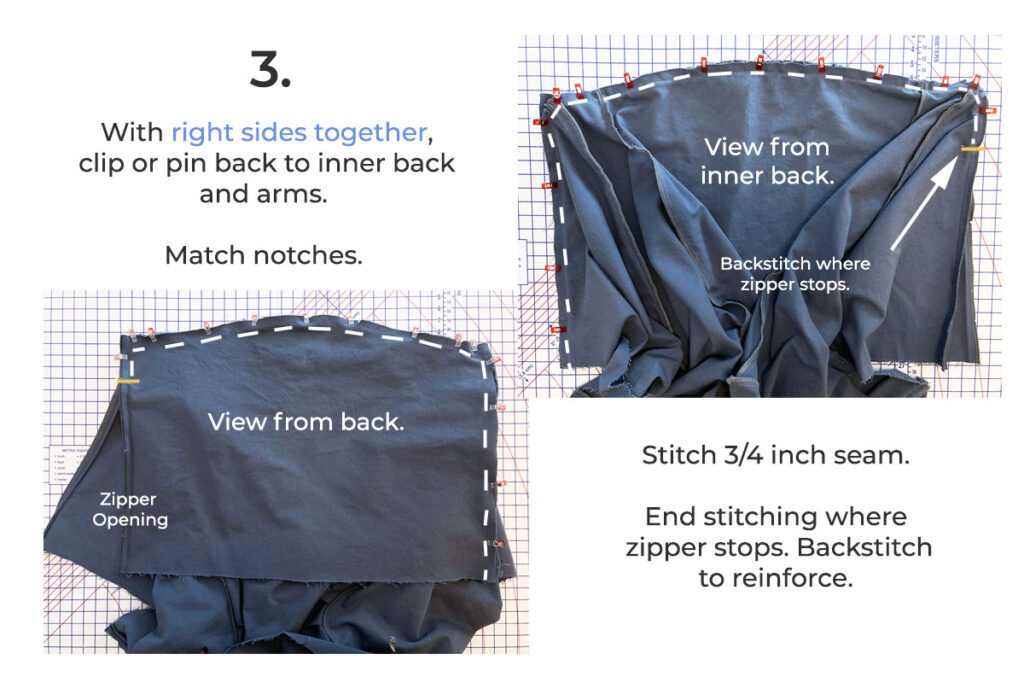
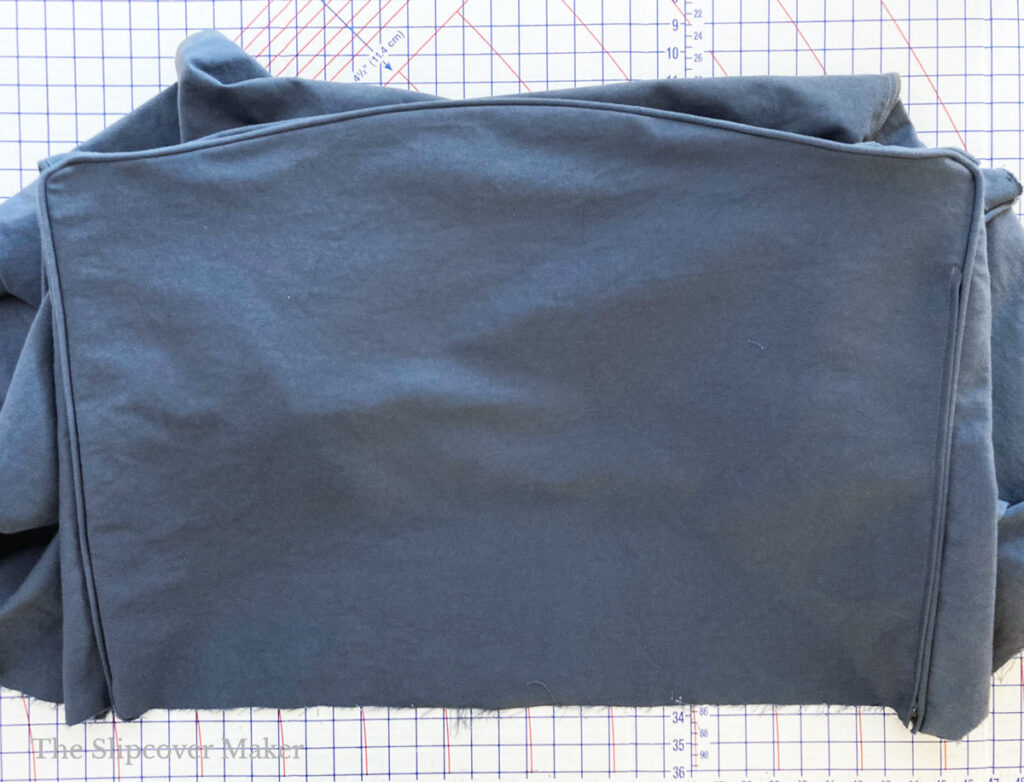
Back completed! This is how the back looks after it’s attached to the inner back and outer arms. It includes a zipper opening.
Your slipcover might not need a side entry zipper.
If you can put your slipcover on and take it off easily without a zipper opening, omit the zip and continue to sew the back corner seam to finish attaching the back.
My slipcover needed one. I used a size 3 nylon coil, closed end zipper with automatic lock.
Below are basic instructions for inserting a zipper in the left back corner seam trimmed with welt cord.
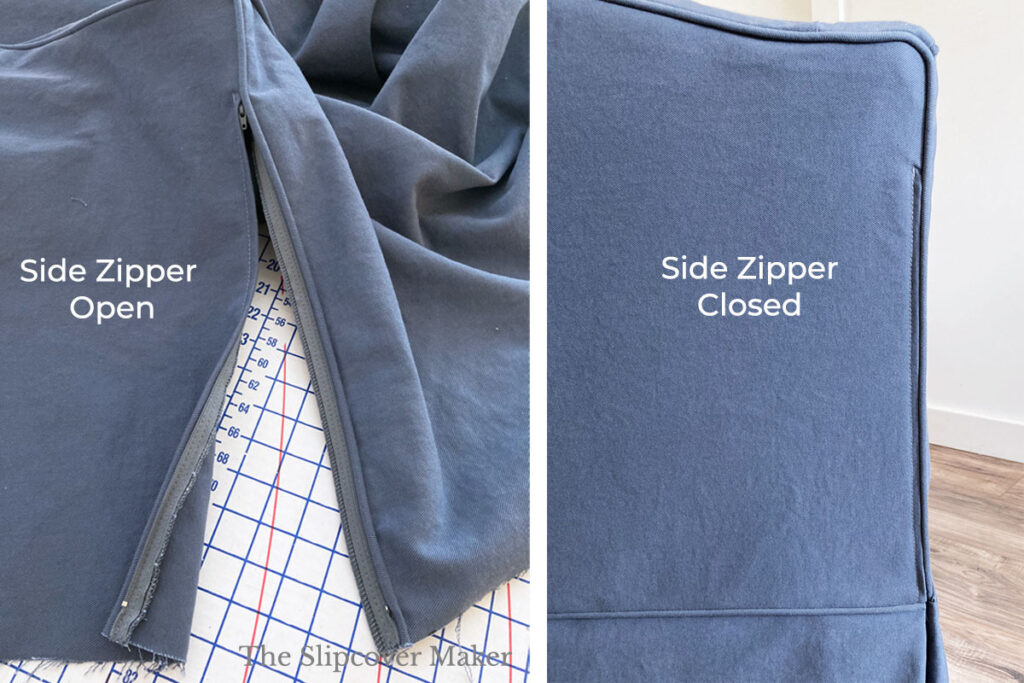
Below you can see how the finished slipcover zipper looks opened and closed.
After you have completed sewing your slipcover body, put it on your chair or sofa right side out. Close the zipper (if you have one).
Then, check the fit. How does it look?
If you want to make a minor revision or two, this is a good time to do it.
Coming up next…
In Part 4, the last module of this pin fit series, I will put the finishing touches on my slipcover!
You will learn how to cut, sew and attach an unlined skirt. And, make a box seat cushion cover with a zipper opening.
Until then, enjoy sewing your slipcover body! — Karen
Hi Karen! Thank you so much for sharing your knowledge. I stumbled across your blog while searching for slipcover tutorials. My oldest daughter just moved into her first apartment and took our couch with her. The fabric color was not to her liking. She found pictures of painters drop cloth slip covers on Pinterest. We made the cushion covers and they look fabulous. The frame is a beast… rolled arms, welting, etc. Working with 10oz with home machine has been easy. Your tutorial was just what I was looking! Awesome!!
Melissa
Hi Melissa, I’m so glad you found my tutorial! I think you will find the right side out method pretty easy. First apartment? So exciting!! Have fun decorating.